Your first little tour of the Blender workshop! Learn what you're looking at, how to move your view, and how to find your cube again if it seems to disappear.
For absolute beginnersAbout 15 minutesBlender 5.2
WHAT YOU'LL LEARN
Your first Blender essentials
What the main Blender areas do
How to orbit, pan, and zoom
How to select your cube and use the Outliner
How to get back when you feel lost
YOU ONLY NEED
A fresh General file
Open Blender 5.2, choose New File → General, and keep the default cube, camera, and light.
✦
START HERE
Before we begin
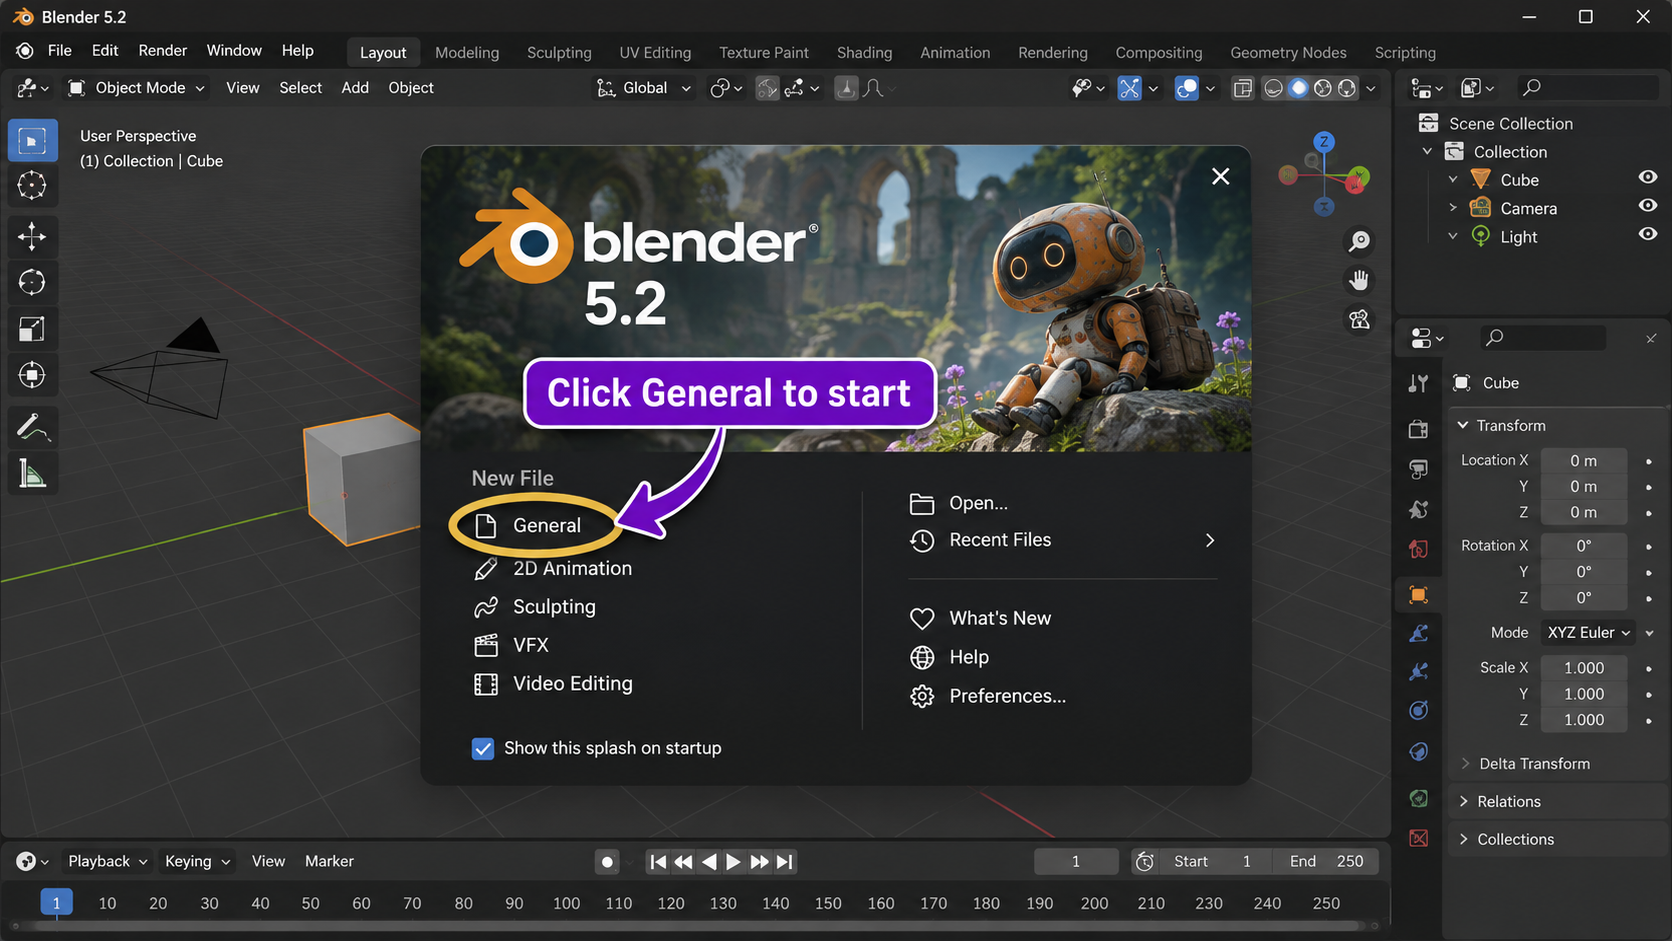
Open Blender 5.2 and choose New File → General from the splash screen if it's showing. You should see a cube, a camera, and a light in the scene. If you already have a different project open, use a fresh General file for this lesson.
For now, we're learning to look around—not to change the shape of a model. That distinction makes Blender much less confusing!
If the splash screen opens, choose New File → General to begin with the default cube.
✦
QUICK REFERENCE
Your first shortcut spellbook
MMB
Orbit
Turn your view around the object.
Shift + MMB
Pan
Slide your view across the screen.
Mouse Wheel
Zoom
Move closer to or farther from the cube.
T
Toolbar
Show or hide the left toolbar in the viewport.
N
Sidebar
Show or hide the right sidebar in the viewport.
Numpad .
Frame Selected
Bring your selected object back into view.
01
YOUR FIRST LOOK
Meet the Blender Window
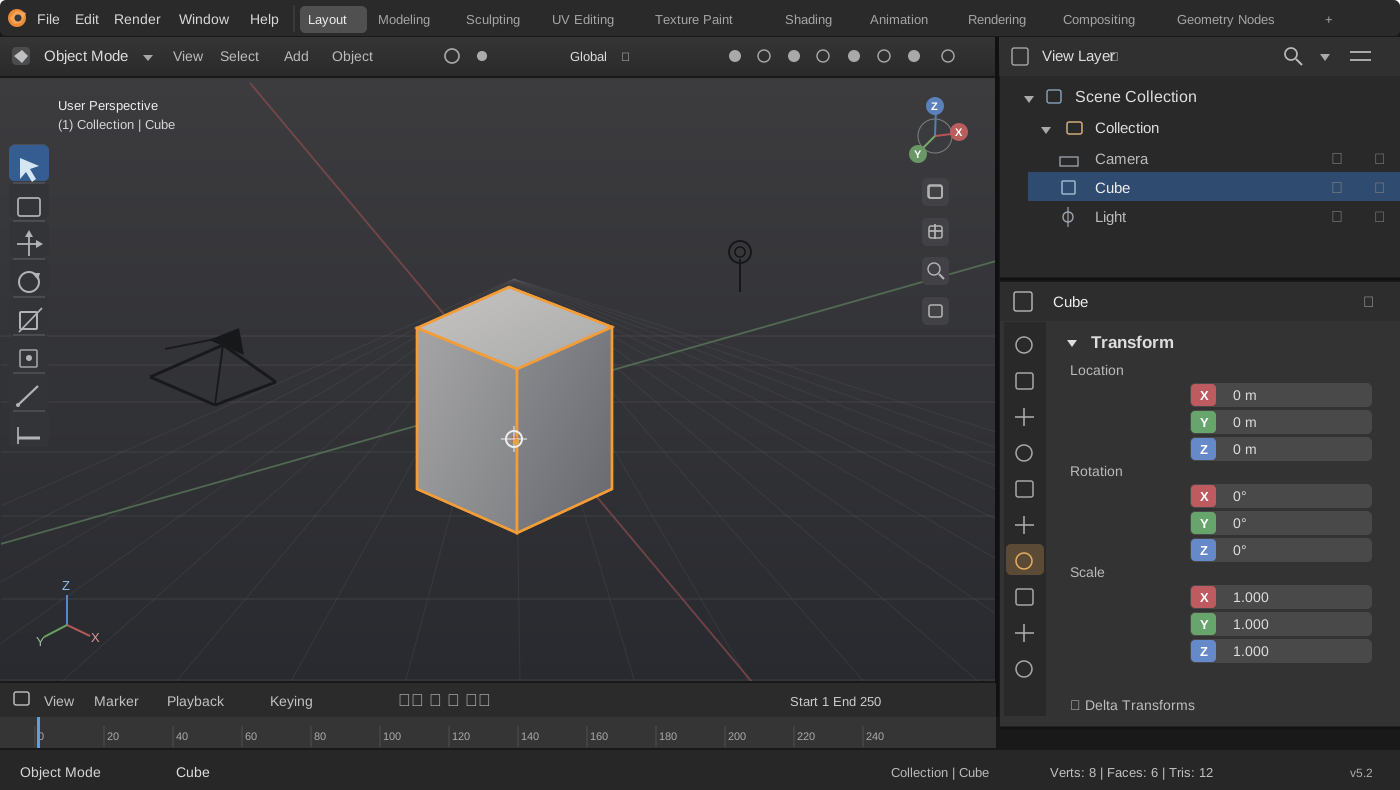
Blender is divided into areas, each with a different job. The default Layout workspace has four main editors. Below is a Blender 5.2-style window showing the real arrangement of tools and panels.
A detailed illustration of Blender 5.2's default Layout workspace, based on the official interface—not a screenshot. Your icons and spacing may vary with screen size or preferences. View it larger ↗
01Workspace tabsAcross the top
023D ViewportLarge modeling area
03OutlinerUpper-right object list
04PropertiesSettings below the Outliner
05TimelineAlong the bottom
✦ 3D Viewport
The big area where you see your cube and work with 3D objects.
✦ Outliner
The list of objects in your scene. Find Cube, Camera, and Light here.
✦ Properties
Settings for the selected object, materials, modifiers, and more.
✦ Timeline
Controls animation frames. You can ignore it for now.
✦ Workspaces
Tabs along the top, such as Layout and Modeling. Stay on Layout for this lesson.
✦ Top menus
File is for opening and saving; Edit has Preferences and other options.
A very useful trick: Blender shortcuts often work in whichever area your mouse pointer is hovering over. Before trying a viewport shortcut, move the pointer into the large 3D Viewport. Official Blender explanation.
02
LOOKING AROUND, NOT MOVING THE MODEL
Orbit, Pan & Zoom
Keep your mouse pointer inside the 3D Viewport and try each of these movements with the default cube.
↻
Orbit · Turn your view
MMB + drag (press the scroll wheel and move the mouse). You circle around the cube to see its different sides.
✥
Pan · Slide your view
Hold Shift + MMB and drag. The whole scene slides across your screen without the cube moving in 3D space.
⌕
Zoom · Get closer or farther
Roll the mouse wheel forward and backward. Zoom changes your view, not the cube's size.
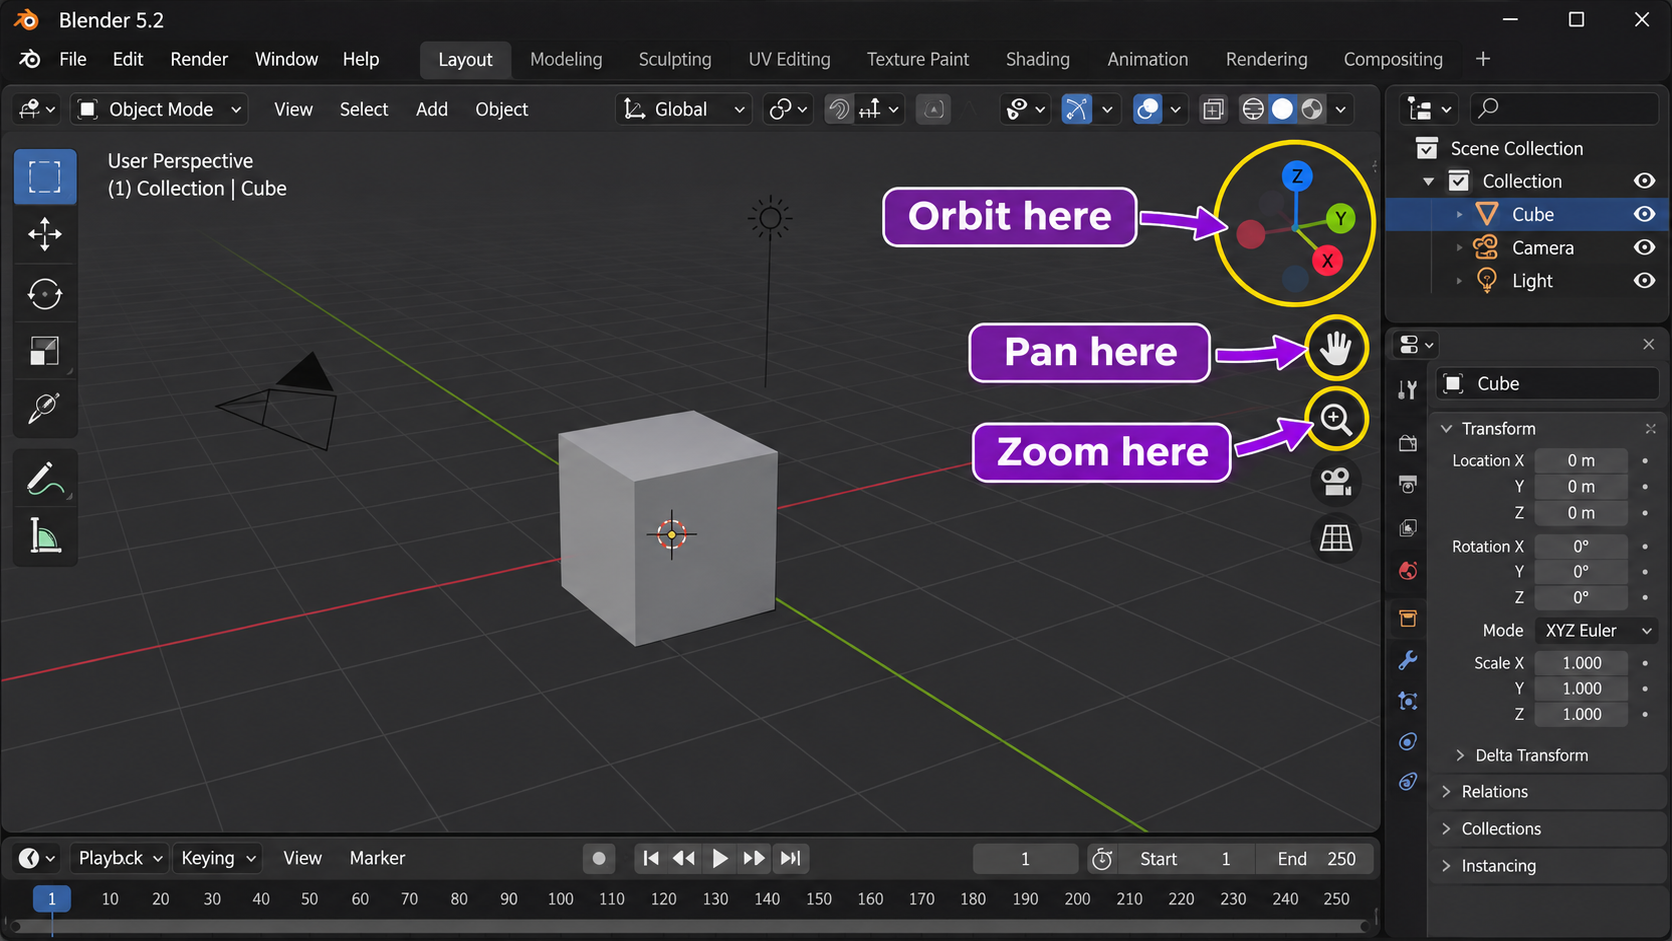
No middle mouse button? Look in the upper-right corner of the 3D Viewport. Drag the colored X/Y/Z navigation gizmo to orbit. Below it, drag the hand icon to pan and the magnifying glass icon to zoom. You can also click an axis letter to face that direction.
These are the built-in viewport controls in the upper-right corner if you do not want to use the middle mouse button.
Try it: Orbit until you can see the top and two sides of the cube. Then pan it to one side and zoom back toward it.
03
WORKING WITH WHAT IS ON SCREEN
Select an Object & Find the Tools
Click the cube with LMB inside the 3D Viewport. Blender highlights the selected object with an orange outline.
Find “Cube” in the Outliner (upper right). Click its name to select it from the list instead. The Outliner is handy when objects overlap.
Look at the Properties editor below the Outliner. The little vertical icons let you choose different groups of settings.
Press T with your mouse over the 3D Viewport to show or hide its left-hand Toolbar.
Press N in the 3D Viewport to show or hide its right-hand Sidebar, where many add-ons later put their panels.
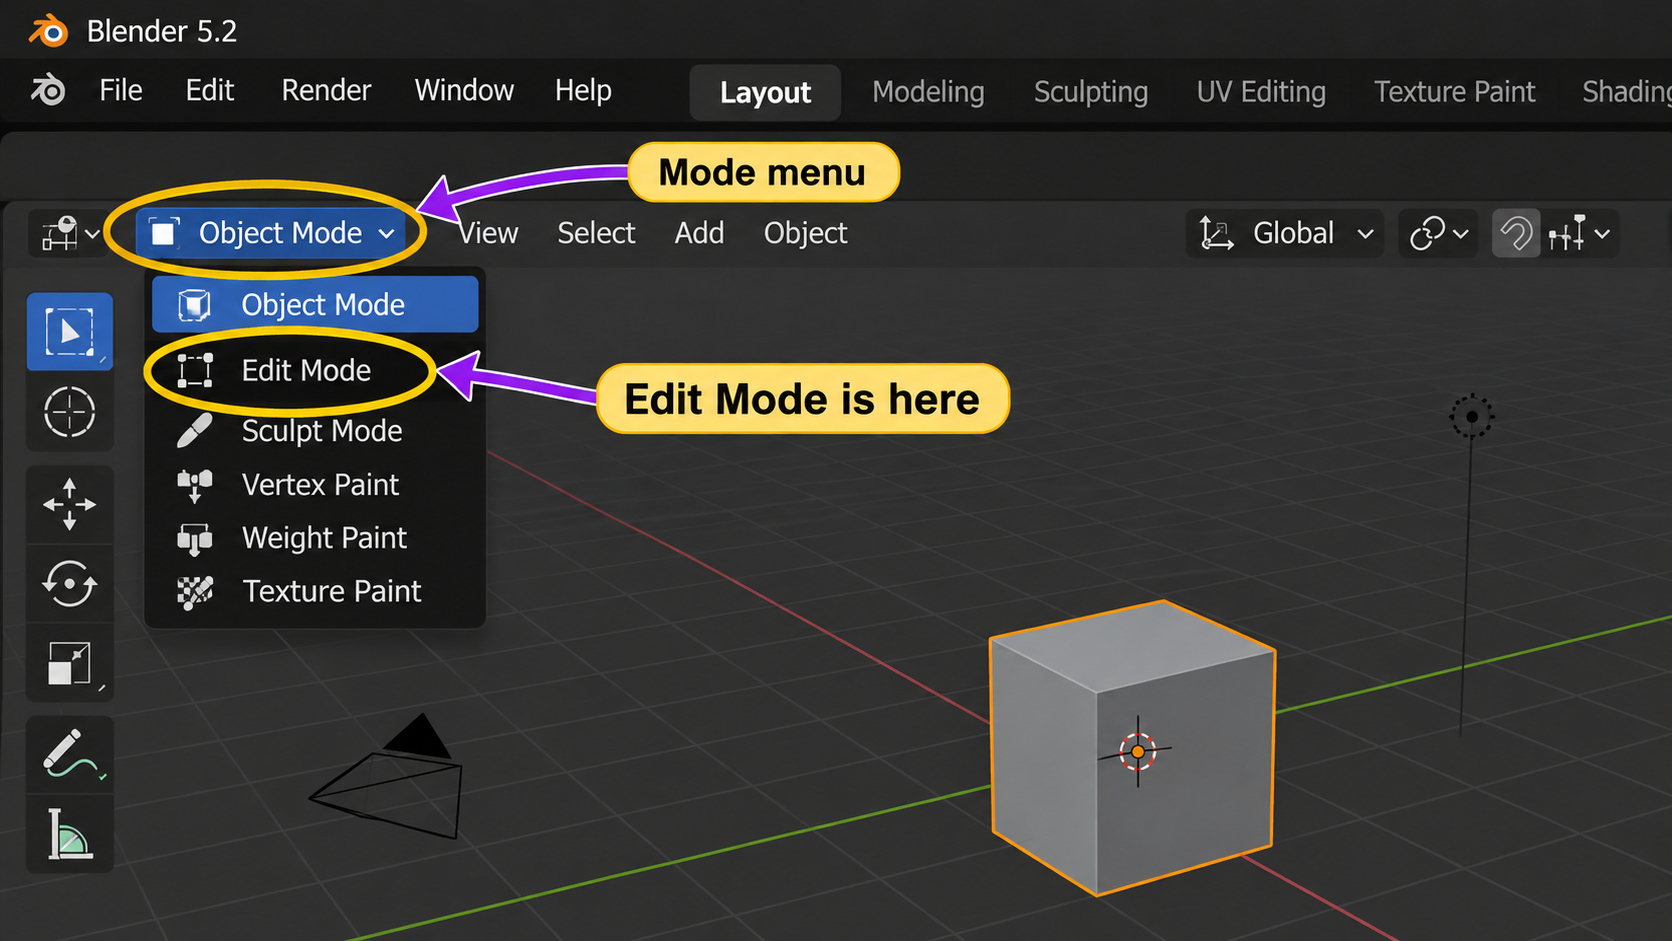
Check the mode selector at the top-left of the 3D Viewport. It should say Object Mode. With the cube selected, press Tab to enter Edit Mode, then Tab again to return to Object Mode.
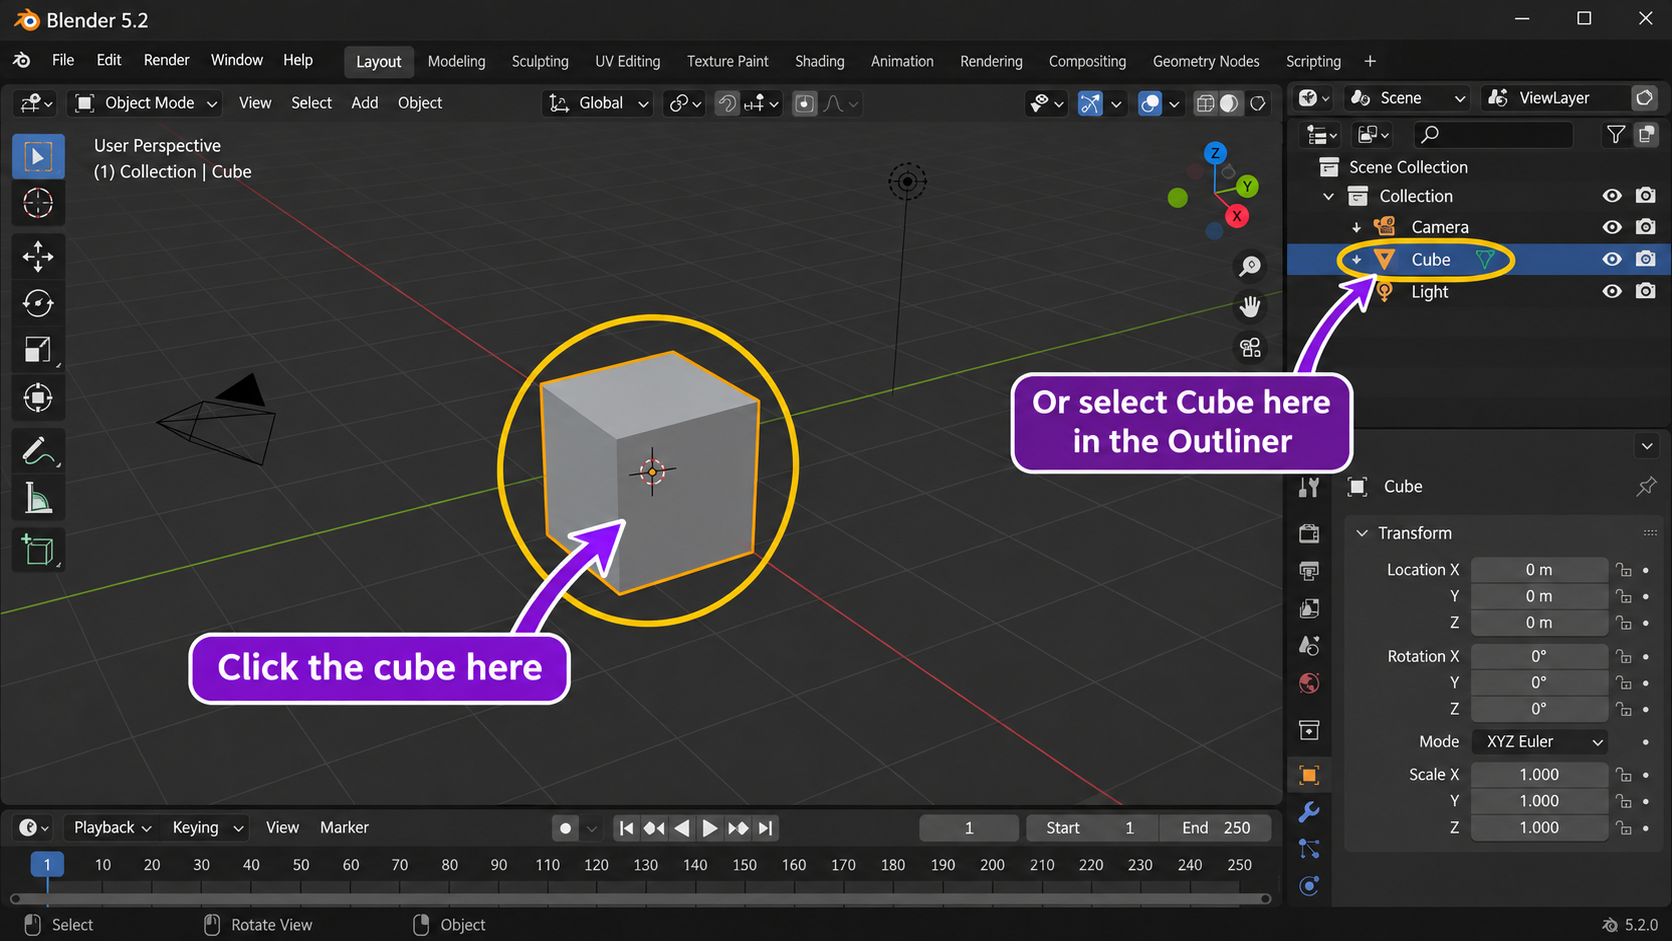
Here are the two most important places to click while you are getting comfortable in Blender.
You can select the object directly in the 3D Viewport or click Cube in the Outliner.Keep an eye on the mode menu at the top-left of the viewport. This is where you switch between Object Mode and Edit Mode.
What’s the difference?Object Mode lets you select and transform whole objects. Edit Mode lets you change a mesh's vertices, edges, and faces. We'll learn the details in another lesson.
04
YOUR LITTLE BLENDER COMPASS
Useful Views & How to Get Back
If you've orbited so far that the scene looks strange, you can always change the angle or bring the cube back into view.
Numpad 1Front view
Numpad 3Right view
Numpad 7Top view
Numpad 0Look through camera
Numpad 5Toggle perspective / orthographic
Numpad .Frame selected object
HomeFrame all objects
TabQuick peek into Edit Mode
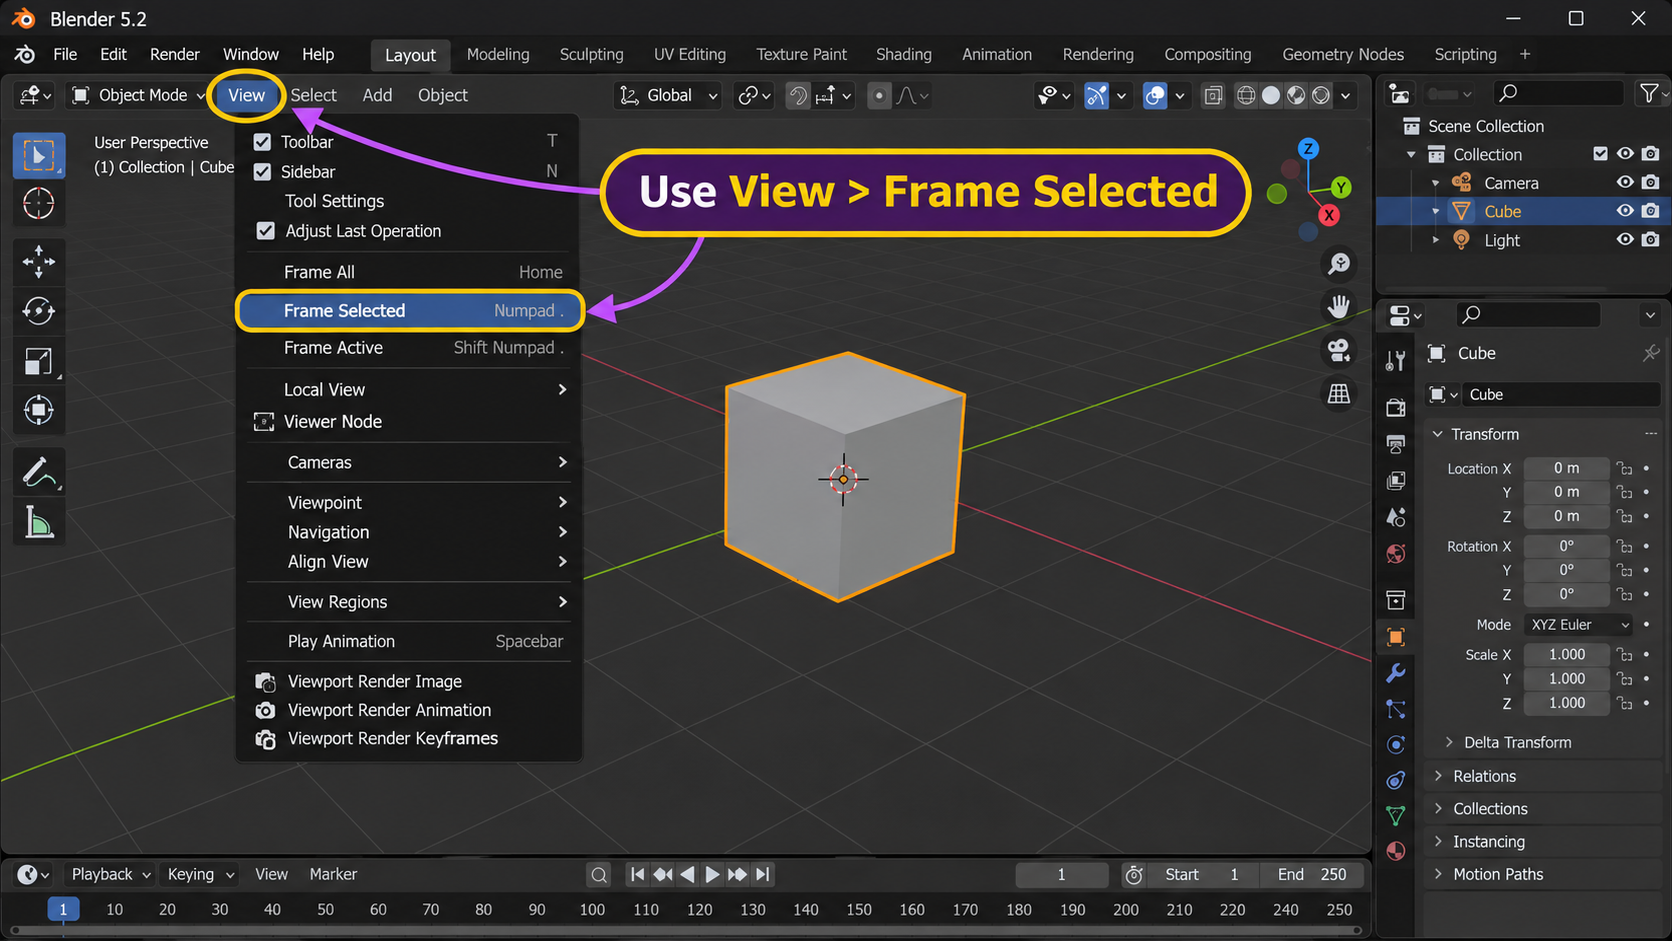
Don't have a numpad? Use the navigation gizmo in the upper right for front, side, and top views. For the most useful rescue command, select Cube in the Outliner, then in the 3D Viewport choose View → Frame Selected. Or choose View → Frame All to fit the whole scene.
If your cube seems lost, select Cube and use View → Frame Selected to bring it back into view.
Remember: These are numpad keys, not the number keys across the top of your keyboard. If your computer has no numpad, the View menu works just as well.
05
PUT YOUR NEW SKILLS TO USE
Your First Blender Adventure
Stay in your new General scene and work through this little challenge. Nothing needs to be modeled or exported yet.
Select Cube in the Outliner and locate it in the 3D Viewport.
Orbit so you see more than one side of the cube.
Pan the scene to the left, then zoom in and out.
Find your cube again: choose View → Frame Selected or use Numpad ..
Try a straight-on view: click an axis on the navigation gizmo or press Numpad 1 for Front.
Open and close the sidebar with N, then check the Object Mode selector.
Bonus: Press Tab twice to visit Edit Mode and return. You're back in Object Mode and ready for the next lesson!
✧
You've found your feet in Blender!
Now you know where the main editors live, how to look around without changing your model, and how to get back to your object whenever your view wanders.
A few beginner questions
Where did my cube go?
Click Cube in the Outliner, place your mouse over the 3D Viewport, and choose View → Frame Selected. Try Home to frame all objects.
Why isn't a shortcut doing anything?
Move your mouse pointer over the 3D Viewport before pressing the key. Some shortcuts only work in certain areas or modes.
I moved the cube instead of my view!
If you accidentally transformed it, use Ctrl + Z to undo the last action. Orbit, pan, and zoom change only the view.
What if I use a laptop?
Use the viewport's built-in gizmo and the View menu. You don't need a numpad or middle mouse button to follow this lesson.