


✦ BLENDER BASICS · LESSON 02 · BLENDER 5.2 LTS ✦
Object Mode & Edit Mode
This is the lesson that starts making Blender make sense. Learn when you are moving the whole object and when you are editing the actual mesh.
WHAT YOU'LL LEARN
Your first real modeling idea
- What Object Mode actually does
- How Edit Mode changes the mesh
- How to switch between modes with the menu or Tab
- How to use faces and extrude a tiny tower
YOU ONLY NEED
A fresh General file
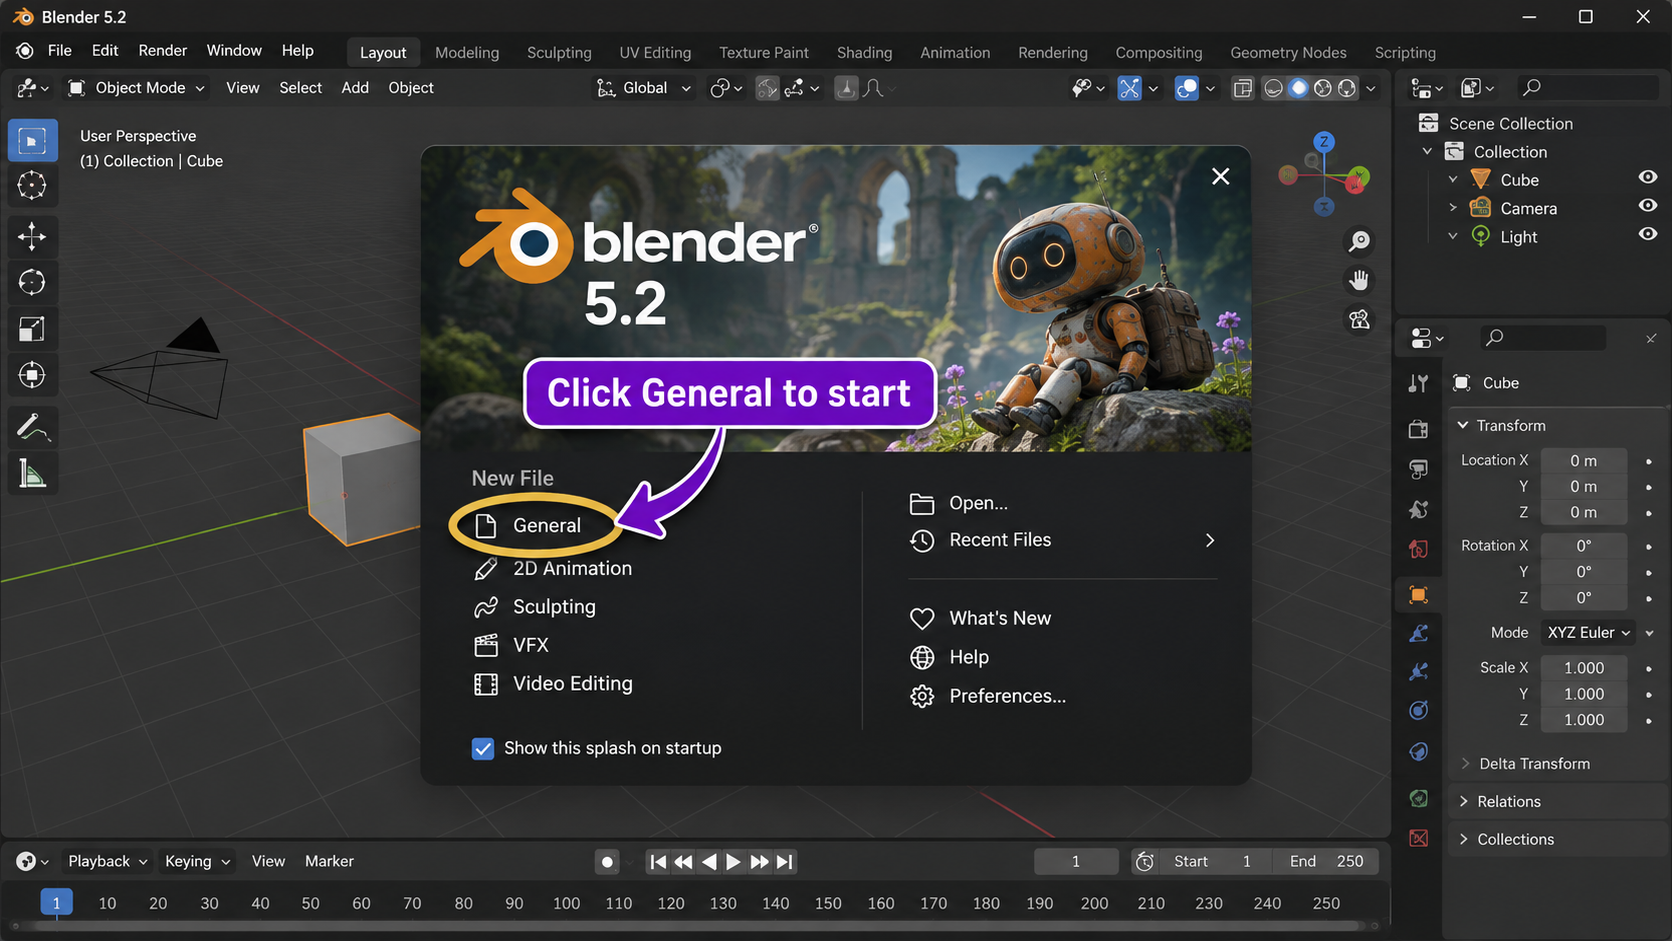
Open Blender 5.2, choose New File → General, and keep the default cube. If you finished Lesson 01, you're ready.
START HERE
Before we begin
Open Blender 5.2 and choose File → New → General. You should see the default cube. This lesson starts right where Lesson 01: Getting Around Blender leaves off.
We're going to use the cube to learn Blender's two big modeling modes, then turn it into a tiny enchanted tower with a separate cone roof.
ONE CUBE, TWO JOBS
What's the Difference?
Imagine a little toy house. You could pick up the whole house and move it across your desk—or you could reshape its roof. That's the difference between Blender's two main modeling modes.
These are simplified teaching illustrations. The helper images below show what this looks like in the real Blender interface.
YOUR MODE SWITCH
How to Switch Modes
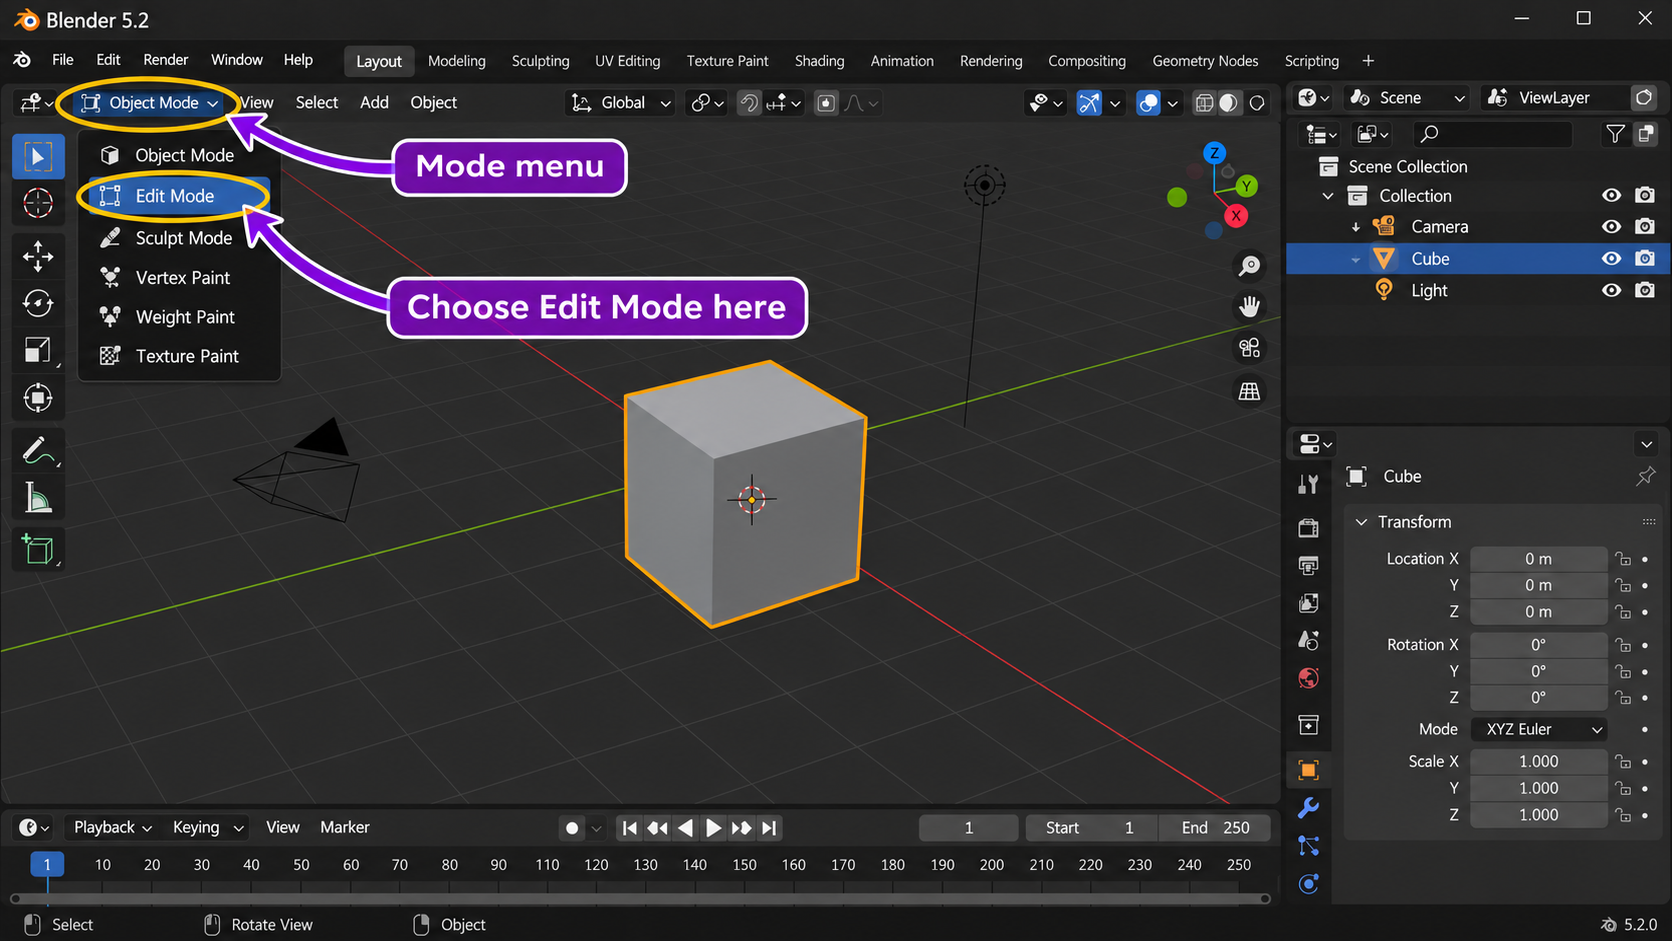
With the cube selected, look in the upper-left corner of the 3D Viewport. You'll find a dropdown menu that says Object Mode. Choose Edit Mode to work on the mesh.
- Click the cube so its orange outline appears.
- Open the mode menu in the upper-left of the 3D Viewport and choose Edit Mode.
- Or hover inside the 3D Viewport and press Tab to switch quickly.
- Press Tab again to return to Object Mode.
MOVE THE WHOLE CREATION
Getting to Know Object Mode
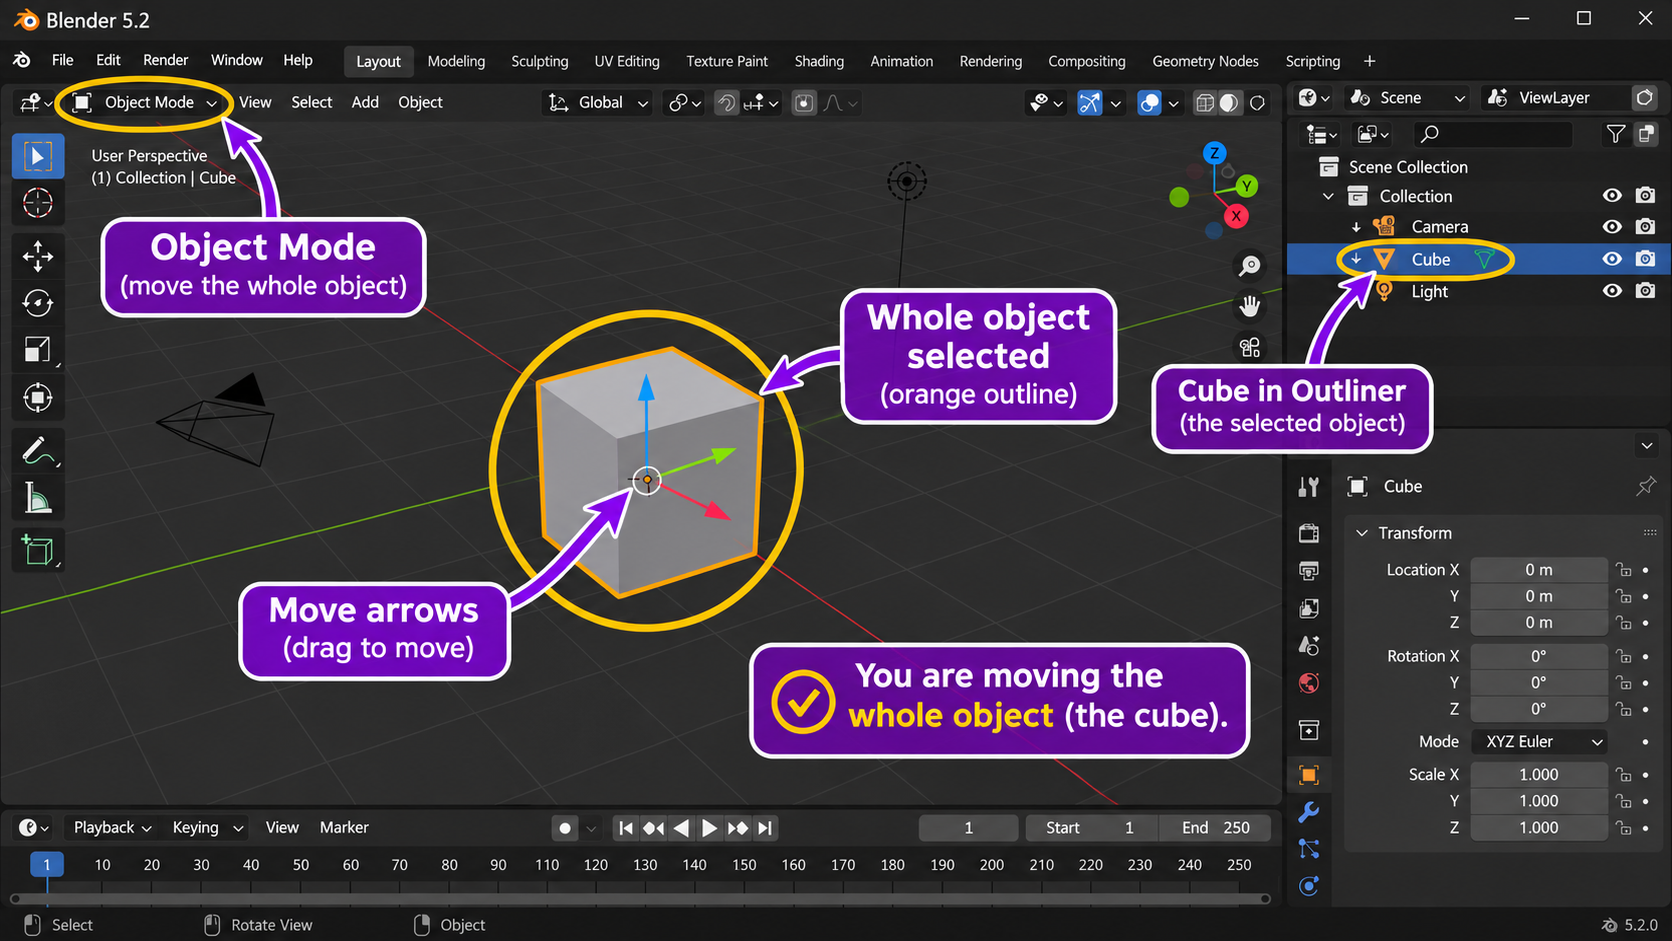
In Object Mode, the selected cube has an orange outline. Try these three essential actions:
- Move: Press G and move your mouse. Left-click to confirm.
- Rotate: Press R and move your mouse. Left-click to confirm.
- Scale: Press S and move your mouse. Left-click to confirm.
If you make a mistake, press Ctrl + Z to undo. That's a magical lifesaver in Blender.
NOW CHANGE THE SHAPE
Getting to Know Edit Mode
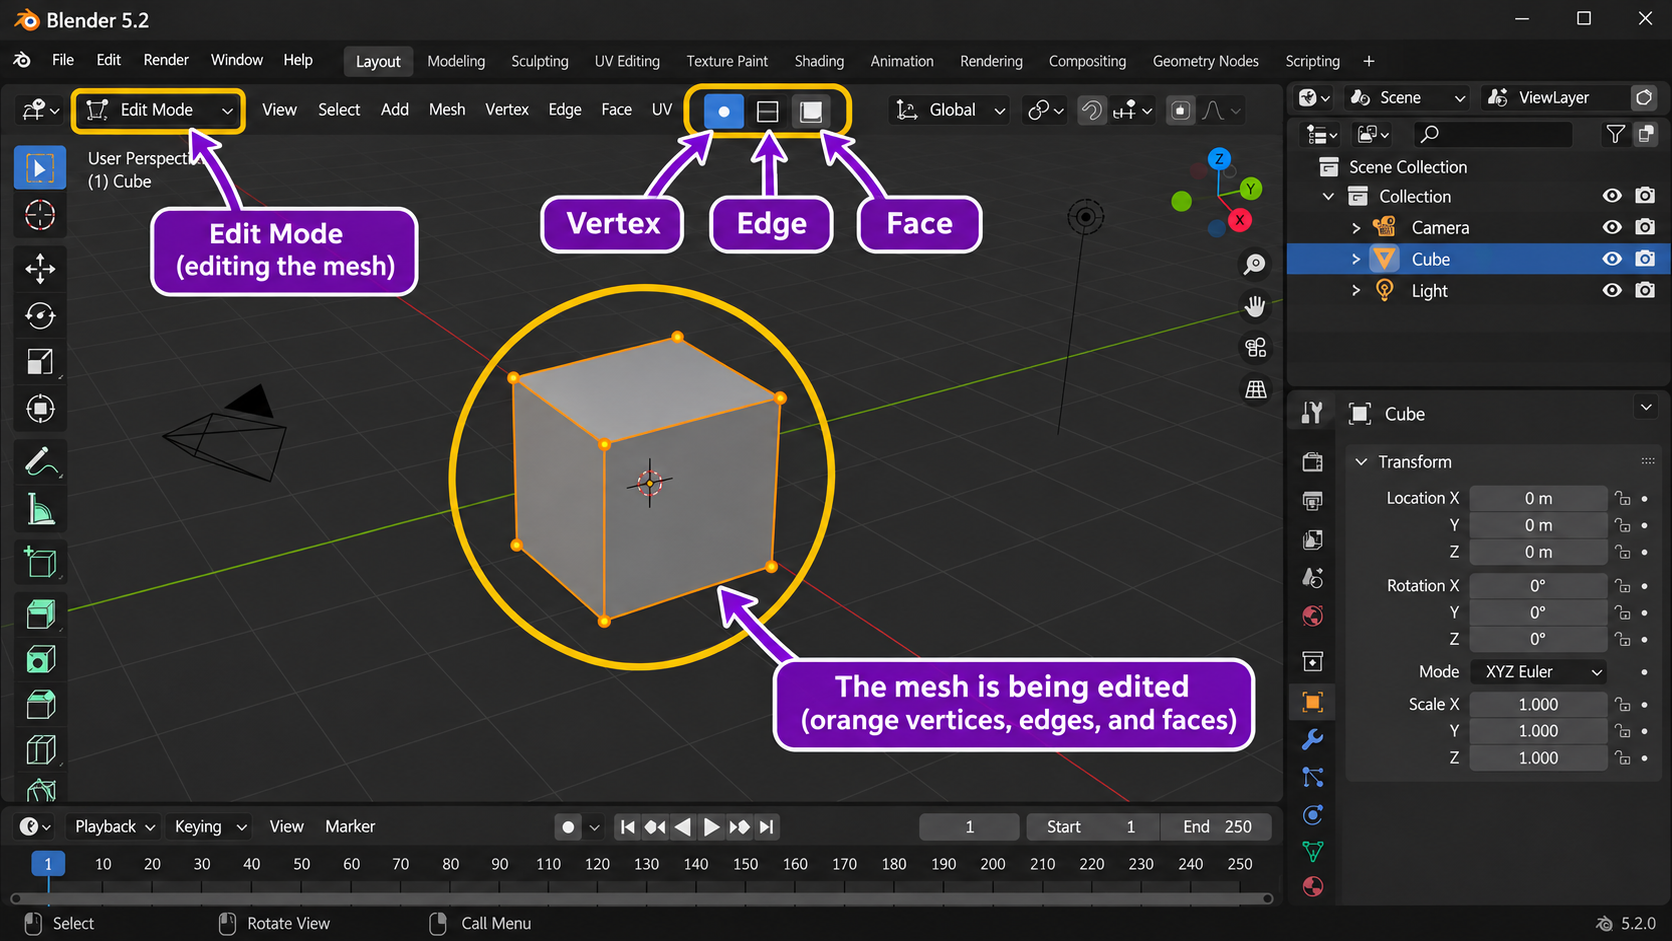
When you switch to Edit Mode, you stop working with the whole object and start working with its mesh. Blender lets you select three kinds of mesh parts:
1 · Vertex Select
Select a single point of the mesh.
2 · Edge Select
Select a line joining two vertices.
3 · Face Select
Select a flat surface of the mesh.
You can still use G, R, and S in Edit Mode. This time, they act on your selected vertices, edges, or faces, instead of transforming the whole object.
A LITTLE HANDS-ON MAGIC
Build a Tiny Enchanted Tower
Let's try both modes in one simple project, using a cube for the tower and a cone for its roof. You'll discover that the finished tower is really two separate objects.
Start with a cube → change its mesh → add a separate roof
- Start fresh. Choose File → New → General. Select the default cube. In Object Mode, press F2, name it Workshop Tower, and press Enter.
- Practice Object Mode. Press G, then X, type 2, and press Enter. Then press Ctrl + Z to bring it back to the center.
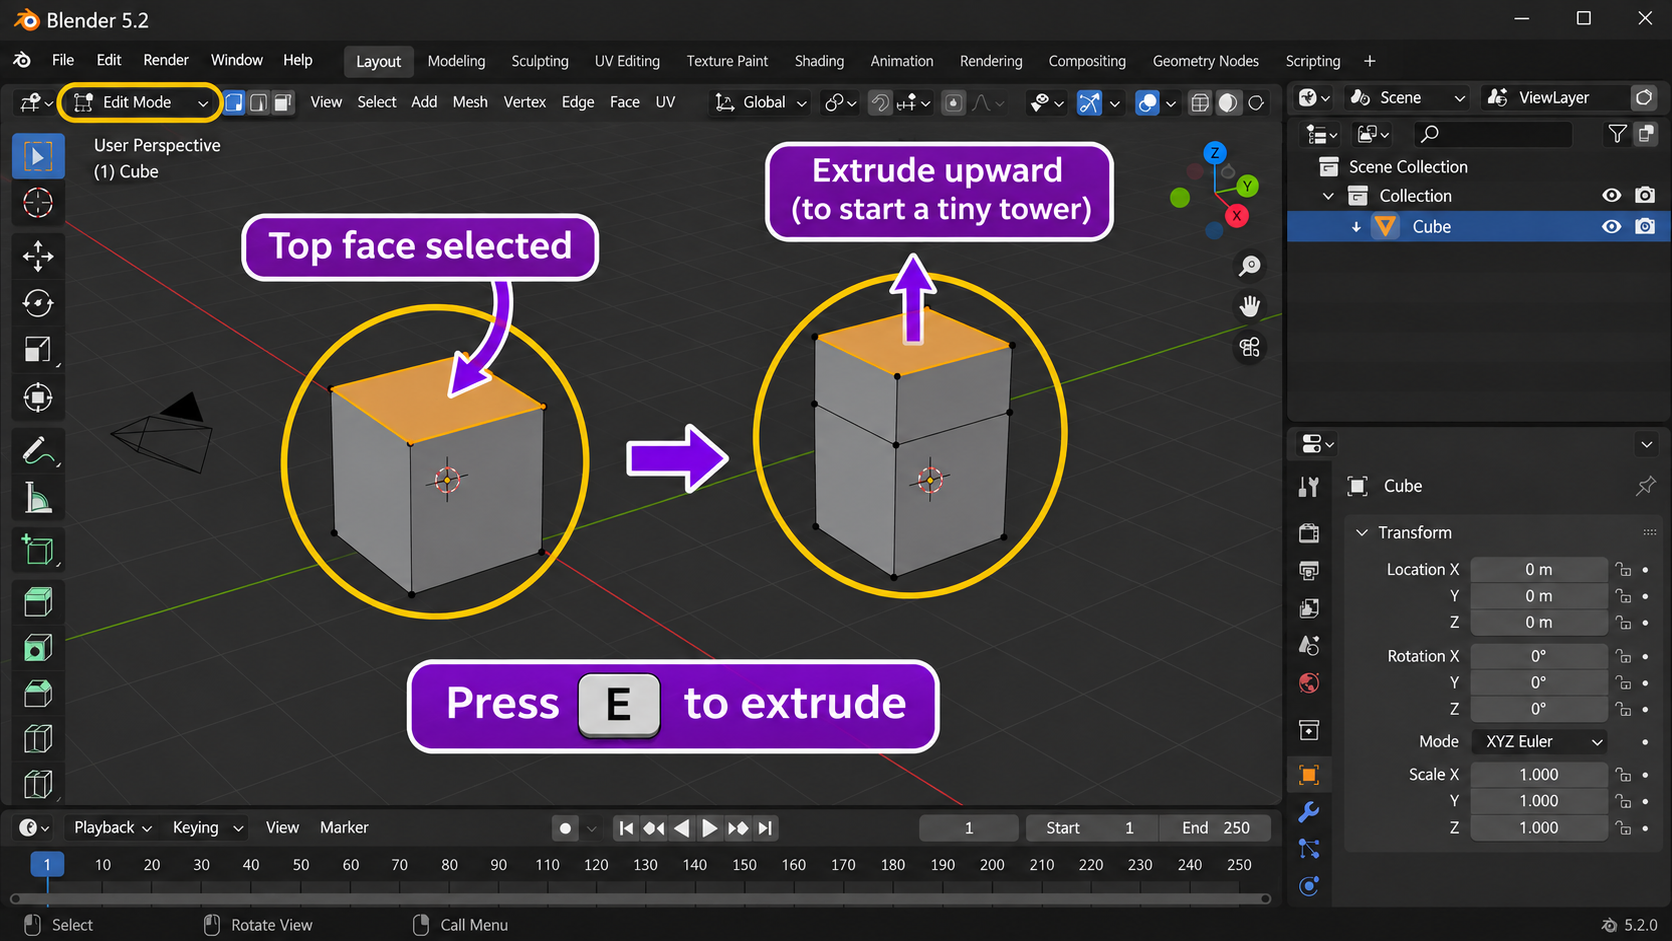
- Choose the top face. Press Tab to enter Edit Mode. Press 3 on the number row for Face Select. Press Alt + A to deselect everything, orbit to see the top, then click the cube's top face.
- Make the first tier. Press E, type 0.6, and press Enter to extrude the top face upward. Then press S, type 0.8, and press Enter to make the upper part narrower.
- Make a second tier. With the new top face selected, press E, type 0.5, and press Enter. Then press S, type 0.6, and press Enter. Now the tower has a stepped shape.
- Leave Edit Mode. Press Tab. Your whole tower is selected again. The shape changed in Edit Mode, but the object is still one mesh object.
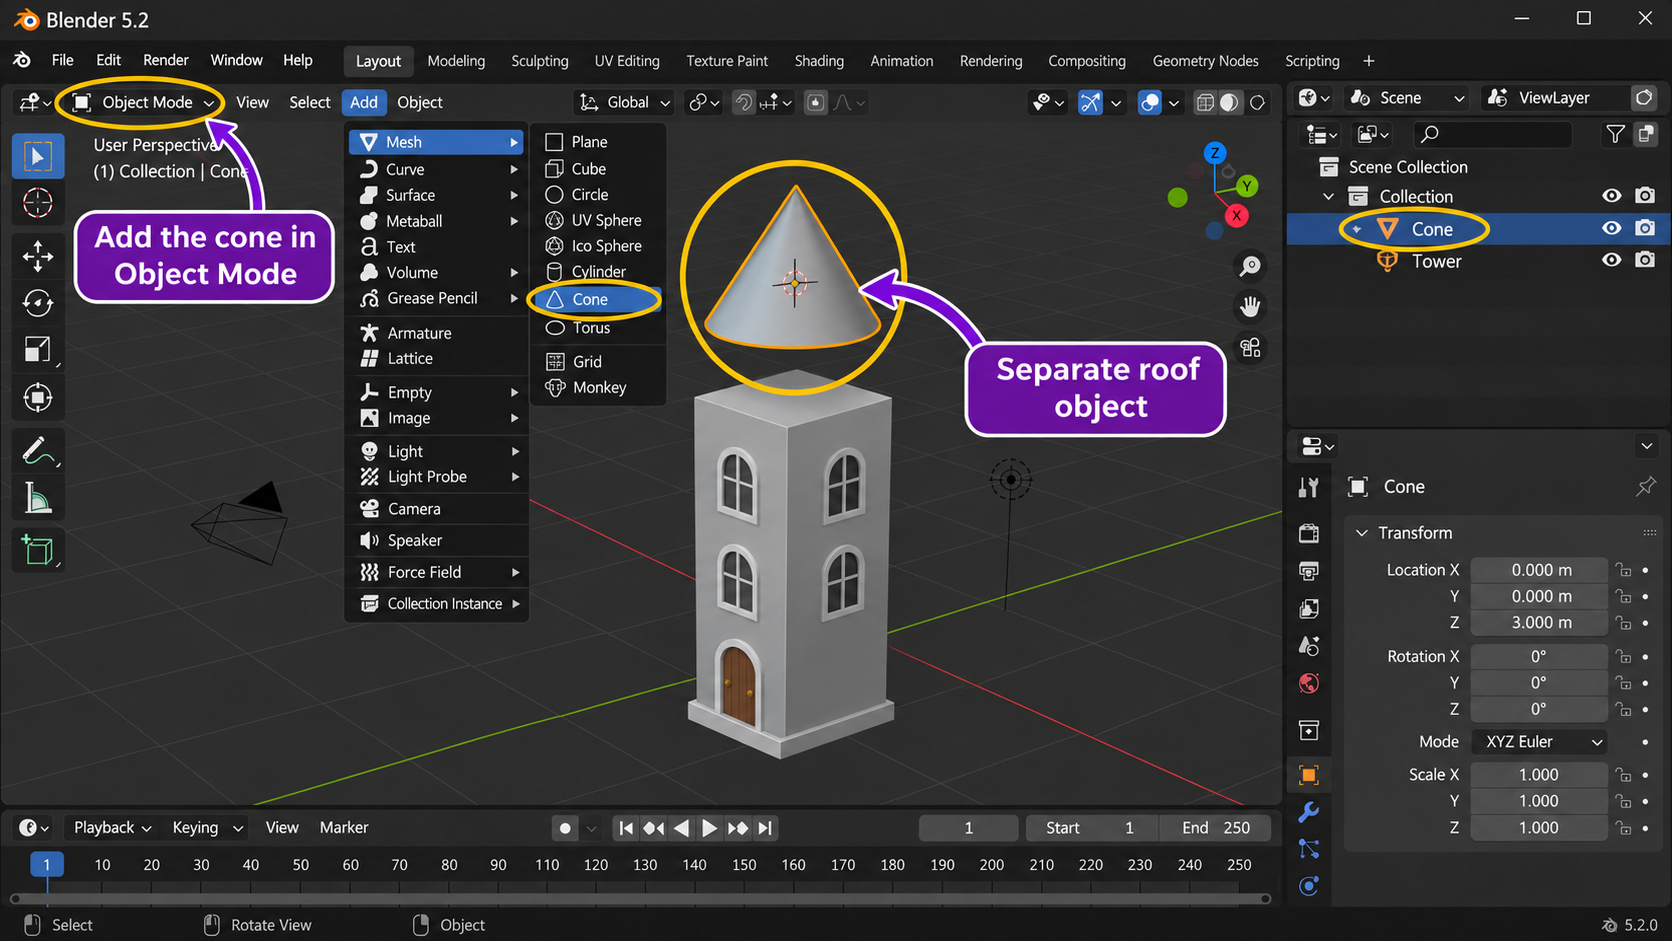
- Add a separate roof. In Object Mode, press Shift + A and choose Mesh → Cone. With the new cone selected, press G, then Z, type 3.1, and press Enter. Its base should sit on the new top of the tower with Blender's default dimensions.
- Save your work. Press Ctrl + S and save the project as My Enchanted Tower.blend. You've used both modes to create your first little building!
You've made your first little tower!
You now know when you're working with a whole object and when you're sculpting its underlying mesh. That's one of the biggest beginner breakthroughs in Blender.
A few beginner questions
Where are the vertex, edge, and face buttons?
Select a mesh and enter Edit Mode. The selection buttons appear in the 3D Viewport header.
Why does Tab seem to do nothing?
Make sure you selected the cube and move your mouse over the 3D Viewport before pressing Tab.
Why did I move the whole cube?
You're probably in Object Mode. Press Tab, select a mesh face, and try again.
Why did my cone become part of the tower?
It was probably added in Edit Mode. Undo, switch back to Object Mode, and add the cone again.