The wonderful moment when your own 3D creation leaves Blender and arrives in OpenSim or Second Life. We'll prepare the upload, inspect the preview, and give your treasure chest a proper home in-world!
Load and inspect all four detail levels and physics
Review costs, upload, and test your chest in-world
HAVE THESE READY
Your finished mesh package
A mesh-compatible viewer, permission to upload and rez, and the extracted Mesh Refinery ZIP from Lesson 11.
✦
THE FINAL ADVENTURE
Your First Creation Is Ready for the World
In Lesson 11, you cleaned your mesh, exported a .glb file, and used The Mesh Refinery to prepare a Collada .dae upload package. Now we will use that package in a mesh-compatible virtual-world viewer.
We'll use a simple decorative treasure chest as the practice object. A vase, crate or small fairy-house prop works just as well. This lesson is for static objects, not rigged bodies, clothing, attachments with skin weights, or animated avatars.
Before you start: Viewer menus and grid upload fees can differ. Use a mesh-enabled viewer, be sure you have permission to upload the model and textures, and check that your destination grid allows mesh uploads. In Second Life, mesh-upload eligibility and fees also apply.
✦
YOUR UPLOAD SPELLBOOK
Five little things to remember
HIGH
Main Model
Choose the _HIGH.dae file when you first open the model uploader.
LOD
Distance Detail
Medium, Low, and Lowest are extra versions of the same mesh.
PHYS
Collision
The _PHYS.dae file helps control how avatars collide with a prop.
FEE
Review First
Check the preview, size, resource weights, and actual displayed fee.
REZ
Place In-World
Drag your uploaded object from Inventory onto land where you can build.
TEST
Check Everything
Inspect textures, distances, physical behavior, and saved permissions.
01
FOLLOW THE MAGICAL ROUTE
From the Blender Workbench to Your World
✦BlenderFinish your mesh and export a GLB
›
⚙Mesh RefineryPrepare DAE files, LODs and physics
›
◇Mesh UploaderPreview the model and calculate cost
›
✧Your WorldRez, texture, test, and enjoy!
We'll begin with the upload pack from the Refinery—you do not need to export another file from Blender unless you spot something that needs fixing. If you haven't made the package yet, finish Lesson 11 first.
02
OPEN YOUR TREASURE PACK
Know Which Files to Use
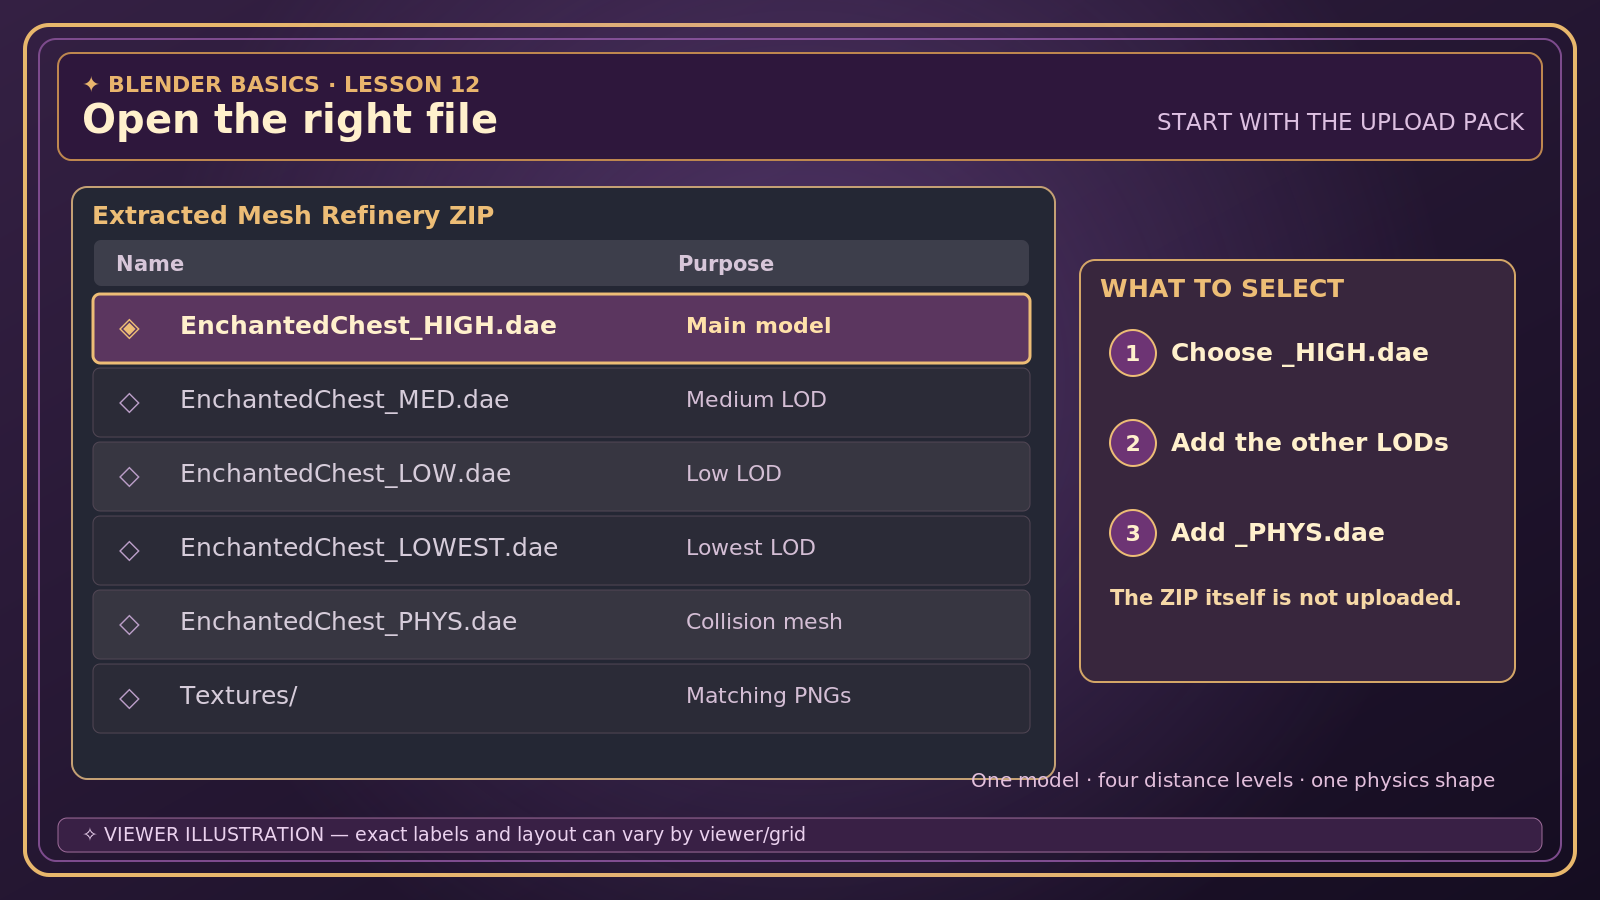
Extract the downloaded Mesh Refinery ZIP into its own folder. Your files may have a different base name, but the familiar suffixes help you find the right pieces:
✦EnchantedChest_HIGH.daeHigh — main model
◇EnchantedChest_MED.daeMedium — middle distance
◇EnchantedChest_LOW.daeLow — farther away
◇EnchantedChest_LOWEST.daeLowest — farthest away
⚙EnchantedChest_PHYS.daeSimple collision shape
🎨Textures/*.pngMatching material images
Choose HIGH first. The other files go in their matching LOD and physics slots—not as separate uploaded objects.
Don't upload the ZIP itself. The viewer's model uploader reads a .dae file, and you choose the additional LOD and physics files in its settings. Keep the accompanying PNGs for texturing.
03
THE DOORWAY INTO YOUR GRID
Open the Mesh Upload Window
Sign in to OpenSim or Second Life in your mesh-compatible viewer. If possible, use a testing or sandbox region where you are allowed to rez objects.
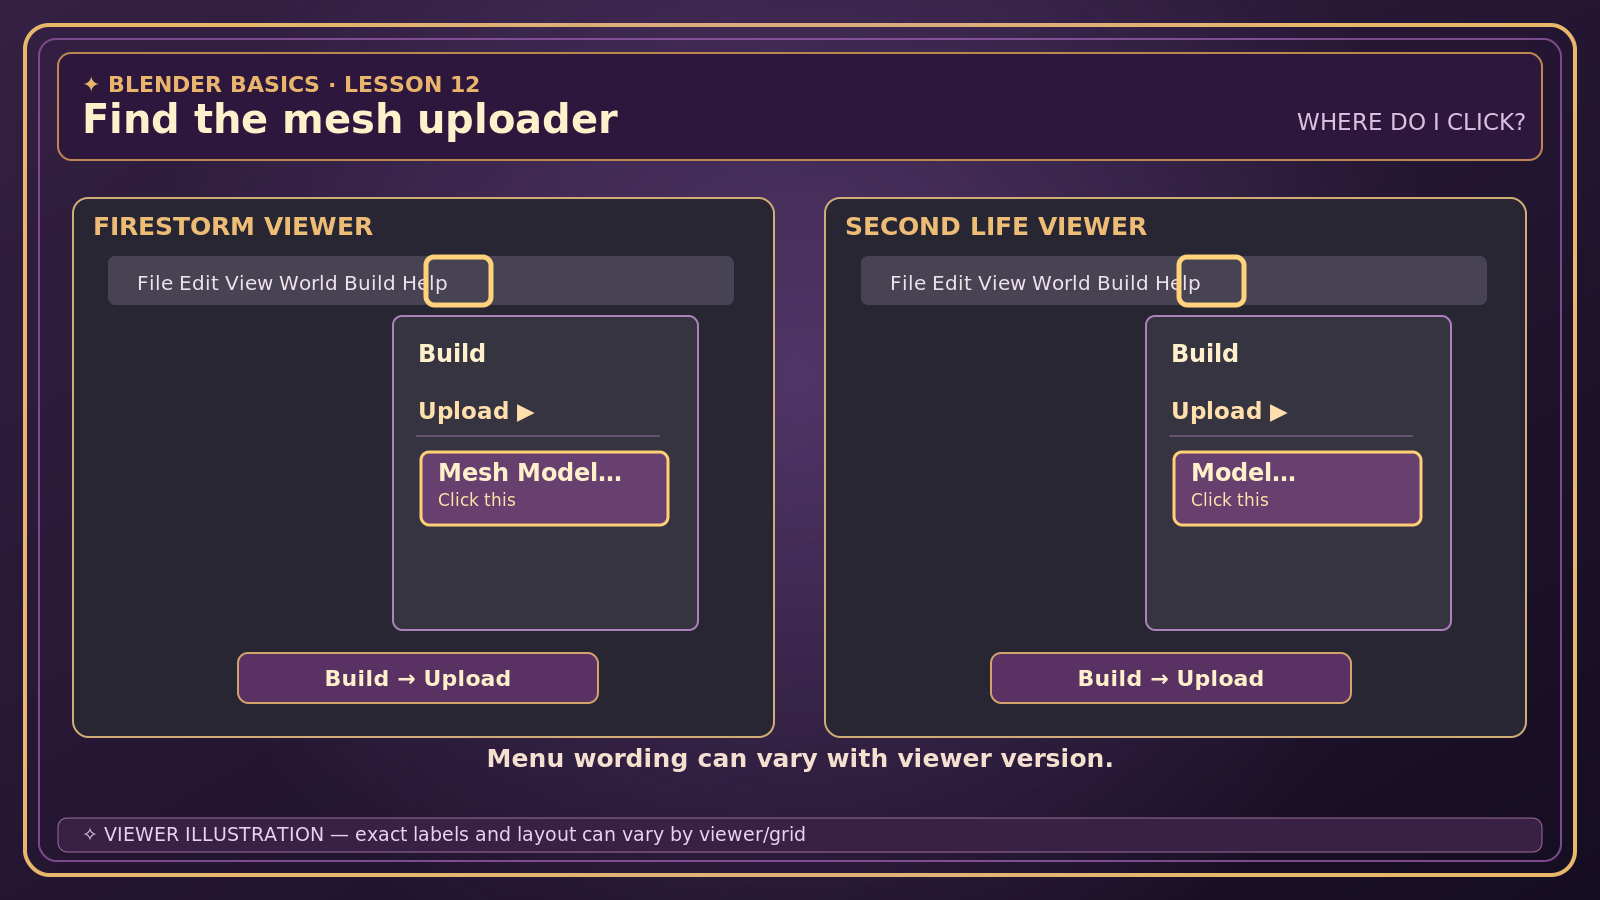
In Firestorm, look for Build → Upload → Mesh Model…. In the official Second Life Viewer, use Build → Upload → Model…. Menu labels can vary by viewer and version.
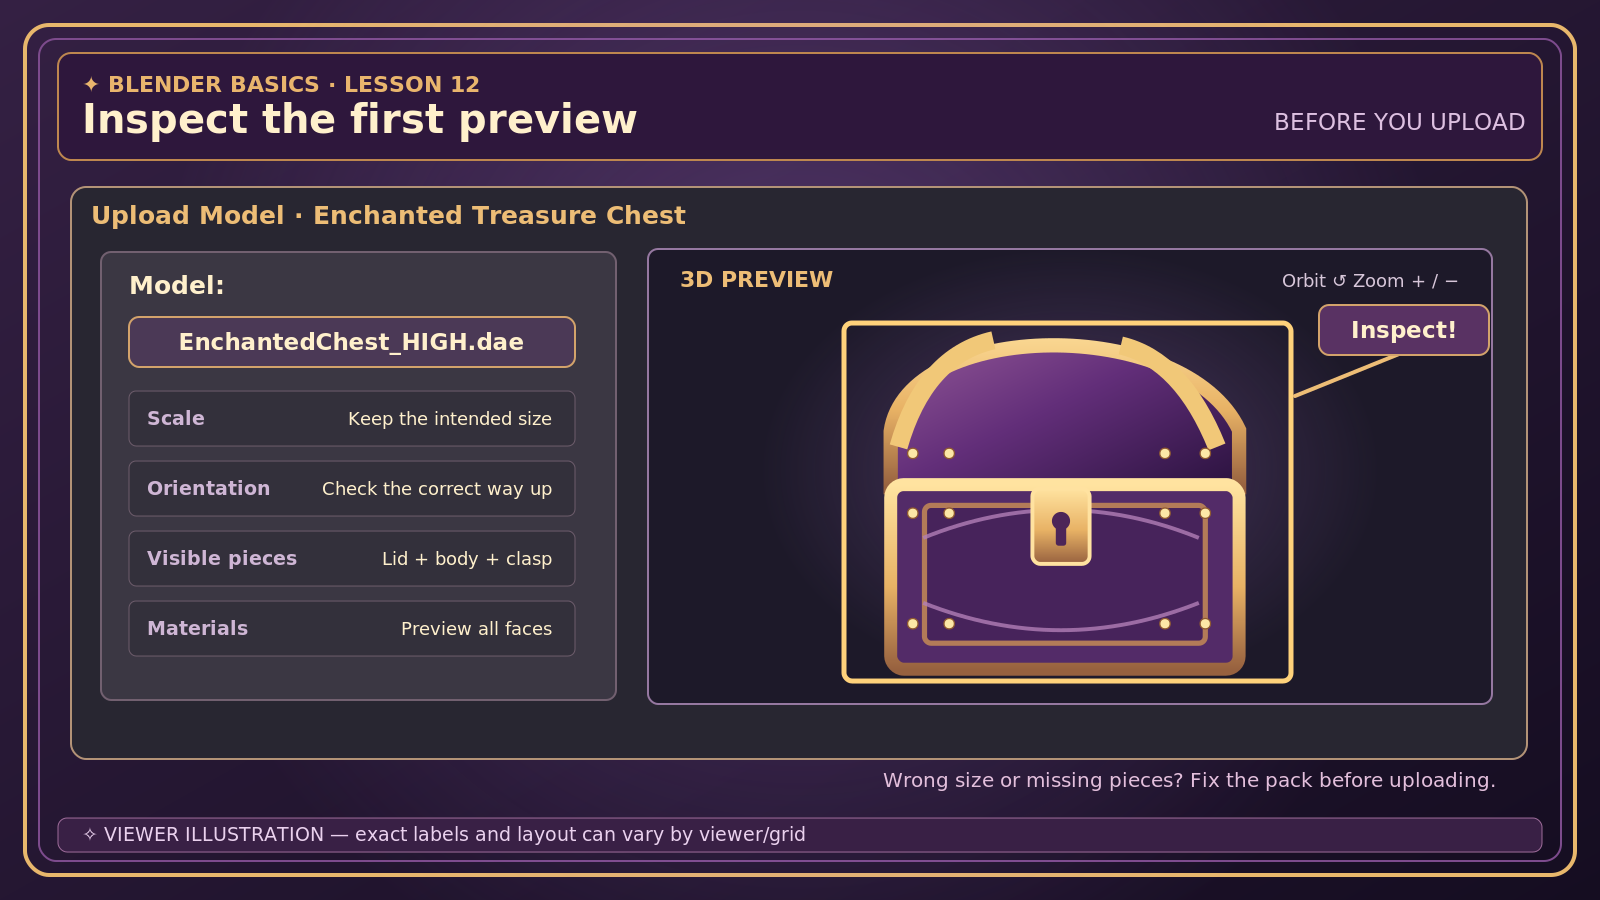
Browse to the extracted upload pack and choose your _HIGH.dae file. Give the model a recognizable name, such as Enchanted Treasure Chest.
Rotate and zoom the uploader preview. Check that the object is the right way up, contains all intended parts, and has sensible dimensions.
Look under Build → Upload. Firestorm and the official viewer may use slightly different names and menu positions.Inspect before uploading: The lid, body, clasp, size, and orientation should all look right in the model preview.
What if the uploader option is grayed out? Check your viewer, account eligibility, grid permissions and region access before changing your mesh. A disabled upload menu is not necessarily a modeling problem.
04
ONE MODEL, FOUR DISTANCES
Check Your Levels of Detail
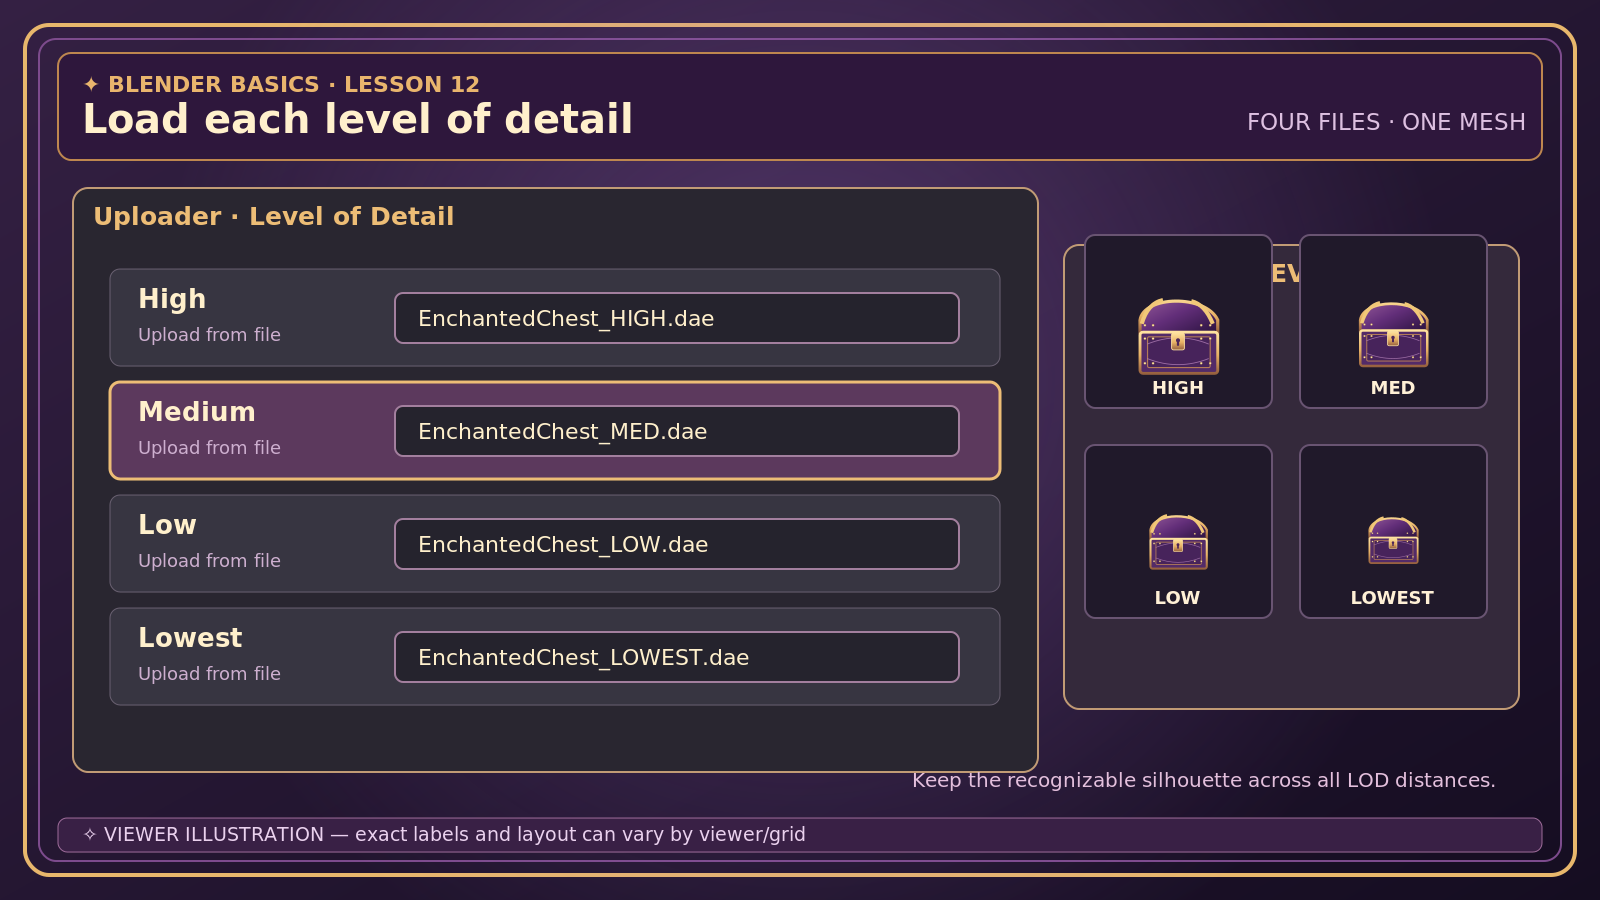
LOD means Level of Detail. Your object needs recognizable versions for different camera distances. The model uploader can generate LODs automatically, but we're using the versions prepared in The Mesh Refinery.
01
High
Main _HIGH.dae model, already loaded.
02
Medium
Choose Load from file and select _MED.dae.
03
Low
Choose Load from file and select _LOW.dae.
04
Lowest
Choose Load from file and select _LOWEST.dae.
One object, four distances: Put each DAE in its matching LOD slot and inspect all four previews.
Click each detail level in the viewer and inspect its preview. The lower-detail files should keep the overall shape, orientation, proportions, and material layout compatible with the High model. If the chest disappears or loses its lid, correct the appropriate LOD instead of uploading anyway.
Remember: These files are not four separate world objects to upload one after another. They are the four LOD slots for one mesh asset.
05
GIVE YOUR CREATION A SIMPLE COLLISION SHAPE
Choose Physics Without Extra Weight
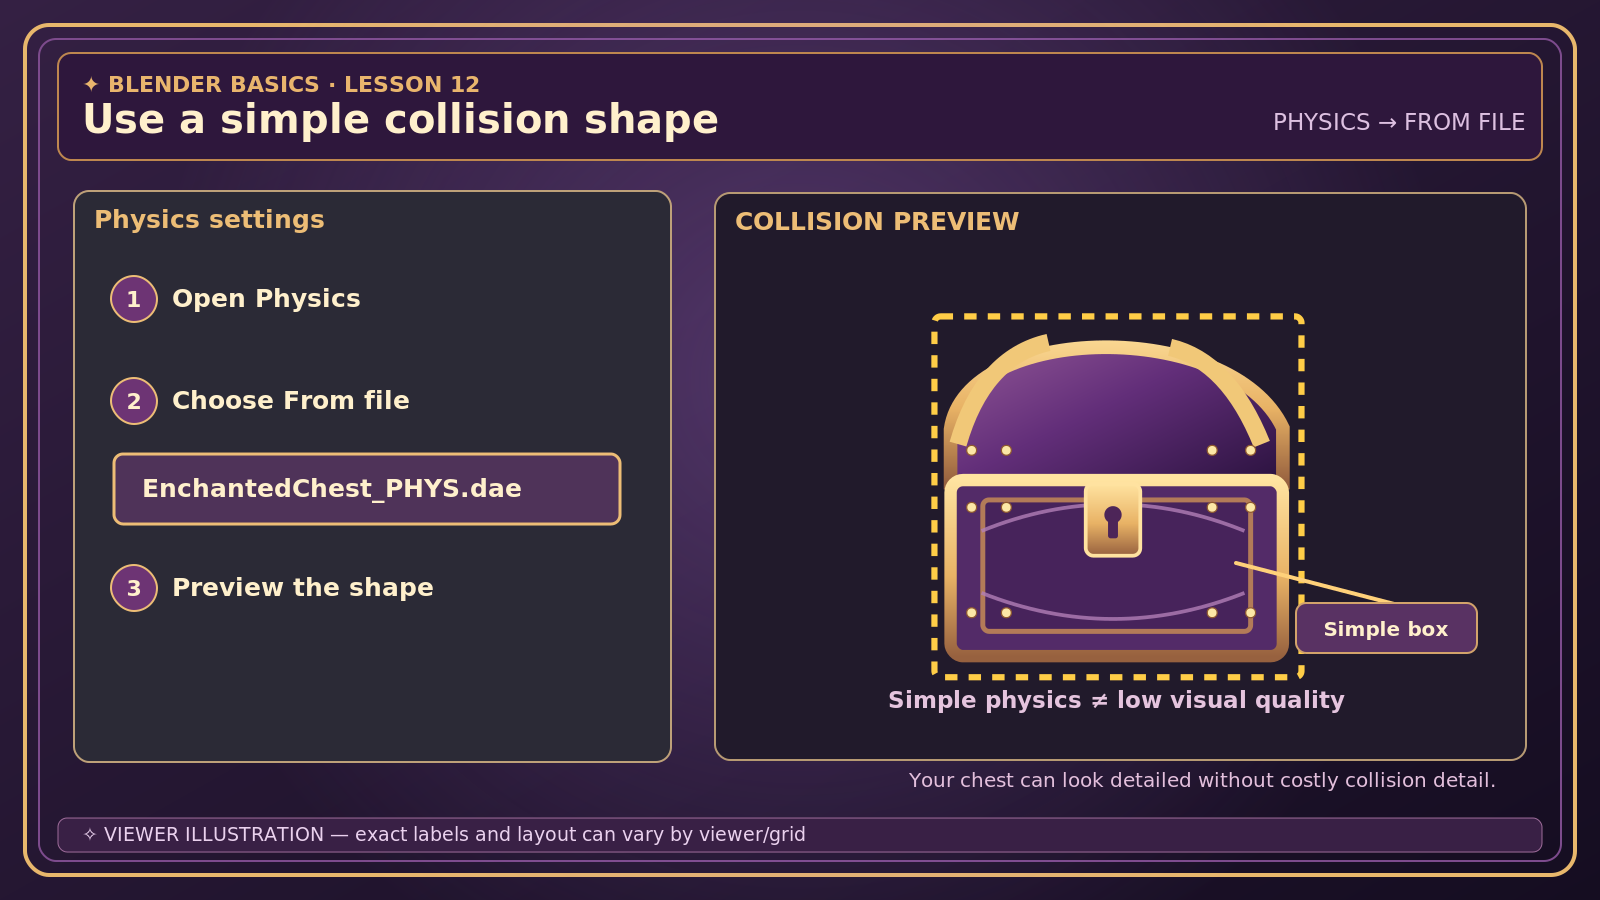
Open the Physics section or tab of the mesh uploader. When supported, choose From file and load your _PHYS.dae file. A simpler alternative is to use a low-detail mesh or a viewer-generated shape that is suitable for your object.
For a decorative chest that people don't need to enter, a simple box-like collision shape usually works better than hundreds of tiny curves. Preview the yellow physics mesh or collision hulls when your viewer offers that option.
Use the matching _PHYS.dae when your viewer supports it. A simple box-like collision shape is often fine for a decorative chest.
In some OpenSim viewers, advanced Physics Analyze or Simplify steps may not behave the same as in Second Life. If they fail, use a known working simple physics file or an appropriate basic shape.
06
THE FINAL PORTAL BUTTON
Review Options, Calculate, and Upload
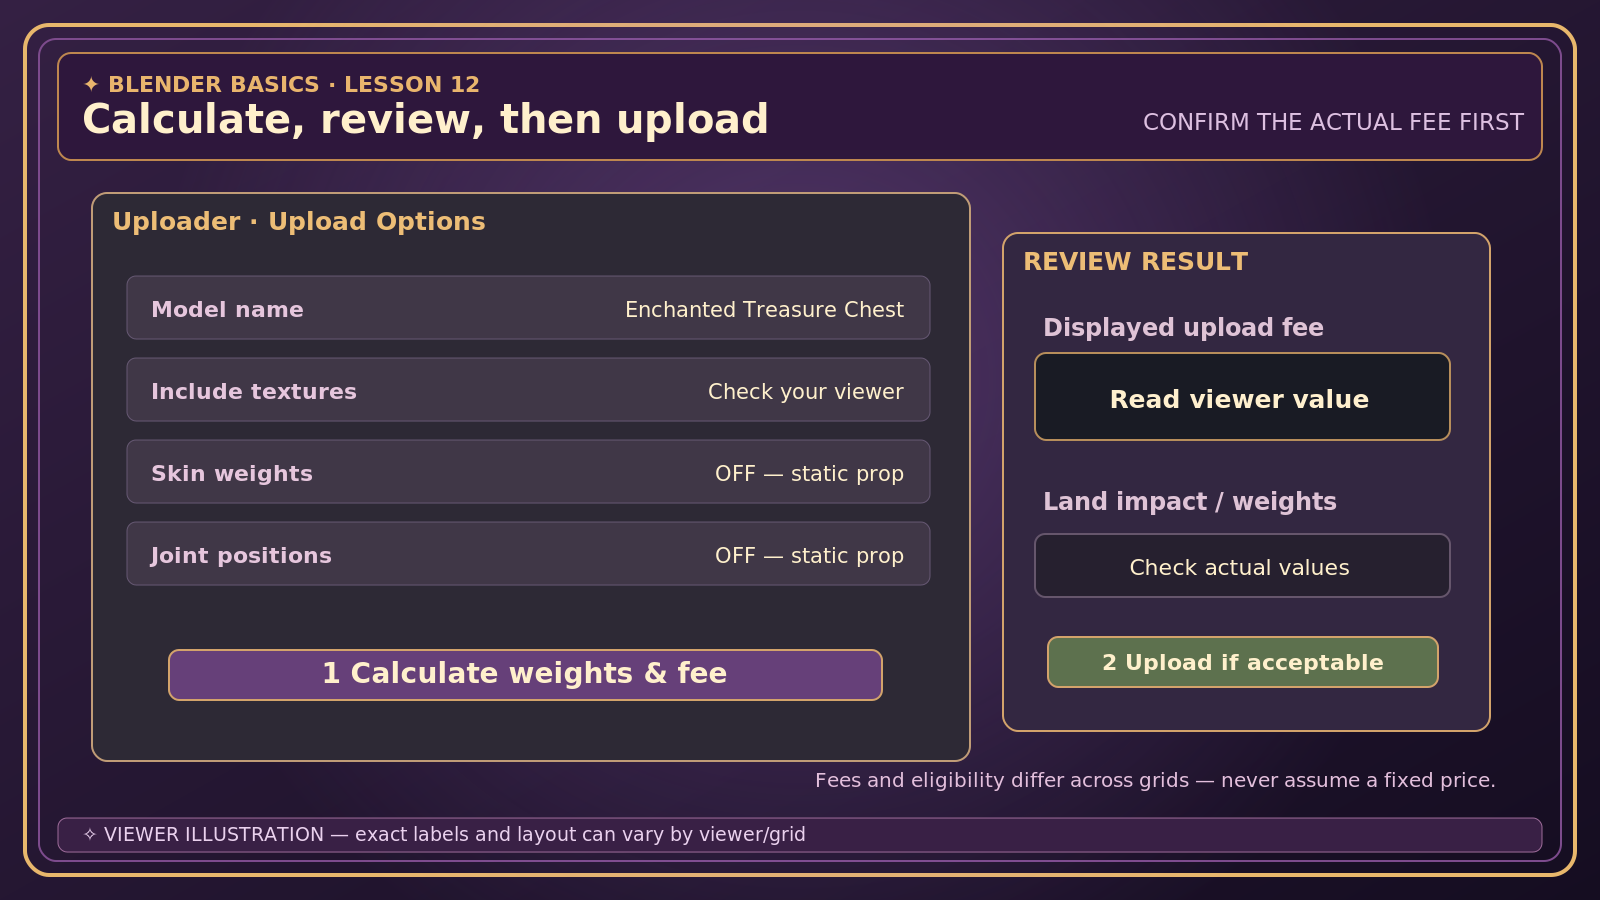
Open the viewer's Upload Options (sometimes called Modifiers) and confirm the model's name, size, and other options. For this static chest, do not enable skin weights or joint positions.
If your viewer offers Include Textures, check the cost and preview before selecting it. Texture inclusion may not reliably reproduce every Blender material; you can upload compatible image textures separately and apply them in-world.
Choose Calculate weights & fee (or the equivalent button). Read the displayed land impact / resource weights and upload charge. Fees and terminology vary by grid and viewer.
If the preview, LODs, collision shape, size, and cost are acceptable, select Upload. Wait until the viewer confirms that the operation has finished; don't click repeatedly.
Look for the uploaded item in your Inventory, often in the Objects folder or a folder created for the model.
Calculate first, upload second. Always check the real fee and resource weights shown by your own viewer.
Second Life creators: The main grid has mesh upload eligibility requirements, including payment information on file and accepted IP terms. Check the account settings before attempting your first upload. OpenSim grids can have different restrictions and fees.
07
THE HAPPY IN-WORLD MOMENT
Rez, Texture & Test Your Creation
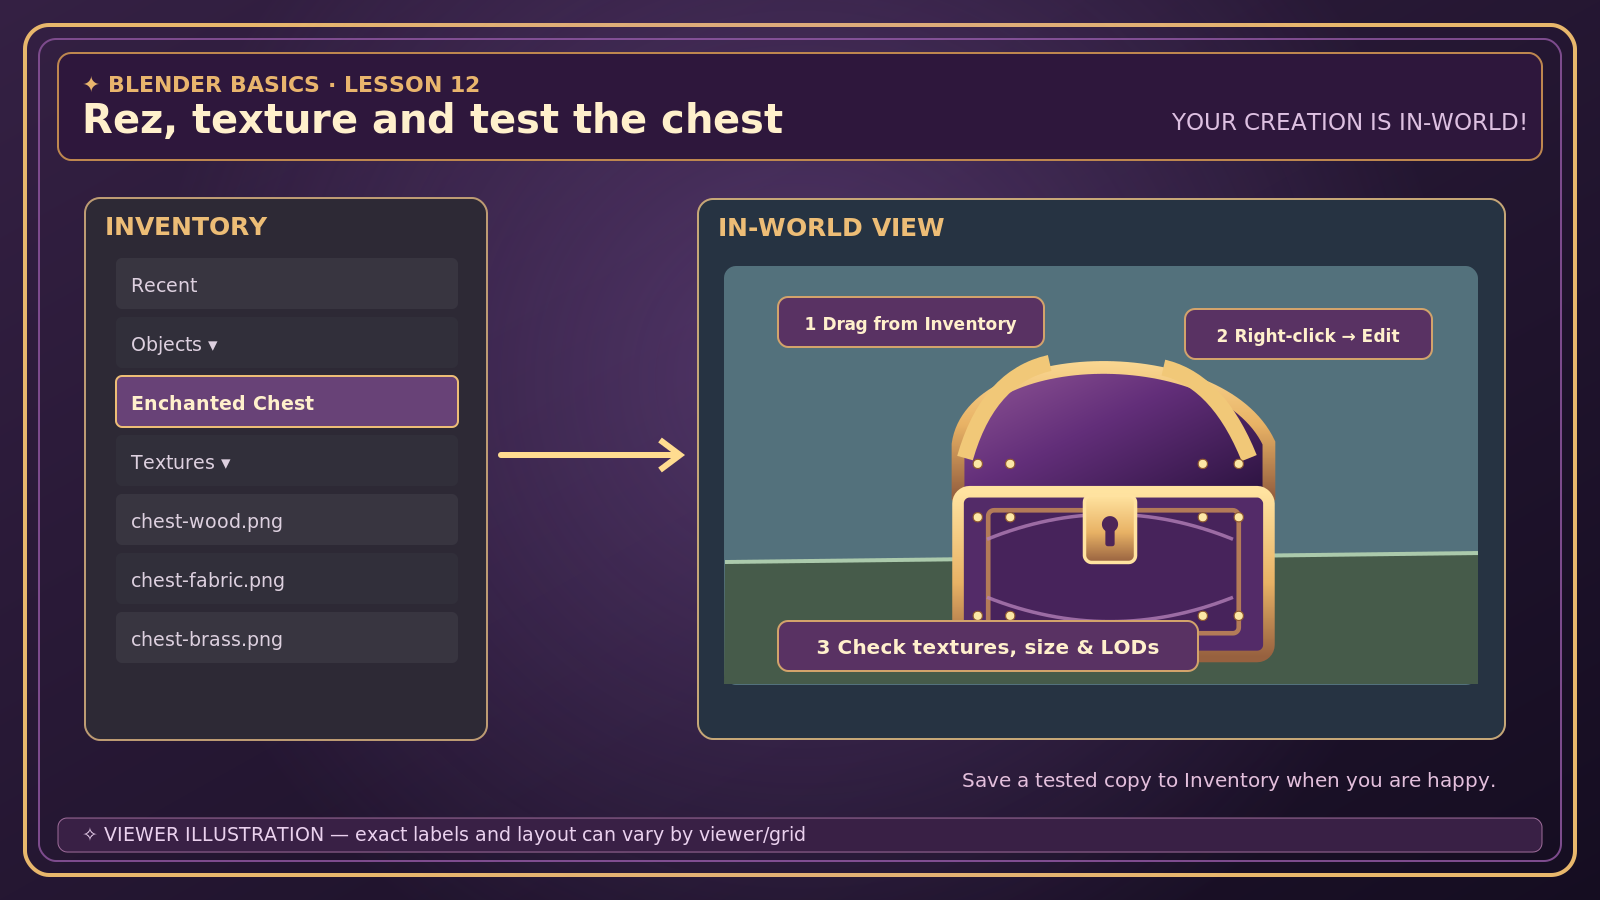
Move to land where you have build / rez permission. Drag the new mesh from Inventory onto the ground.
Right-click → Edit and check its rotation, dimensions and position. Is the treasure chest the size you intended? Does its lid look right from every angle?
Apply the matching texture images from your Refinery pack to the appropriate faces or material slots. If you use normal and specular maps, configure them with the material method supported by your grid and viewer. Revisit Lesson 09 or our Normals & Specular guide for help.
Walk around the object and zoom out. Watch for missing faces, flickering, unexpected transparency, or sudden changes between LODs.
Test the object by walking into it if collision matters. If avatars get stuck or pass through where they shouldn't, inspect its physics shape and available Physics Shape Type settings.
When you're happy, set the desired name, description, and permissions, then take a saved copy into Inventory.
Drag → Edit → Test. Rez the chest on permitted land, apply its matching textures, and inspect it up close and from a distance.
A note for makers: A mesh can be beautiful without being heavy. The goal isn't the most triangles—it's a model that looks good, behaves correctly, and fits comfortably into your world.
08
ONE LAST WORKSHOP CHECK
Your First Upload Checklist
If Something Goes Wrong…
My model disappears at a distance.
Inspect the Low and Lowest LOD previews and use the right DAE file in each slot. A very sparse LOD can lose important features.
The land impact or upload cost is high.
Try simpler LODs and an efficient physics shape; avoid over-complicated hidden geometry. Recalculate before confirming the upload.
Textures are white, missing, or scrambled.
Upload and apply the matching image files supplied with the DAE pack. Check UVs and material faces; a texture from the old UV layout may not fit a rebaked mesh.
I can't rez or upload anything.
Check your region's build rights, grid/viewer mesh compatibility, account upload eligibility, and available upload balance. These are separate from your model geometry.
✧
Your first creation has arrived!
You've traveled from Blender's first cube to a real mesh prop in-world. Save your finished chest, and keep making little bits of magic!