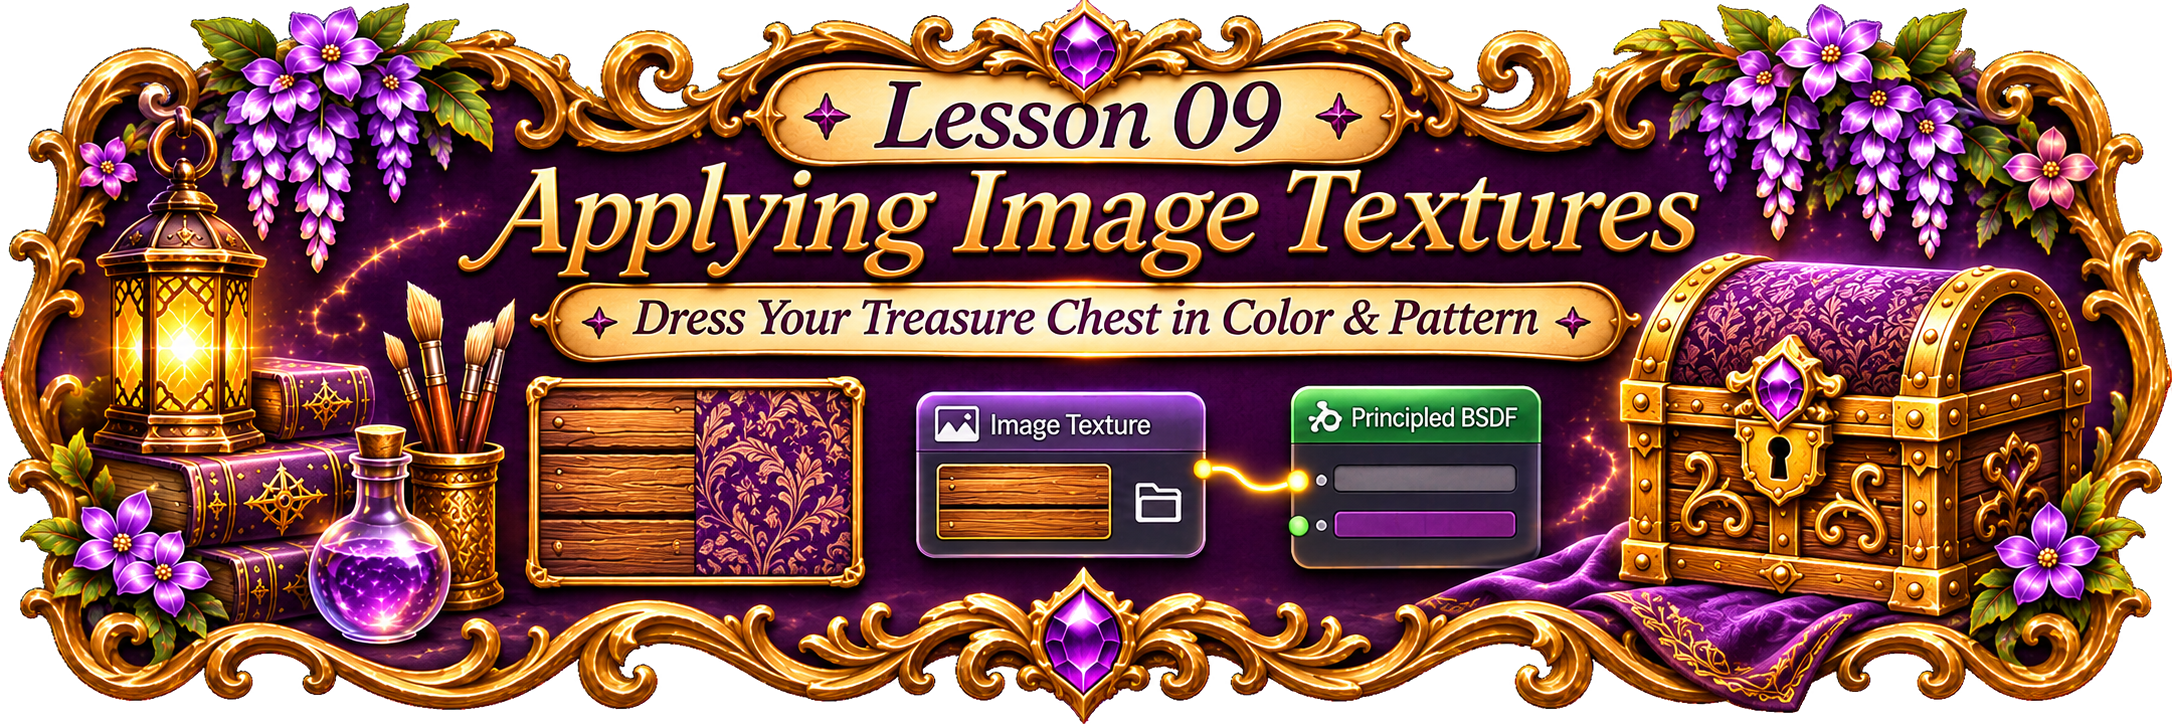
Your chest has UVs. Now give it beautiful wood grain, purple fabric and gilded details by connecting image files to Blender materials.
Beginner-friendlyAbout 40–55 minutesBlender 5.2
WHAT YOU’LL LEARN
Color, pattern & shine
Find the Shading workspace and Shader Editor
Load an Image Texture and link its Color socket
Preview wood, purple fabric, and brass
Adjust UVs and safely pack your images
BEFORE YOU BEGIN
Your Chest UV project
Bring your Enchanted Chest UV Practice.blend file from Lesson 08, or follow the fresh-cube option below. The three practice textures are free to download here.
✦
START HERE
Welcome to the Texture Atelier!
Last time, we unwrapped a simple treasure chest into flat UV islands. In this lesson, we will place real pictures on those UVs using an Image Texture node. The same technique works for fabrics, wood, stone, metal and painted signs.
Bring along your Enchanted Chest UV Practice.blend file from Lesson 08 if you have it. If not, there's an easy way to make the two practice cubes again below. You won't need any add-ons.
Little workshop wisdom: A material controls the way a surface responds to light; an image texture is a picture plugged into that material. A UV map tells Blender which part of the image goes onto each face.
✦
QUICK REFERENCE
Your texture spellbook
Shift + A
Add a node
With the pointer inside the Shader Editor, search for Image Texture.
Color → Base Color
Connect the image
Drag the yellow Color output to the yellow Base Color input.
G / R / S
Adjust UVs
In the UV Editor, move, rotate, and scale the selected UV islands.
01
A PICTURE NEEDS A PLACE TO GO
Material + Image Texture + UV Map
Imagine decorating a tiny wooden chest with patterned wrapping paper. Blender needs three pieces of information before that pattern can appear on the 3D model:
◈
The material
Holds the surface settings and connects everything to Blender's shader.
▧
The image
A PNG or JPG containing color details, like wood grain or embroidered fabric.
◇
The UV map
Defines which parts of that picture land on the model's faces.
We will use the Principled BSDF shader introduced in Lesson 07. You only need one extra node: Image Texture.
Important: Simply opening an image in the UV Editor does not automatically add it to your rendered material. You must also connect that image through the Shader Editor.
02
THREE LITTLE SWATCHES FROM THE WORKSHOP
Get Your Free Practice Textures
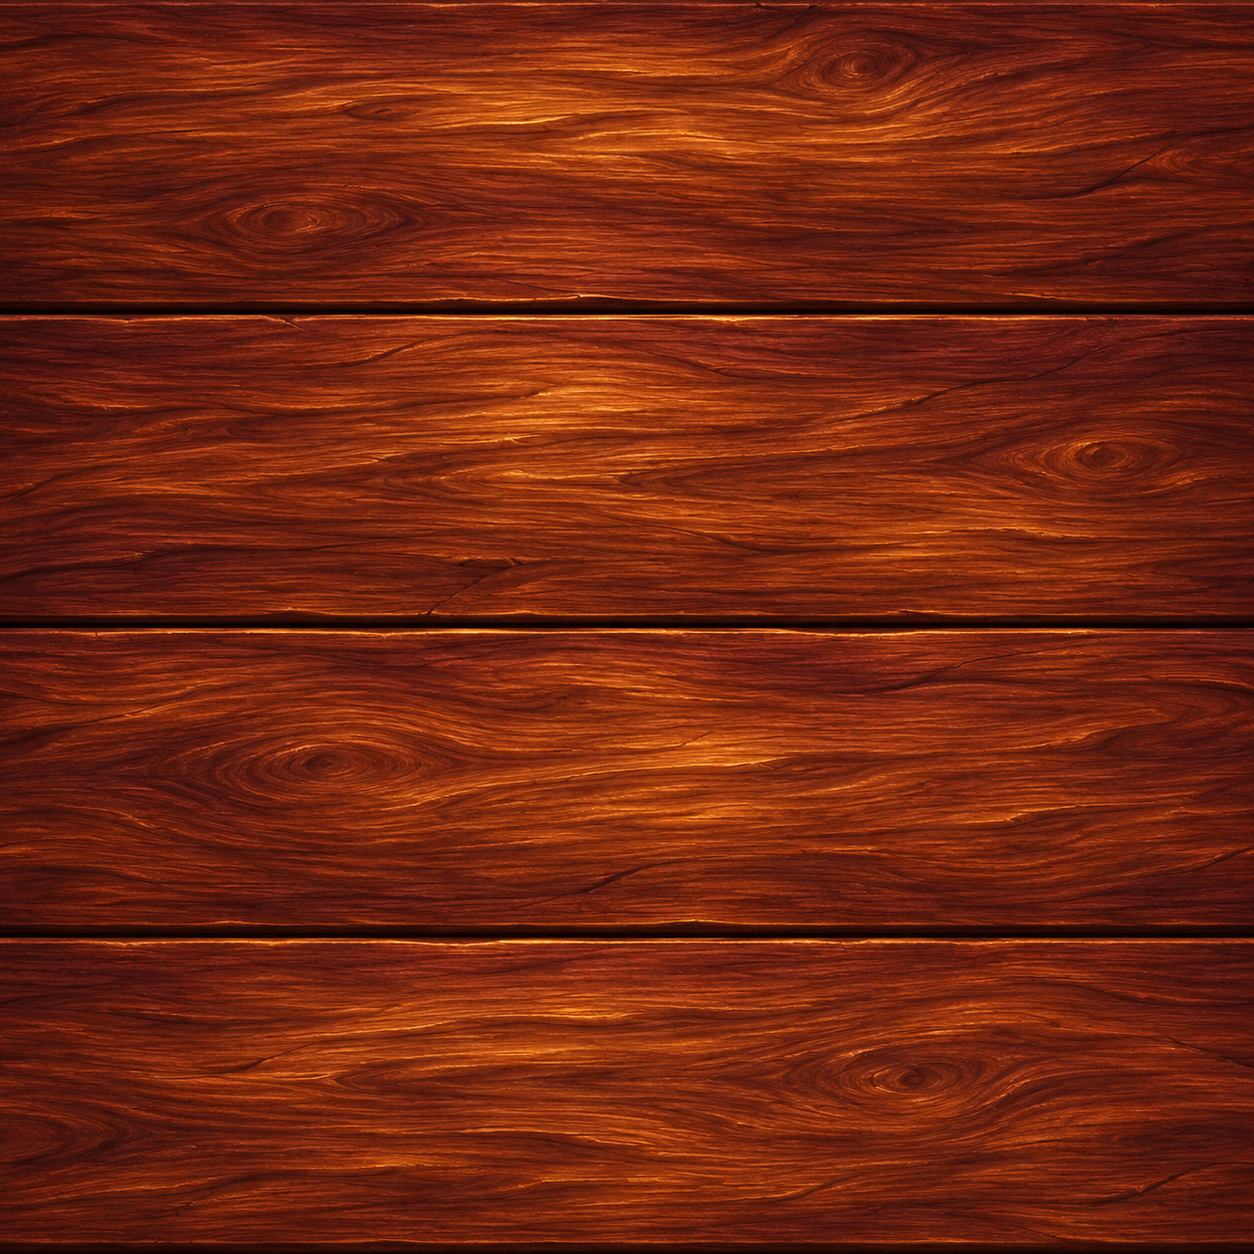
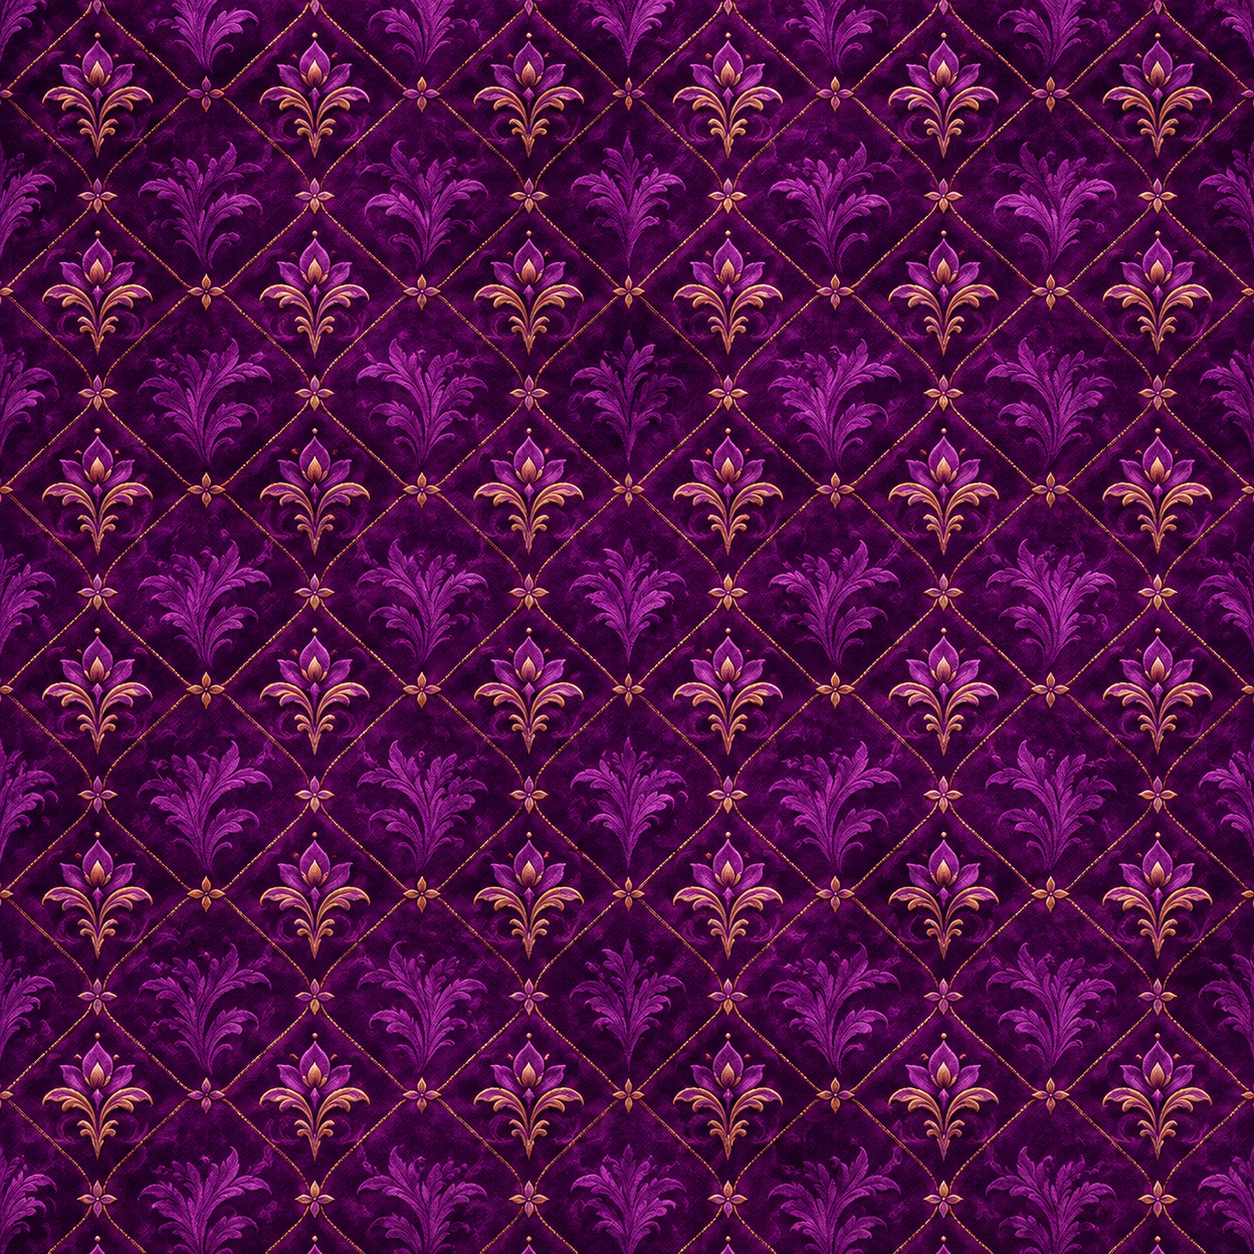
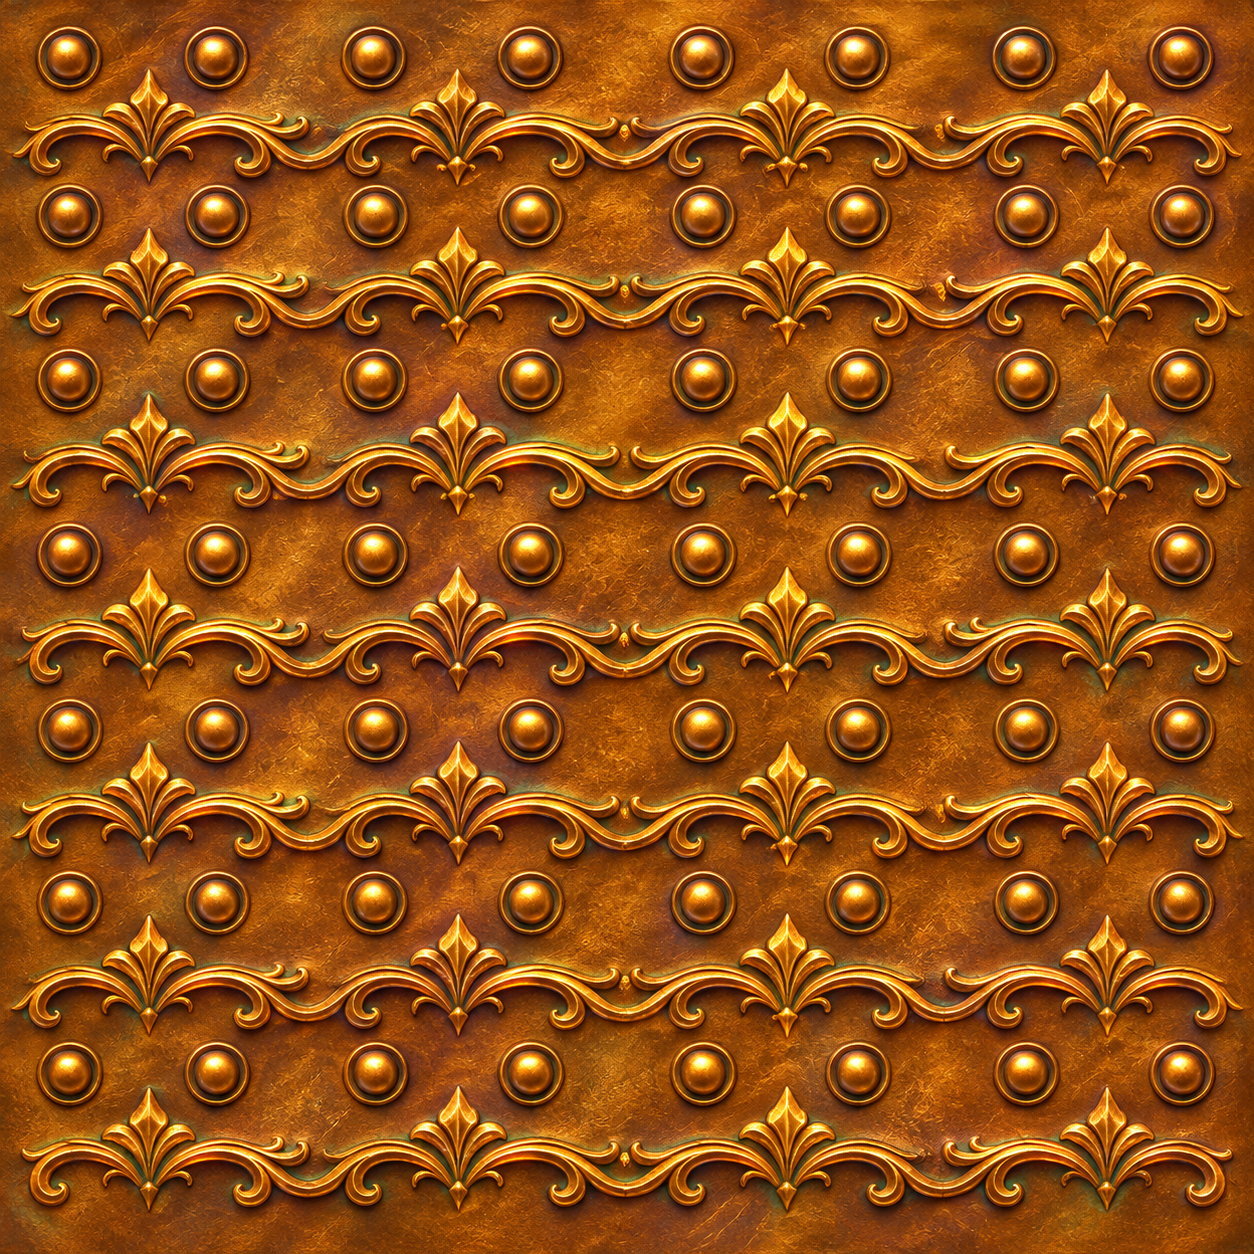
These three original PNG images are included right inside The Enchanted Workshop website. Save them to an easy-to-find folder on your computer—perhaps Documents / Blender Projects / Enchanted Chest / Textures.
If your browser opens a picture instead of downloading it, right-click it and choose Save image as…. Use the original PNG files, not screenshots of the swatches.
03
THE MAGIC CONNECTION
Connect an Image in the Shader Editor
Let's start with the Chest Body. Open your practice file from Lesson 08. If you don't have it, make a fresh body now: select the default cube, rename it Chest Body, scale with SX1.5Enter, SY0.9Enter, SZ0.6Enter, then press Ctrl+A → Scale. Its default UVs can work for this first test; Lesson 08 shows how to mark seams and unwrap more carefully.
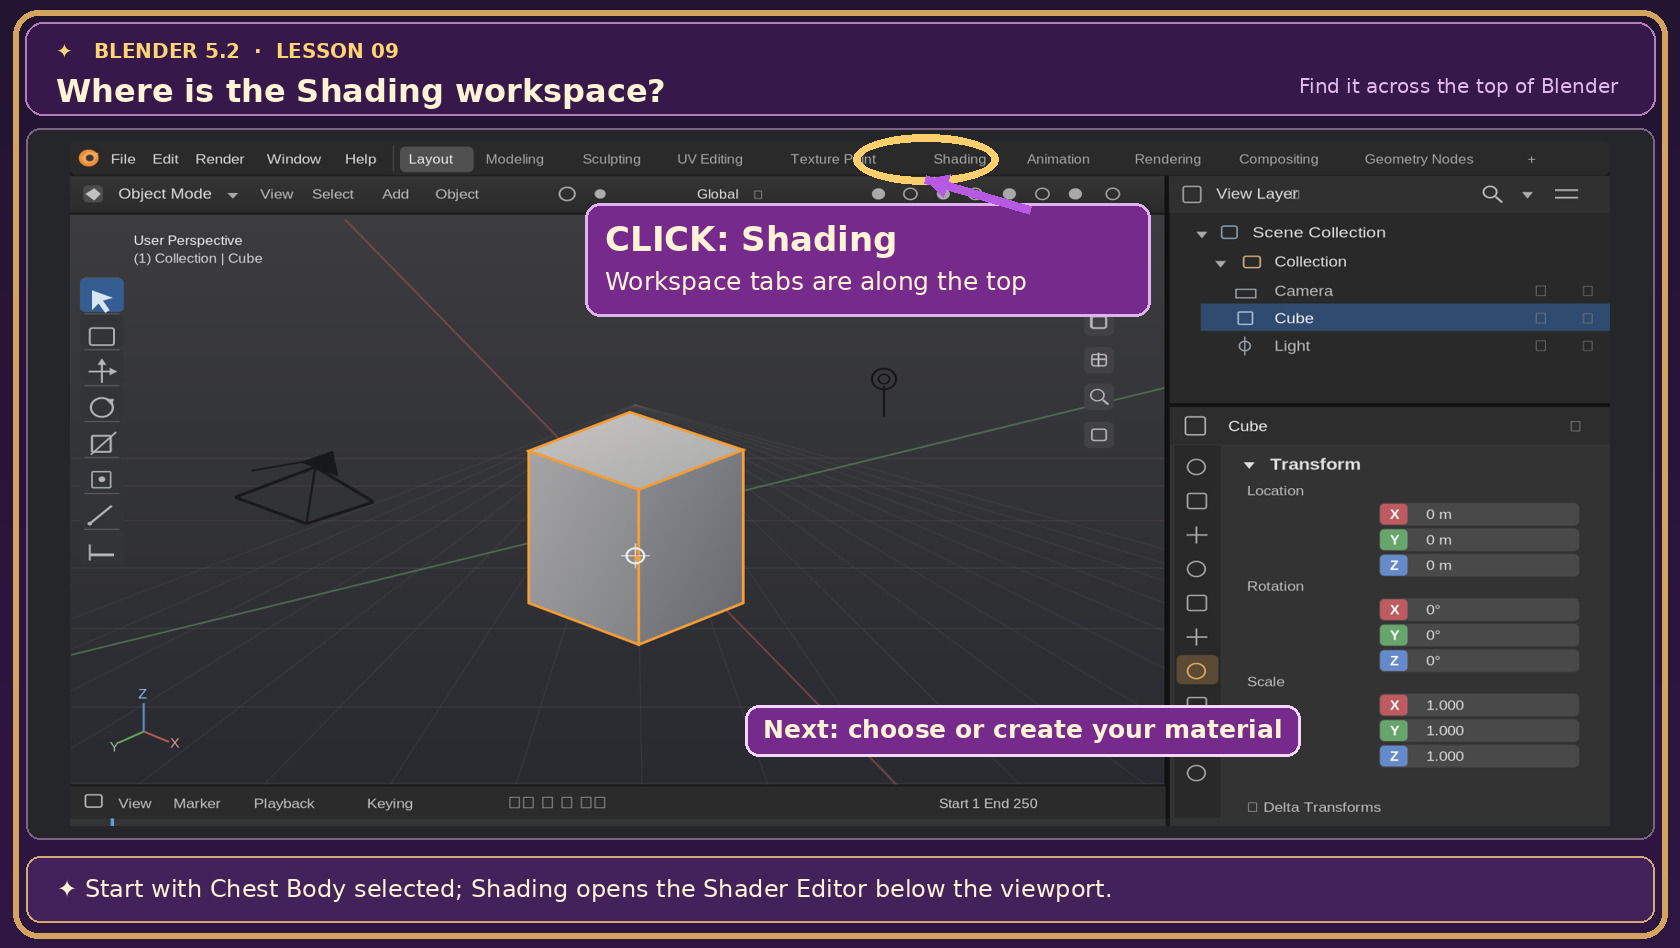
In Object Mode, click the chest body so it is the selected mesh. Choose the Shading workspace at the top of Blender.
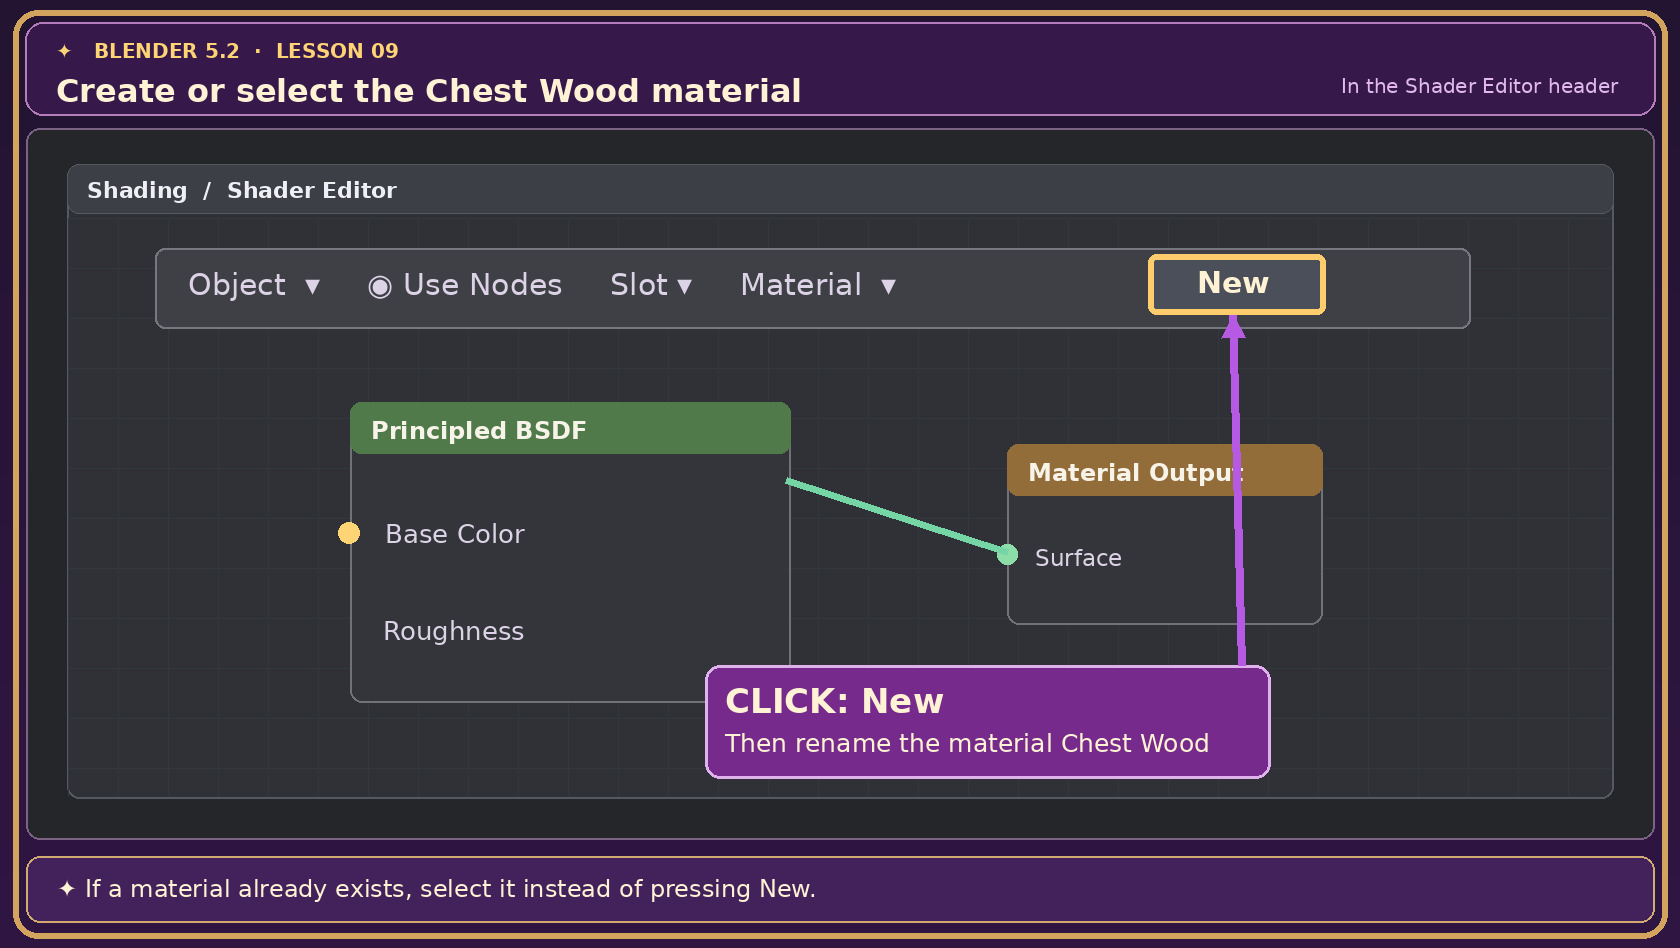
In Material Properties or the Shader Editor, choose the body's material. Click New if it has none; name it Chest Wood. The Shader Editor should show Principled BSDF connected to Material Output.
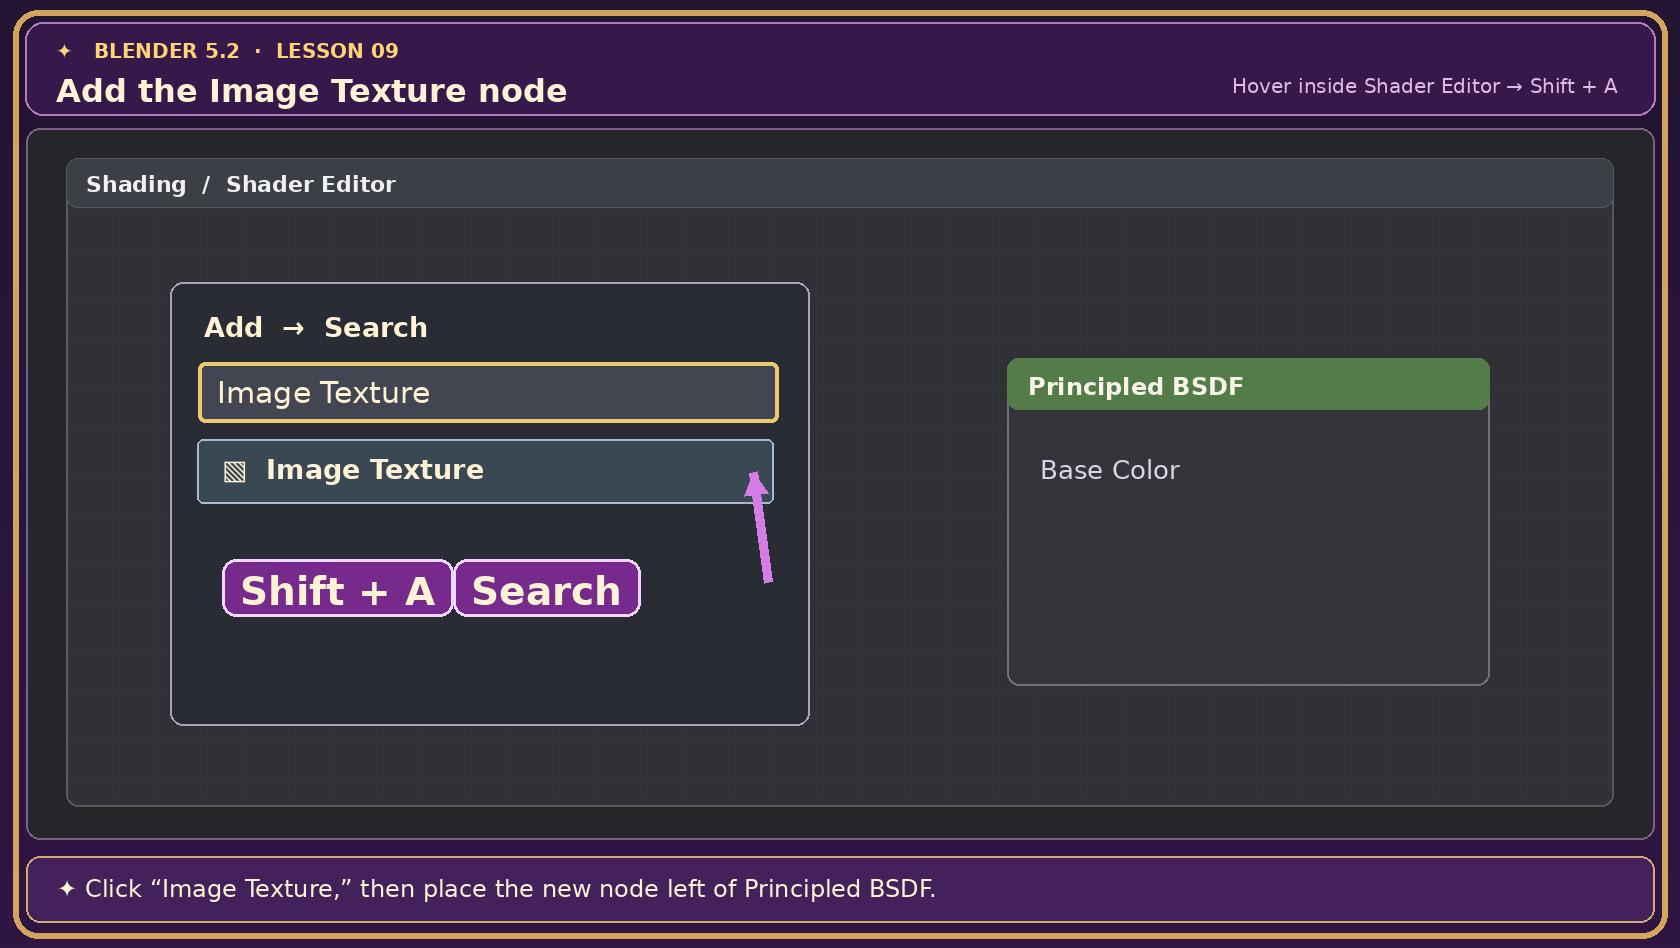
Move your cursor over the Shader Editor and press Shift+A. Use Search, type Image Texture, and place that node to the left of Principled BSDF. You can also use the Add menu.
Click Open on the Image Texture node and find lesson09-wood-planks-v192.png on your computer.
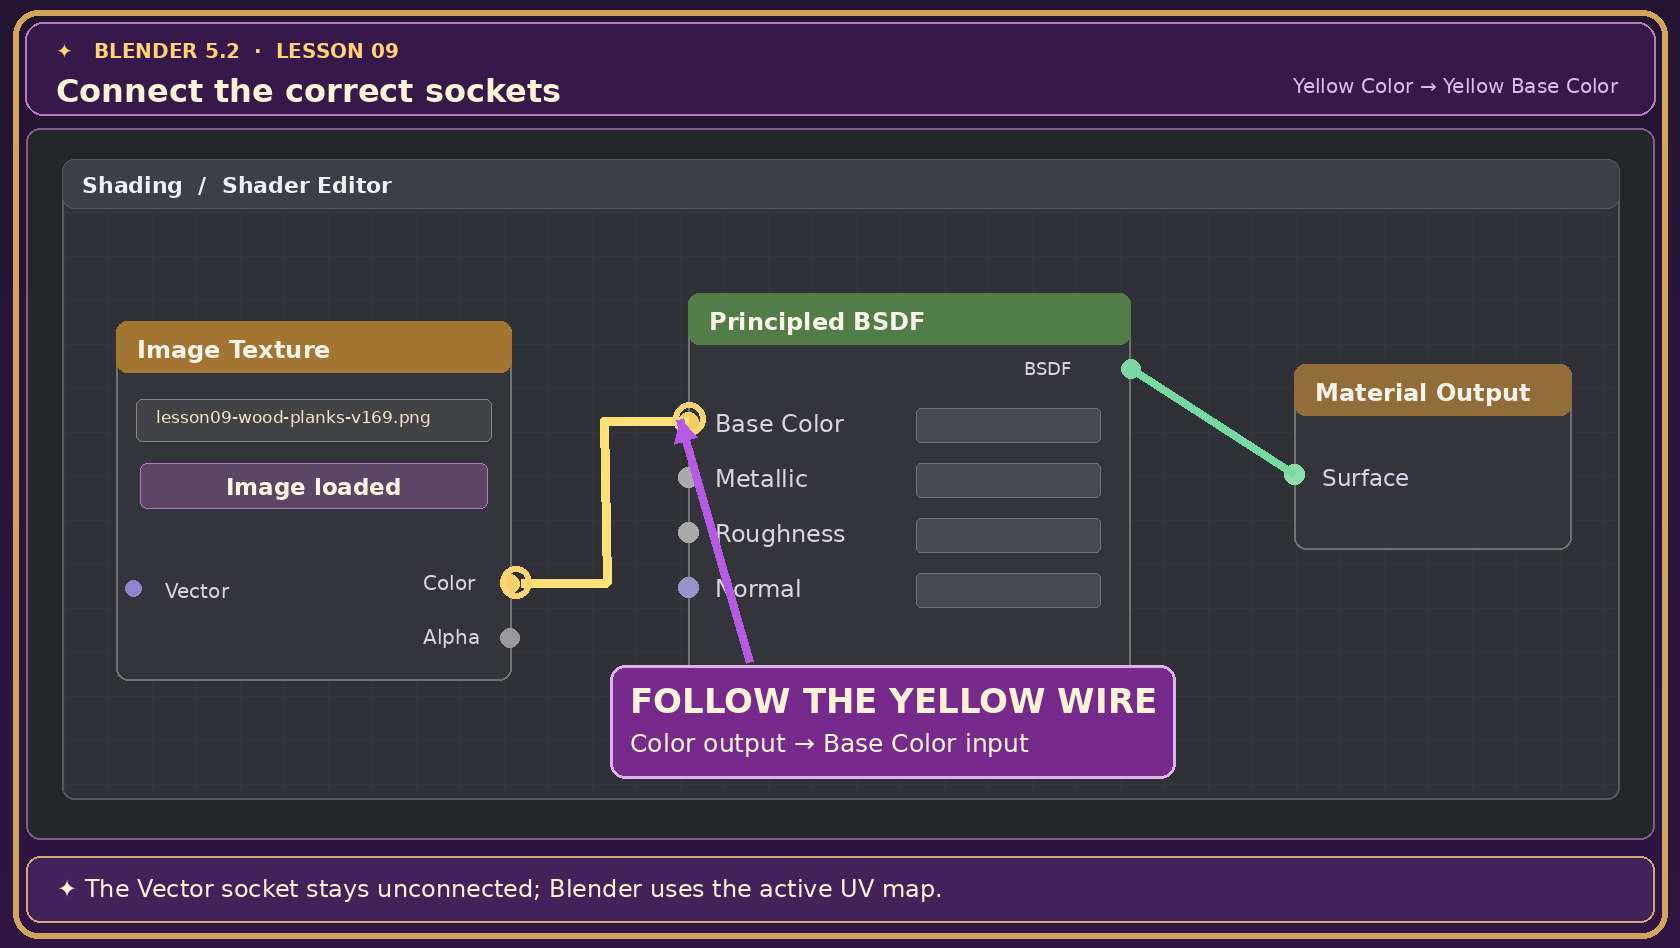
Drag a connection from the Image Texture node's yellow Color output to the Principled BSDF node's yellow Base Color input. Leave the Image Texture's Vector input unconnected for now; it will use the mesh's active UV map.
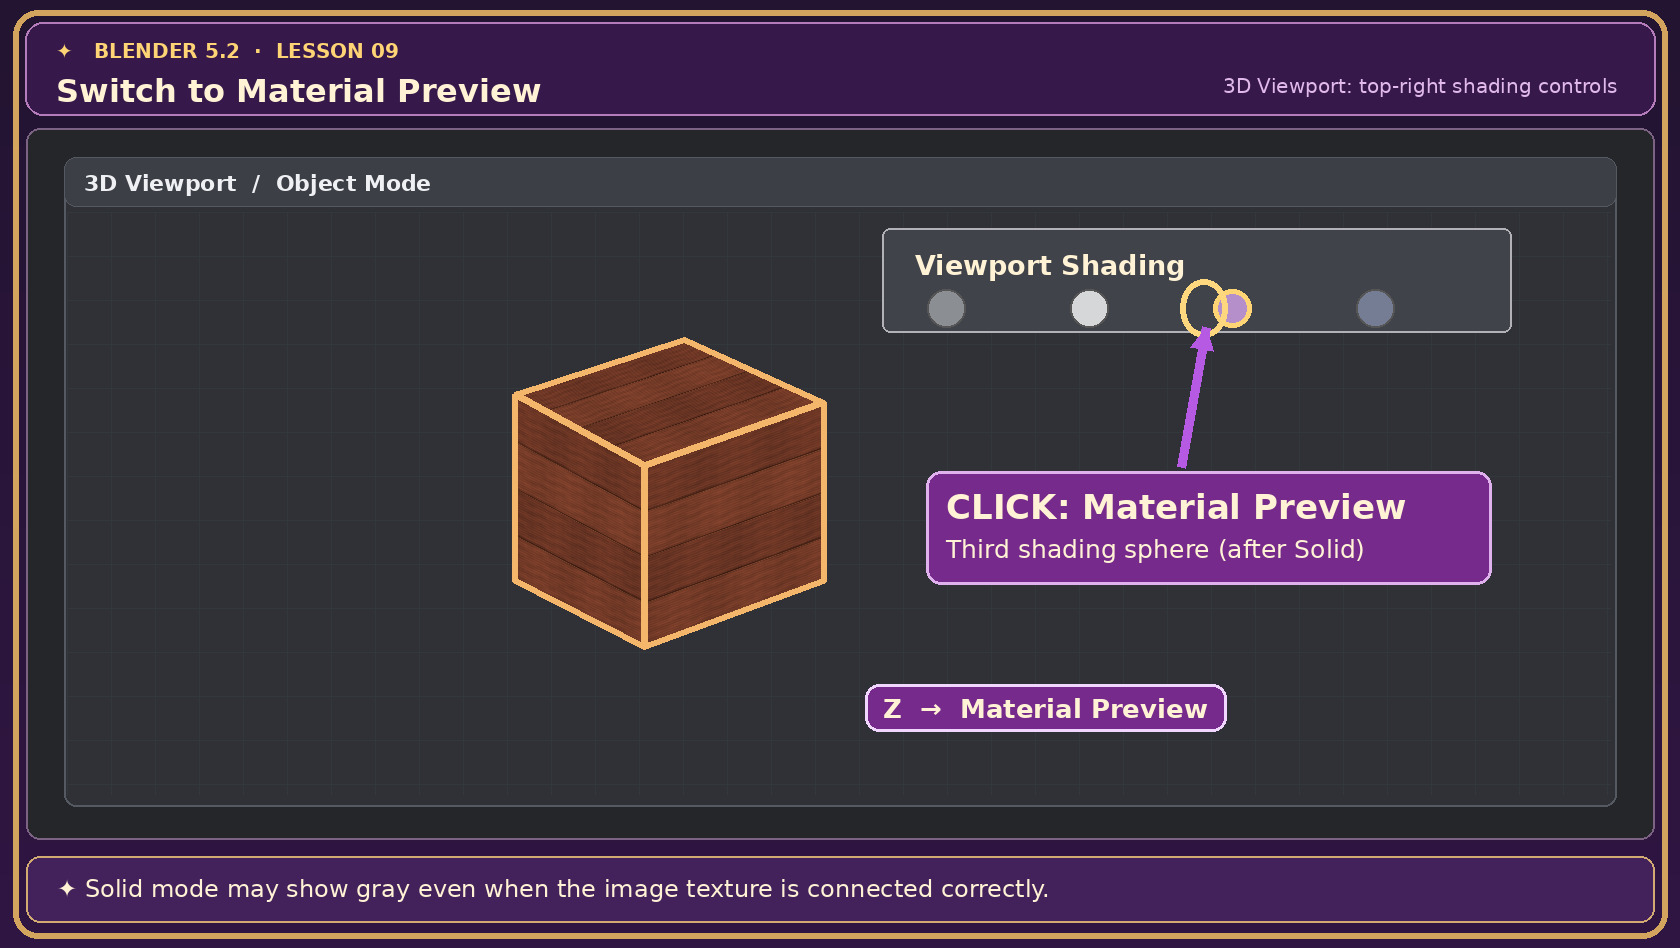
In the 3D Viewport, switch to Material Preview (the third shading sphere at the top-right of the viewport, or Z then Material Preview). Your body should show wooden boards.
Look exactly where to click
1. Shading: Find this workspace along Blender’s top bar.2. Material: Select the existing material, or click New and name it Chest Wood.3. Add: Search for Image Texture and put it to the left of Principled BSDF.4. Connect: The yellow Color output belongs on Base Color—not Normal.5. Preview: Click Material Preview to see the wood grain on the chest.
Interface illustrations are simplified Blender-style guides; actual Blender 5.2 panels can vary slightly with window size and selected objects.
Teaching illustration of the key connections, not a screenshot of Blender's interface.
The secret: We are connecting Color → Base Color, not Color → Normal or Image → Material Output. Those other inputs do different jobs.
04
DECIDING WHERE THE PATTERN LANDS
Adjust the Image with UV Islands
Imagine your wooden boards look crooked, too big, or too small. You usually don't need to resize the 3D model—you can change the UV islands.
Select Chest Body and switch to the UV Editing workspace. Press Tab to enter Edit Mode and A to select its geometry.
In the UV Editor's image dropdown, choose lesson09-wood-planks-v192.png to see the texture beneath the UV outlines. (This image selection is just for editing; the material node from Step 03 is what displays it on the 3D object.)
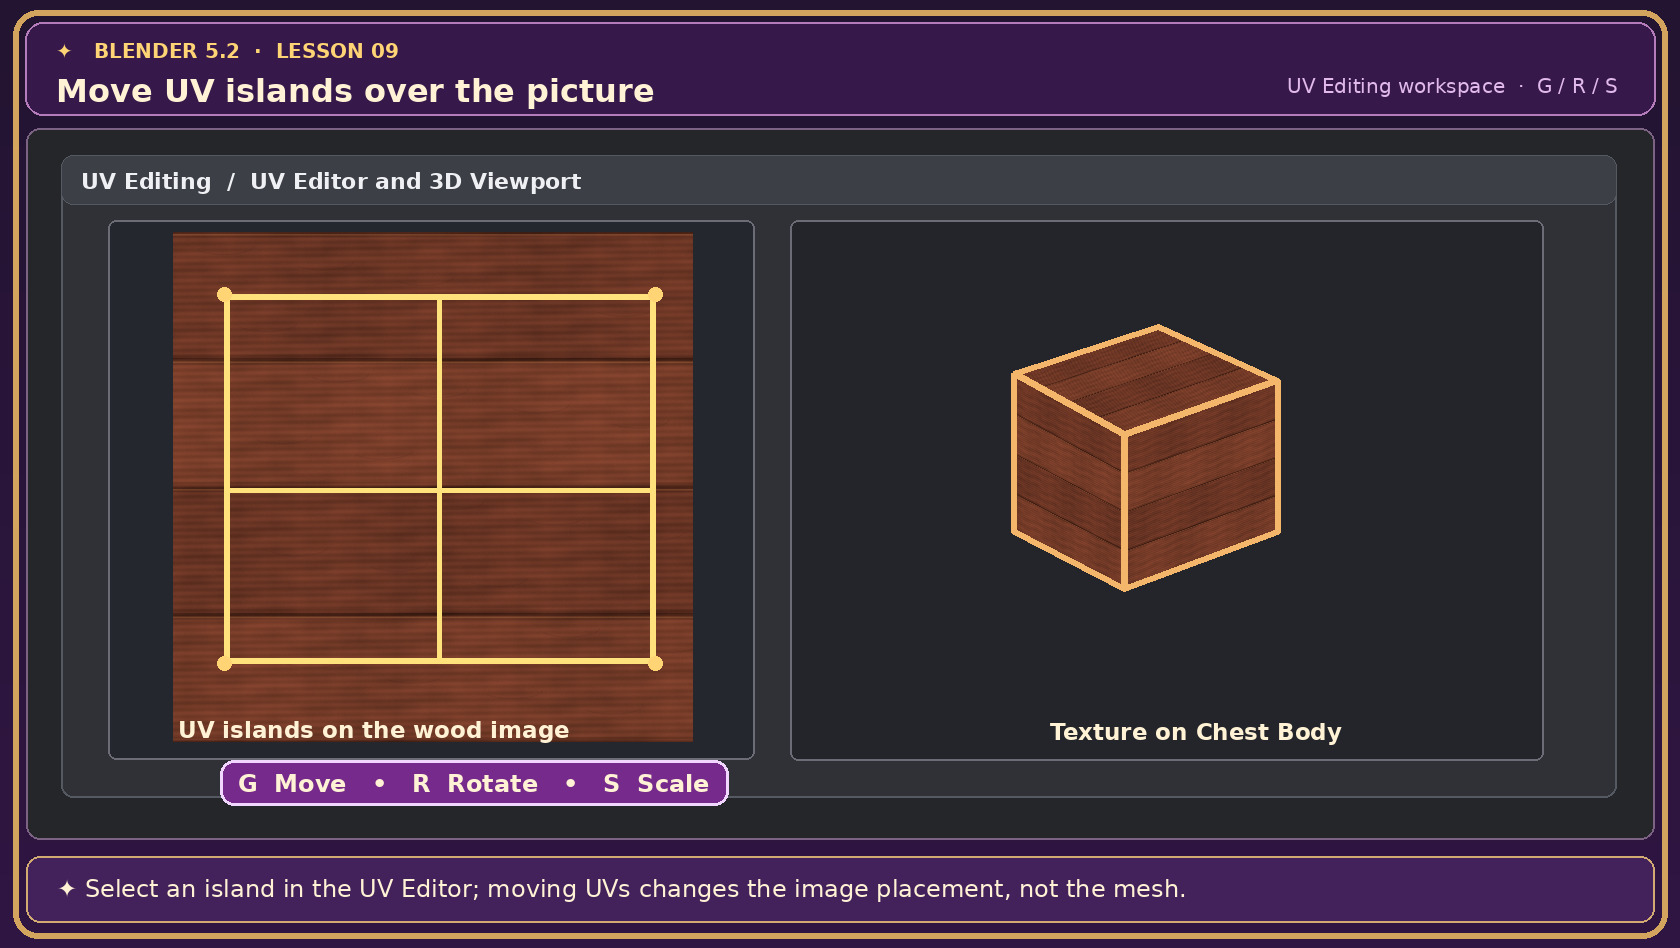
Move the pointer over the UV Editor, then select an island by hovering and pressing L. Use G to move, R to rotate, and S to scale its UVs.
Try R90Enter to turn one island if the wood runs the wrong way. Keep checking the 3D Viewport in Material Preview.
If you want the image pattern to repeat, keep the Image Texture node's Extension as Repeat and move/scale UV coordinates beyond the 0–1 image square when needed. For a uniquely painted texture atlas, keep islands within their intended areas instead.
UV placement: Use G, R, and S while the mouse is over the UV Editor—not the 3D model.
The picture stays still. Your UV islands move.
The overlaid UV lines in this illustration show the idea. In Blender, the actual UV outlines will match your mesh. Try rotating one island until the plank direction looks natural.
Textures may look stretched if an island is very narrow or oddly proportioned compared with its face. Return to Lesson 08 if you need to unwrap again.
05
ONE TREASURE, THREE FINISHES
Hands-On Project · Texture Your Enchanted Chest
Now we'll combine the technique with the two-part chest from Lesson 08. Our learning model is intentionally simple; the richly curved chest in the banner is an illustration of what you could create later.
✧
What you'll finish
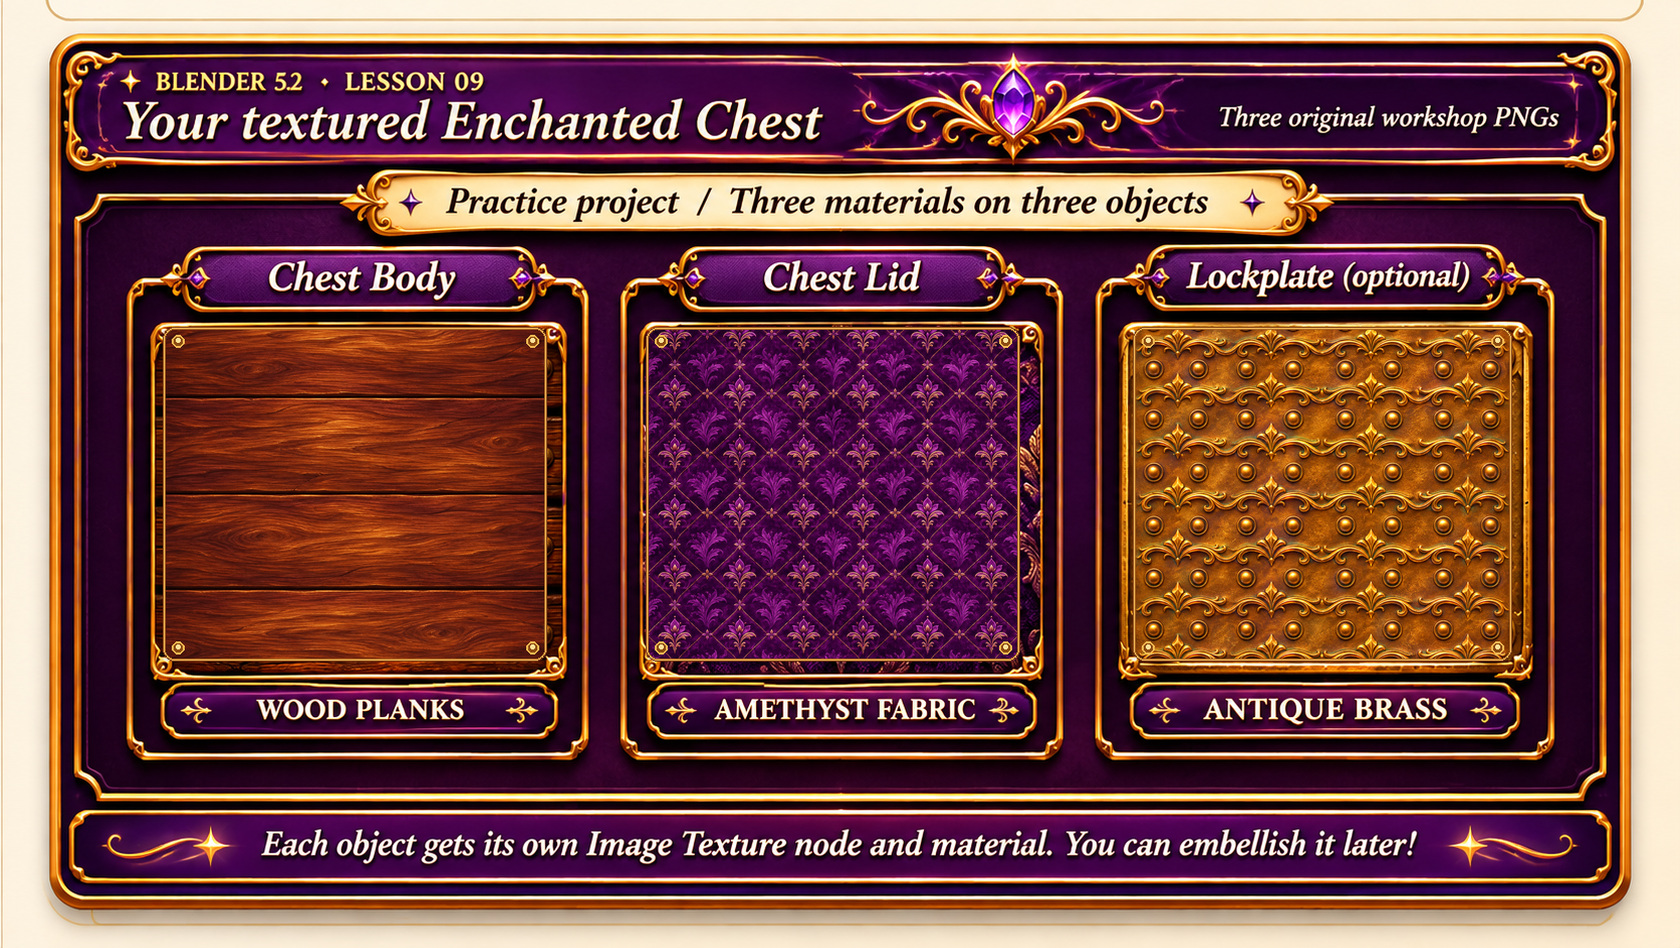
A wooden chest body, a purple patterned lid, and an optional brass lock plate. Each object has its own material and texture image.
Your materials: These are the three included textures you’ll apply to separate objects.
Open the project. Choose File → Open and load Enchanted Chest UV Practice.blend from Lesson 08. If you created only the body earlier, add a second cube with Shift+A → Mesh → Cube, rename it Chest Lid, scale it SX1.55Enter, SY0.95Enter, SZ0.18Enter, move it with GZ0.78Enter, and apply scale via Ctrl+A → Scale.
Wood body. Select Chest Body. Use the Chest Wood material from Step 03 (or make it now) and connect lesson09-wood-planks-v192.png via Image Texture → Base Color.
Purple lid. Select Chest Lid in Object Mode. In the Shading workspace create a new material for this object named Amethyst Lid. Add an Image Texture node, open lesson09-amethyst-fabric-v192.png, and connect its Color output to Principled BSDF → Base Color. Set Metallic to 0.0 and Roughness to around 0.45 for a fabric-like finish.
Optional brass plate. In Object Mode add Shift+A → Mesh → Cube and rename it Gold Lockplate. With the chest still centered at the origin, scale it approximately SX0.16Enter, SY0.04Enter, SZ0.21Enter. Move it to the front with GY-0.93Enter, then slightly up with GZ0.1Enter. You can adjust its placement by eye. Apply the scale.
Give the plate a finish. Create a new material named Antique Brass, connect lesson09-antique-brass-v192.png to Base Color, and set Metallic to about 1.0 and Roughness to around 0.28. Leave the cube's initial UVs for this tiny detail or unwrap it again if its pattern is distorted.
Inspect your treasure. Return to Material Preview, orbit the view, and check that the wood, purple pattern, and brass detail appear on the correct objects. Use the UV Editor to correct any image direction or stretching.
Note on the front of the chest: Blender's front view looks toward the origin along the Y axis, so the practice plate is placed toward negative Y. If your model was moved or rotated since Lesson 08, adjust the position to suit your scene.
BodyWood image
LidAmethyst image
LockBrass image · optional
06
DON'T LOSE THE TEXTURE MAGIC
Pack Your Images and Save
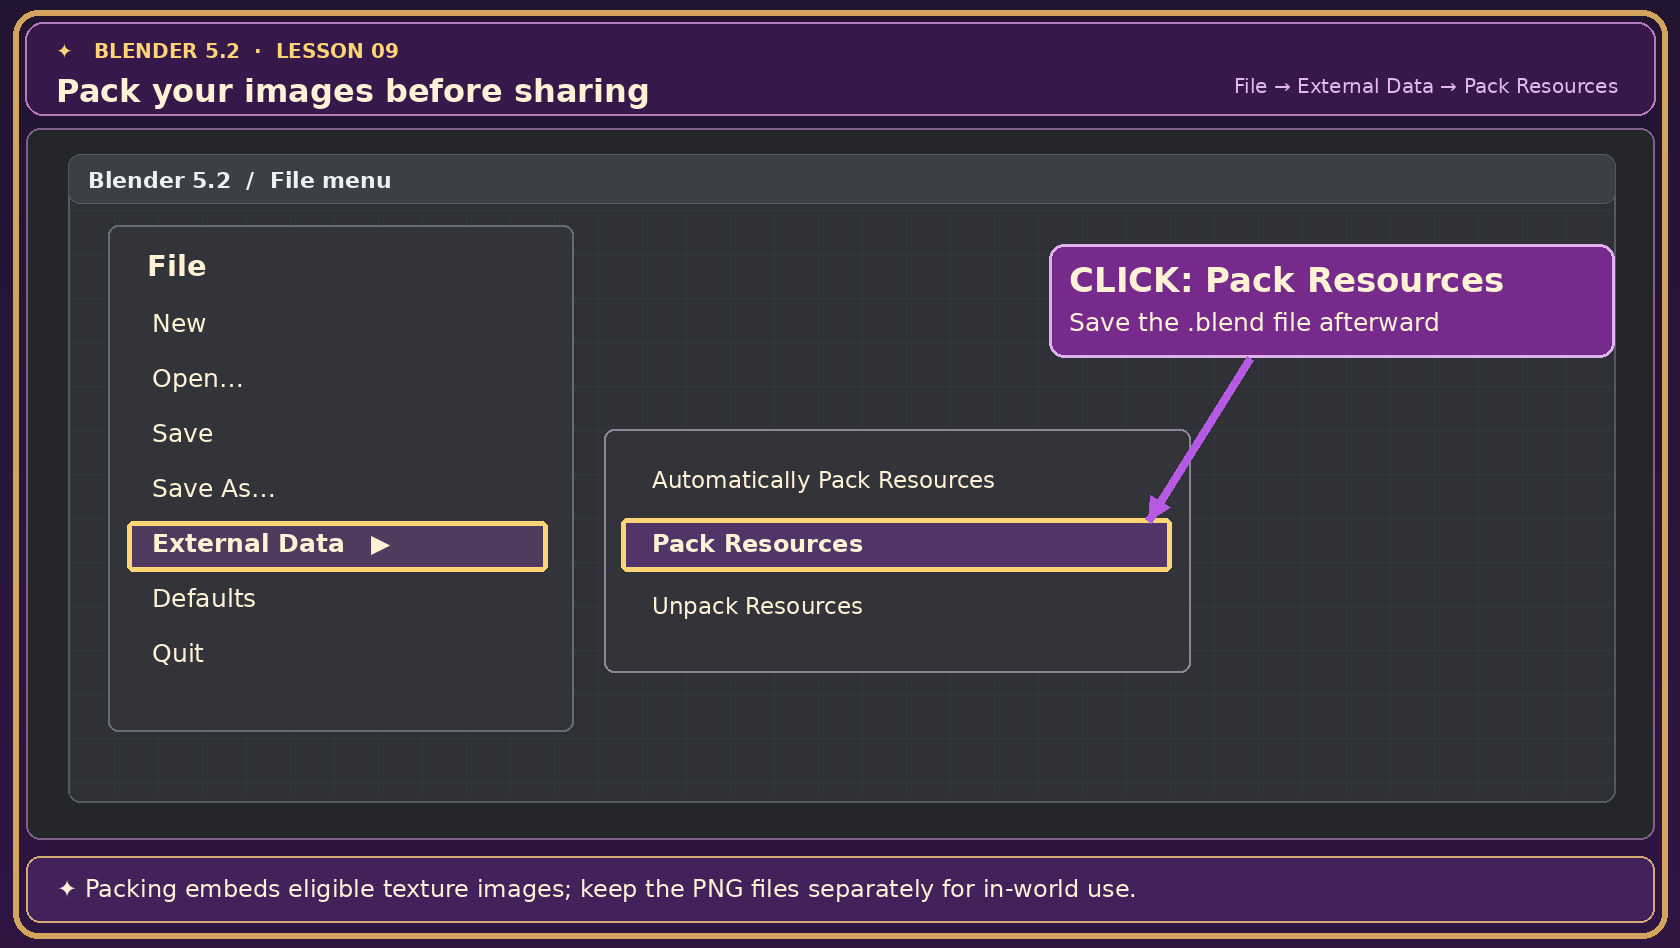
By default, Blender can refer to texture images on your computer. If you move the project or share it, those paths may break. Packing embeds eligible image files into your .blend project.
Make sure every Image Texture node is pointing to a file that really exists.
From Blender's top menu choose File → External Data → Pack Resources.
Choose File → Save As and name the project Enchanted Chest Textured.blend.
Reopen the saved file once to confirm that the wood, amethyst and brass images still show up.
Save safely: Choose File → External Data → Pack Resources, then save the .blend file.
Virtual-world maker tip: Blender material nodes do not automatically become identical in-world materials when exporting a mesh for OpenSim or Second Life. Keep copies of the PNGs so you can upload and assign textures in-world. We'll cover that process in a dedicated workflow lesson.
07
IF YOUR SPELL DOESN'T WORK THE FIRST TIME
Quick Fixes & Helpful Reminders
My chest is still gray.
Switch the viewport from Solid to Material Preview. Check that the correct material is assigned to the selected object.
My texture is pink or missing.
Blender may have lost the original image file. In the Image Texture node click Open and choose the PNG again, then pack the file.
I see a color but no wood grain.
Make sure the Image Texture node's Color output is connected to the Base Color input of Principled BSDF.
Everything looks stretched or sideways.
Inspect the UV islands in the UV Editor. Rotate, resize, or unwrap them as needed. Revisit Lesson 08.
The pattern is too big or tiny.
Scale the UV islands in the UV Editor; for repeating textures, the Repeat setting allows sampling beyond the 0–1 square.
My gold doesn't look shiny.
Check Metallic and Roughness on the brass material and view it under suitable lighting. The brass PNG provides color; shininess comes from the material settings.
Your texture checklist
Chest Body displays wooden boards.
Chest Lid displays purple patterned fabric.
UV islands match the intended image direction.
Optional brass detail has its own material.
All image files have been packed into the saved .blend file.