Move
Grab the selected object and place it elsewhere.


✦ BLENDER BASICS · LESSON 03 · BLENDER 5.2 LTS ✦
Three little shortcuts, a whole lot of creative possibilities! Learn to place, turn, and resize your creations with confidence.
WHAT YOU'LL LEARN
YOU ONLY NEED
Start from a fresh General file in Object Mode. No add-ons or downloads are required.
START HERE
Open Blender 5.2 and choose File → New → General. Select the default cube. Stay in Object Mode for this lesson, and keep your mouse pointer over the 3D Viewport when pressing shortcuts.
In Lesson 02, we learned how whole objects differ from their editable meshes. This time, we’re going to master the three transformations you will use constantly!
A little note: This lesson assumes Blender’s default keymap. LMB means left mouse button. The X, Y, and Z keys below refer to the letter keys on your keyboard.
QUICK REFERENCE
Grab the selected object and place it elsewhere.
Turn the selected object to a new angle.
Grow, shrink, stretch, or flatten.
Lock movement, rotation, or scale to X.
Lock the transform to Y.
Lock the transform to Z (up and down for movement).
Press the shortcuts one after another, not simultaneously. Finish with Enter. The visual examples below are annotated Blender-style illustrations, so some icons and spacing may differ from your screen.
THREE ESSENTIAL SPELLS
A transform changes where something is, which way it faces, or how big it is. These three shortcuts work on a whole selected object in Object Mode. In Edit Mode, the same shortcuts affect the selected mesh elements instead.
Change an object’s location in your scene.
Change which direction an object faces.
Change an object’s size or proportions.
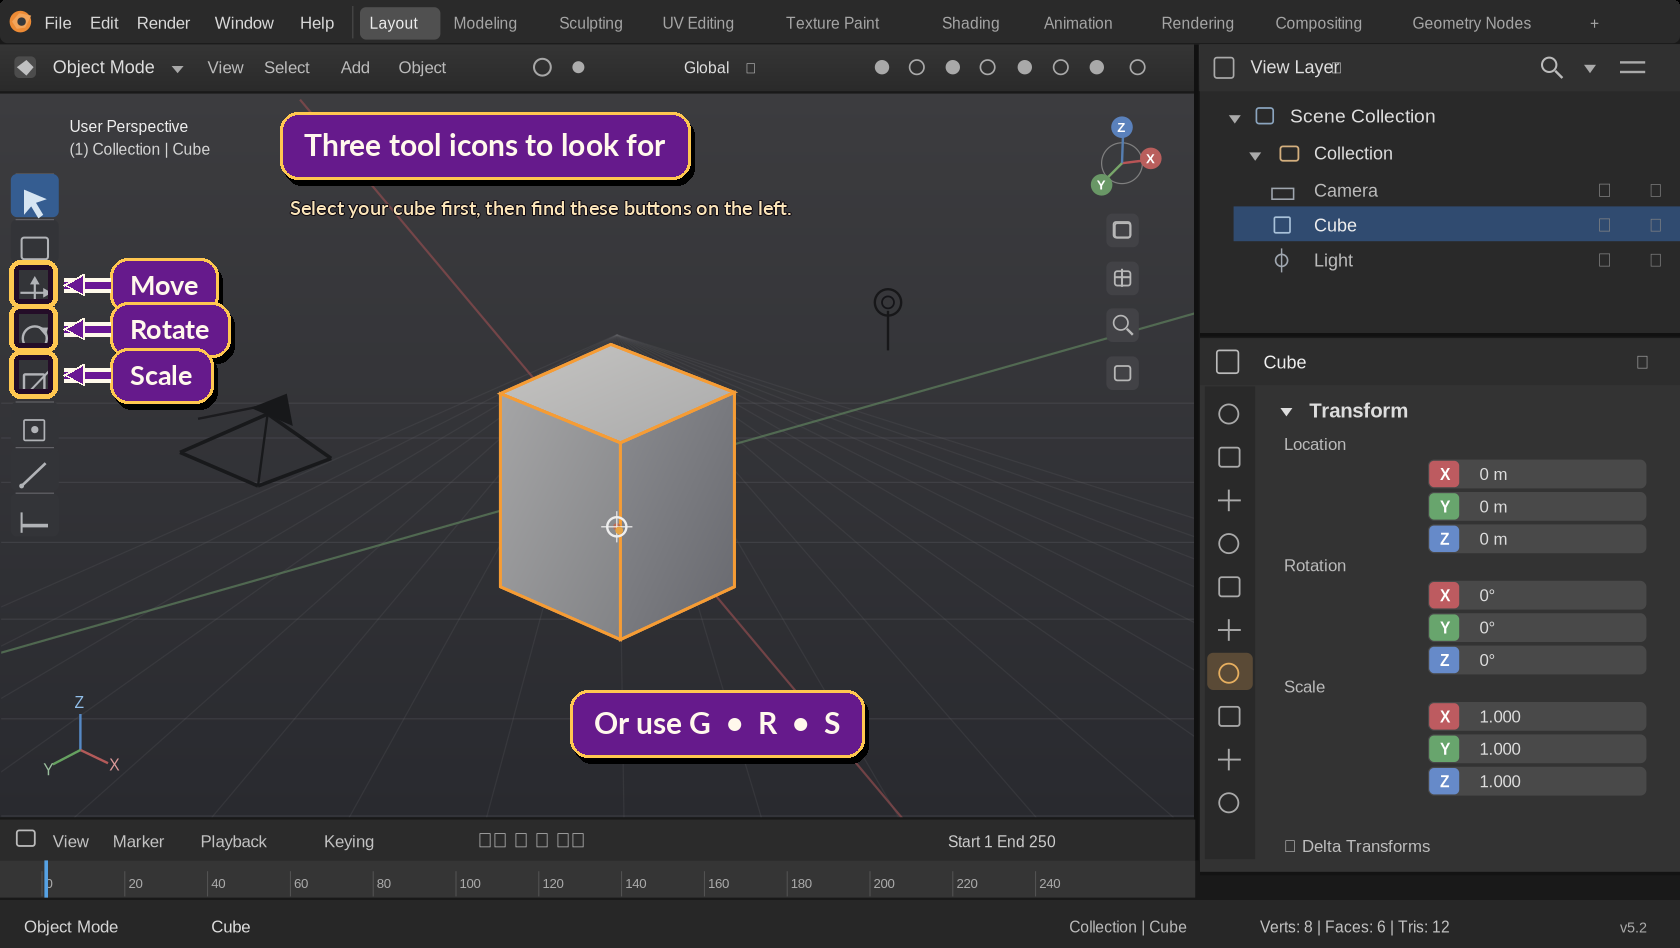
These are simplified teaching illustrations, not screenshots of the Blender interface.
PLACE IT WHERE YOU WANT IT
Moving changes the cube’s location without changing its shape. Select your cube, then try these steps.
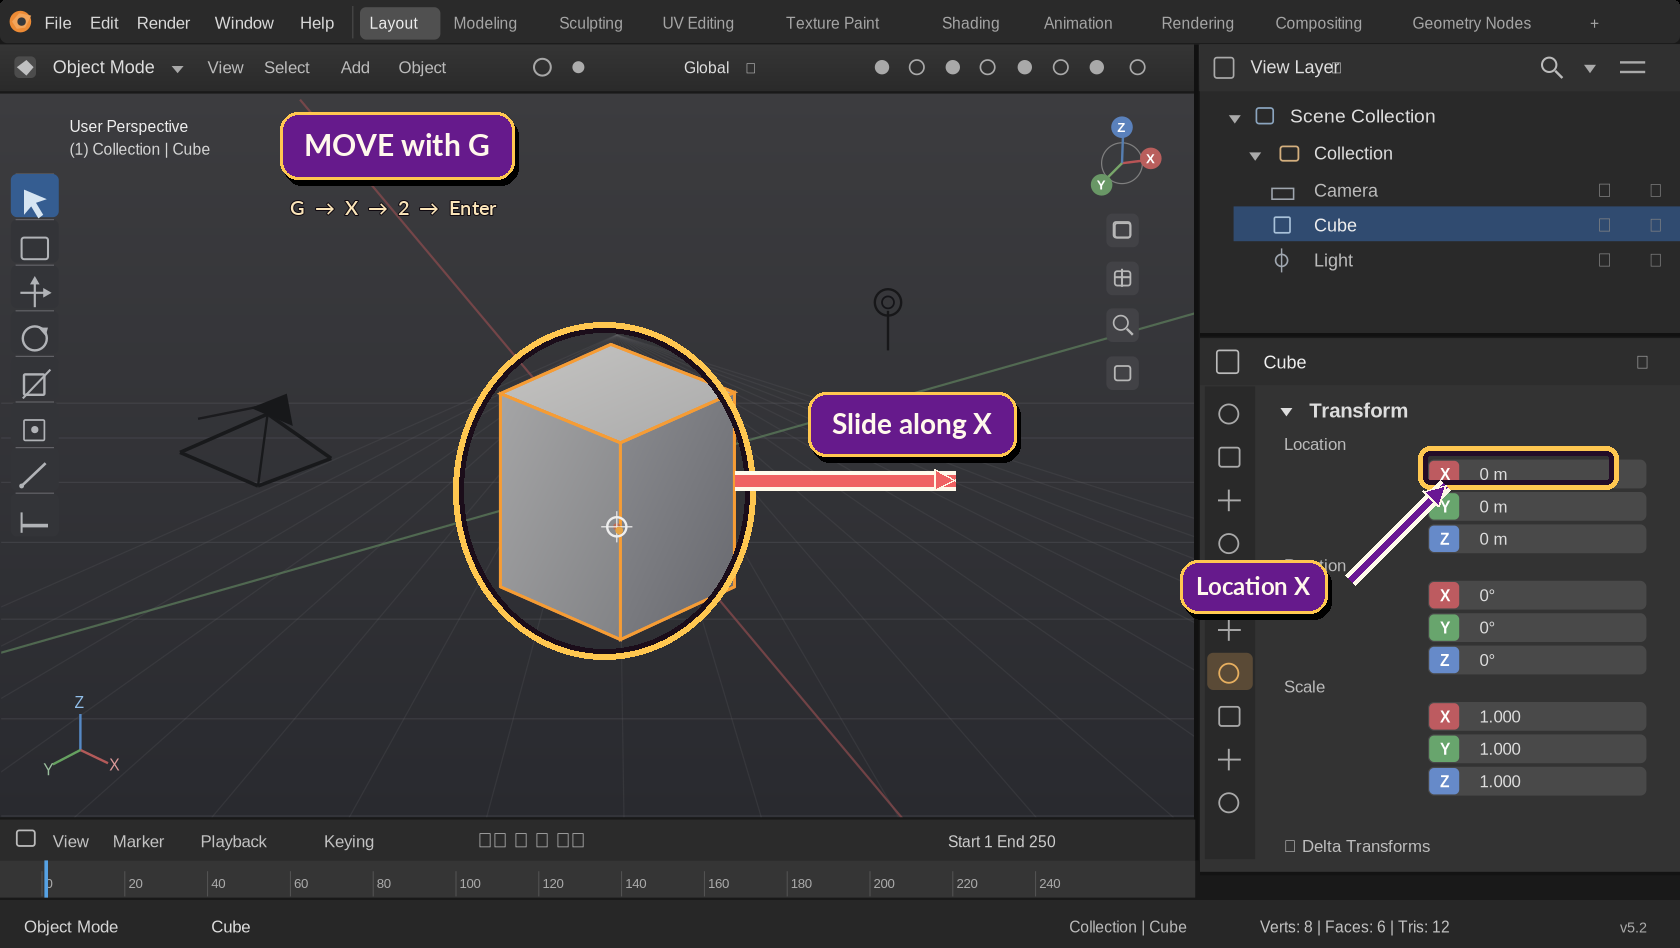
X is red, Y is green, and Z is blue in Blender’s usual axis display. Think of Z as up and down.
G Z 1 Enter = move up one unit.
GIVE IT A LITTLE TWIST
Rotation turns your selected cube. You can turn it freely with your mouse, or choose an axis and type an exact angle.
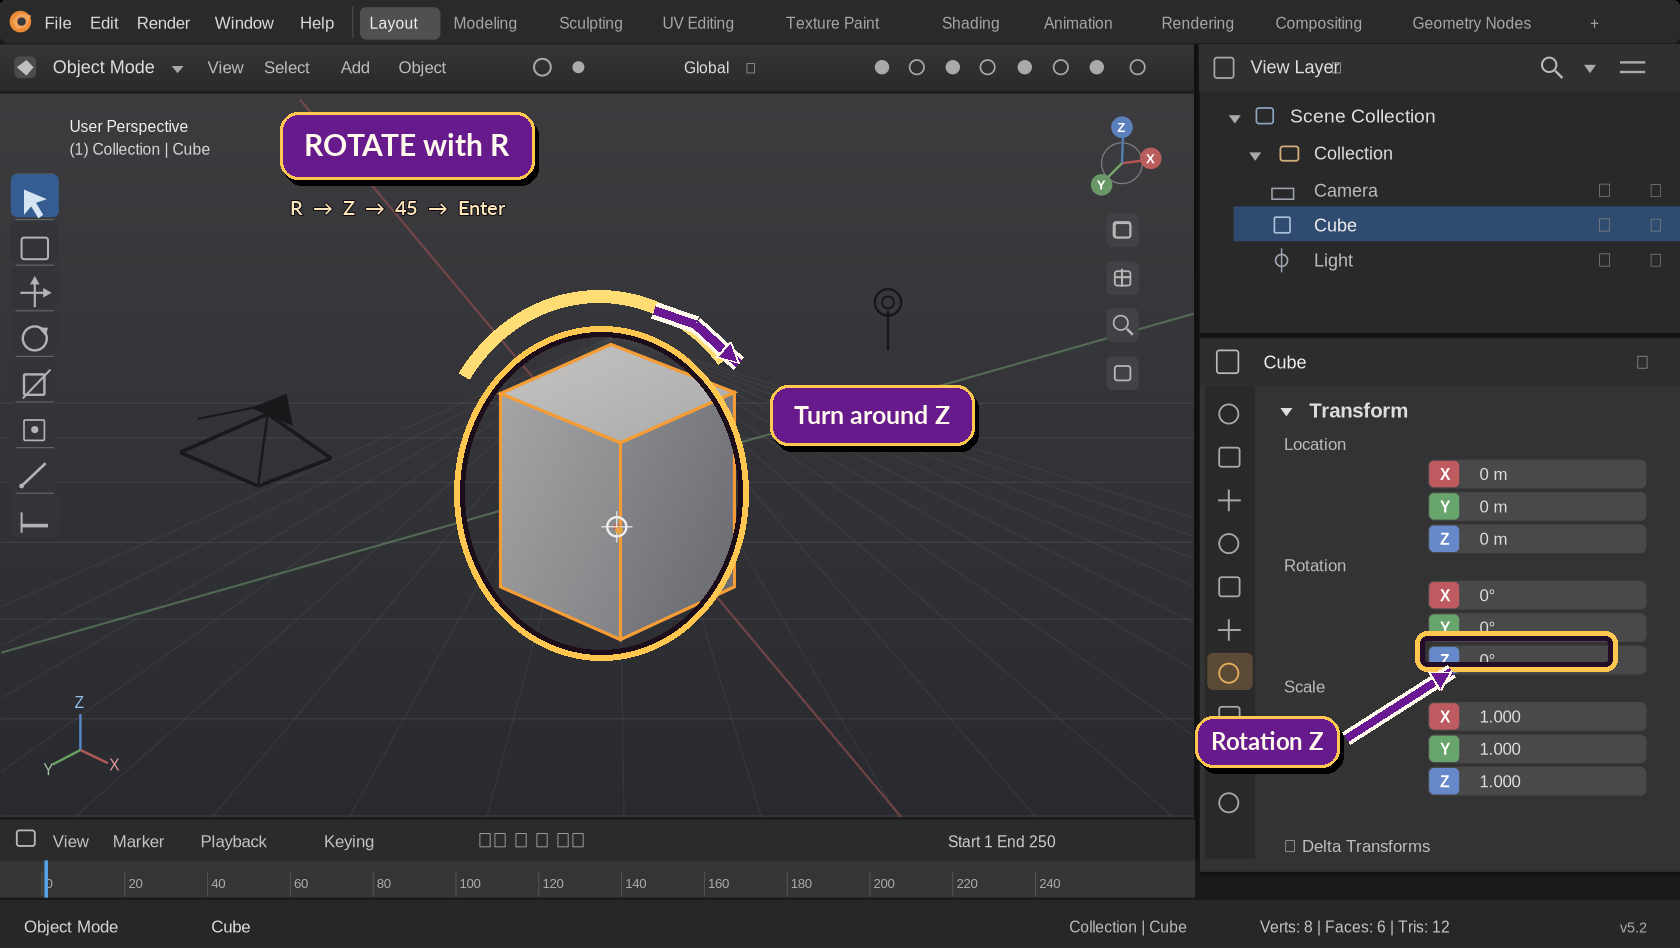
Rotate around Z to turn something like a compass needle on a table. Rotate around X or Y to tip it in another direction. Blender uses degrees when you type an angle.
MAKE IT BIGGER OR SMALLER
Scaling changes an object's size. Without an axis lock, Blender scales all three dimensions together. With an axis lock, you can stretch or flatten just one direction.
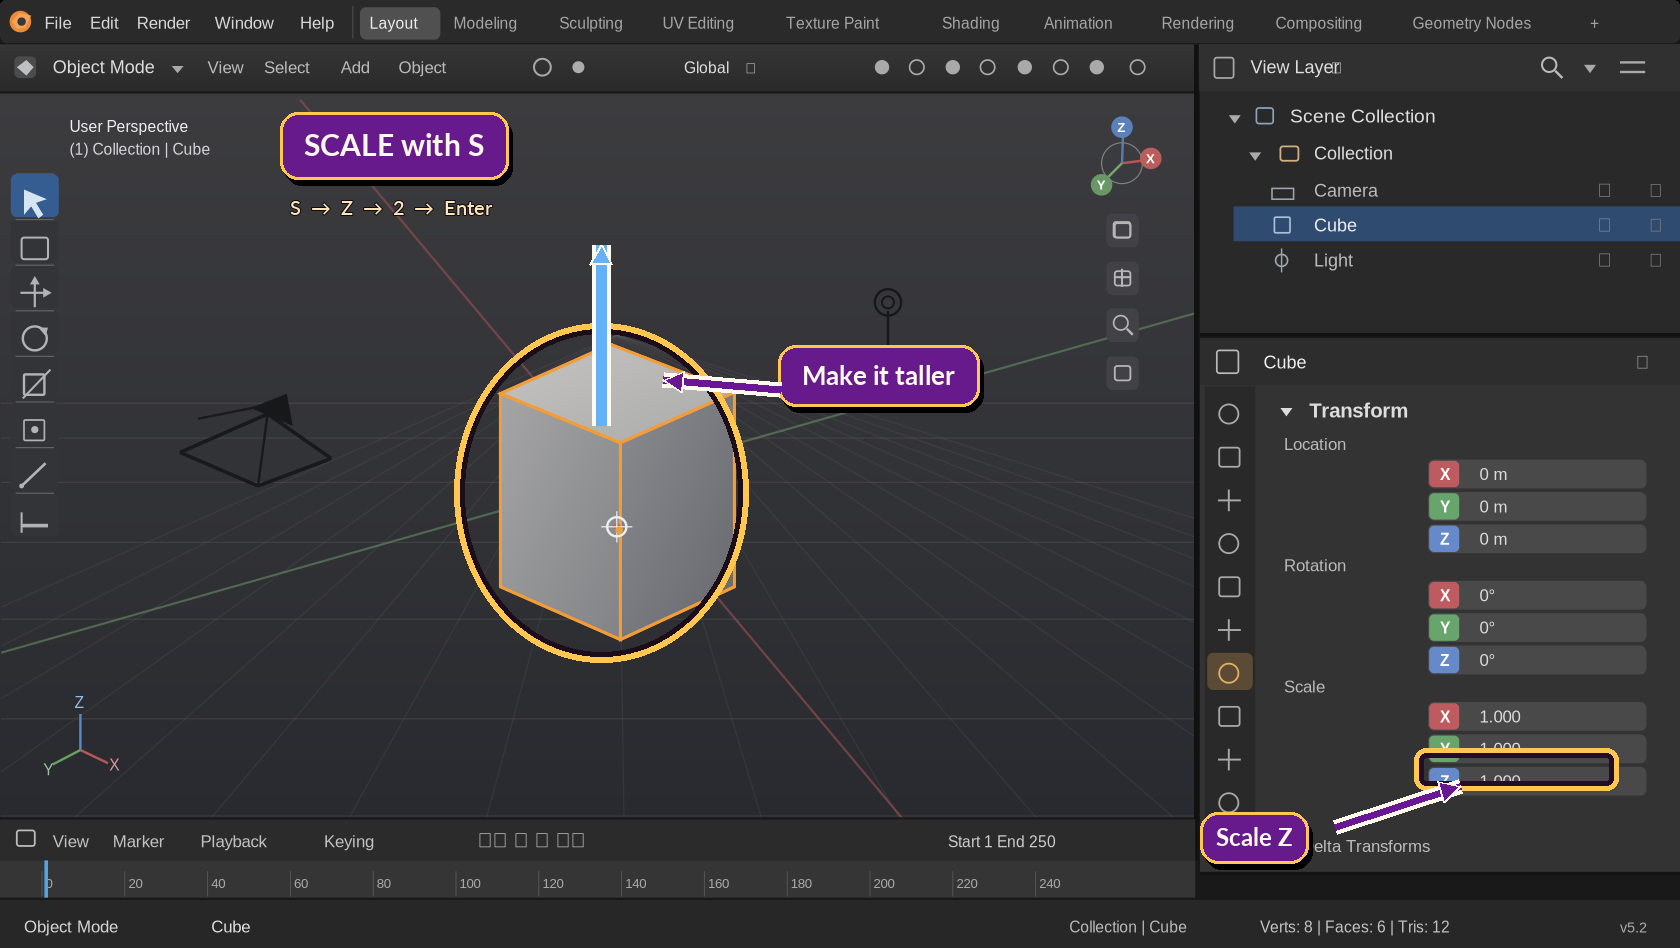
Press S, type 2, then Enter. The cube becomes twice as large in each dimension. Press Ctrl + Z to undo.
Press S, then Z, type 2, and press Enter. The cube is twice as tall, but its width and depth stay the same. Undo when you're ready.
Press S, type 0.5, then Enter to make all dimensions half as large. Type the decimal point using the period key.
NO GUESSWORK NEEDED
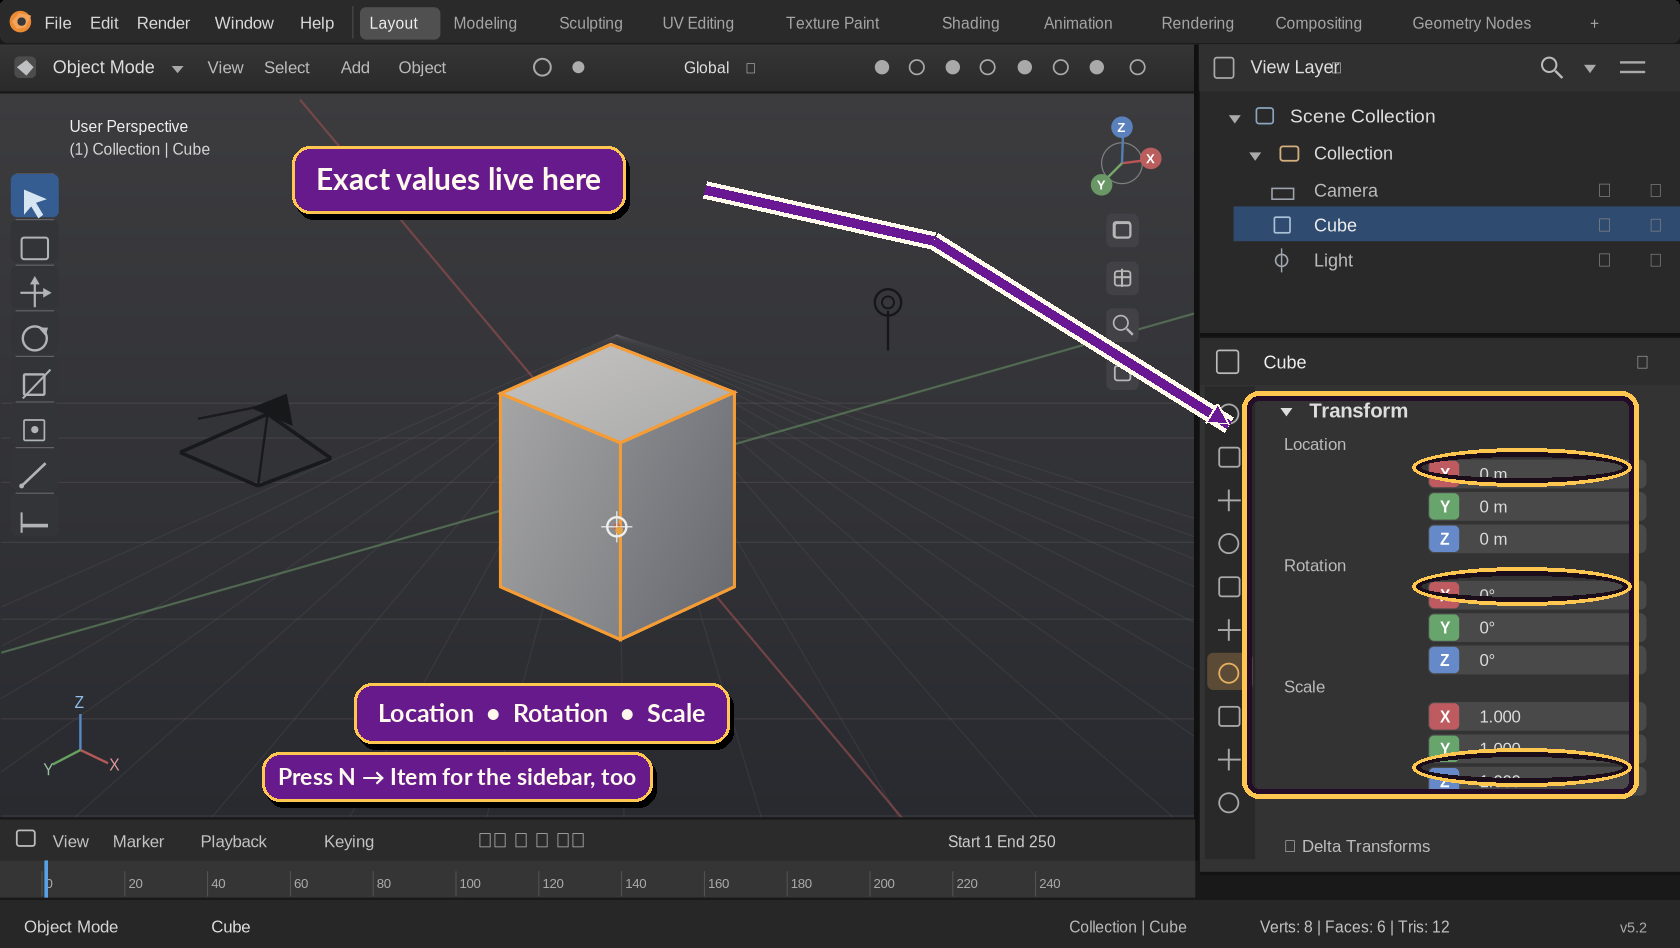
Mouse movements are great for experimenting. For neat models, numbers give you control.
For these sequences, press the keys one after another, not all at once, and finish with Enter. Use a minus sign to move or rotate in the opposite direction.
Press N while your cursor is over the 3D Viewport to open the Sidebar. In the Item tab you can see and edit Location, Rotation, and Scale. Press N again to hide it.
A LITTLE HANDS-ON MAGIC
Let’s put all three shortcuts together! We’ll make a simple arch from cubes and add a floating diamond ornament. No fancy modeling tools required—just G, R, and S.
Two pillars + one beam + a rotated crystal = your very own magical gateway.
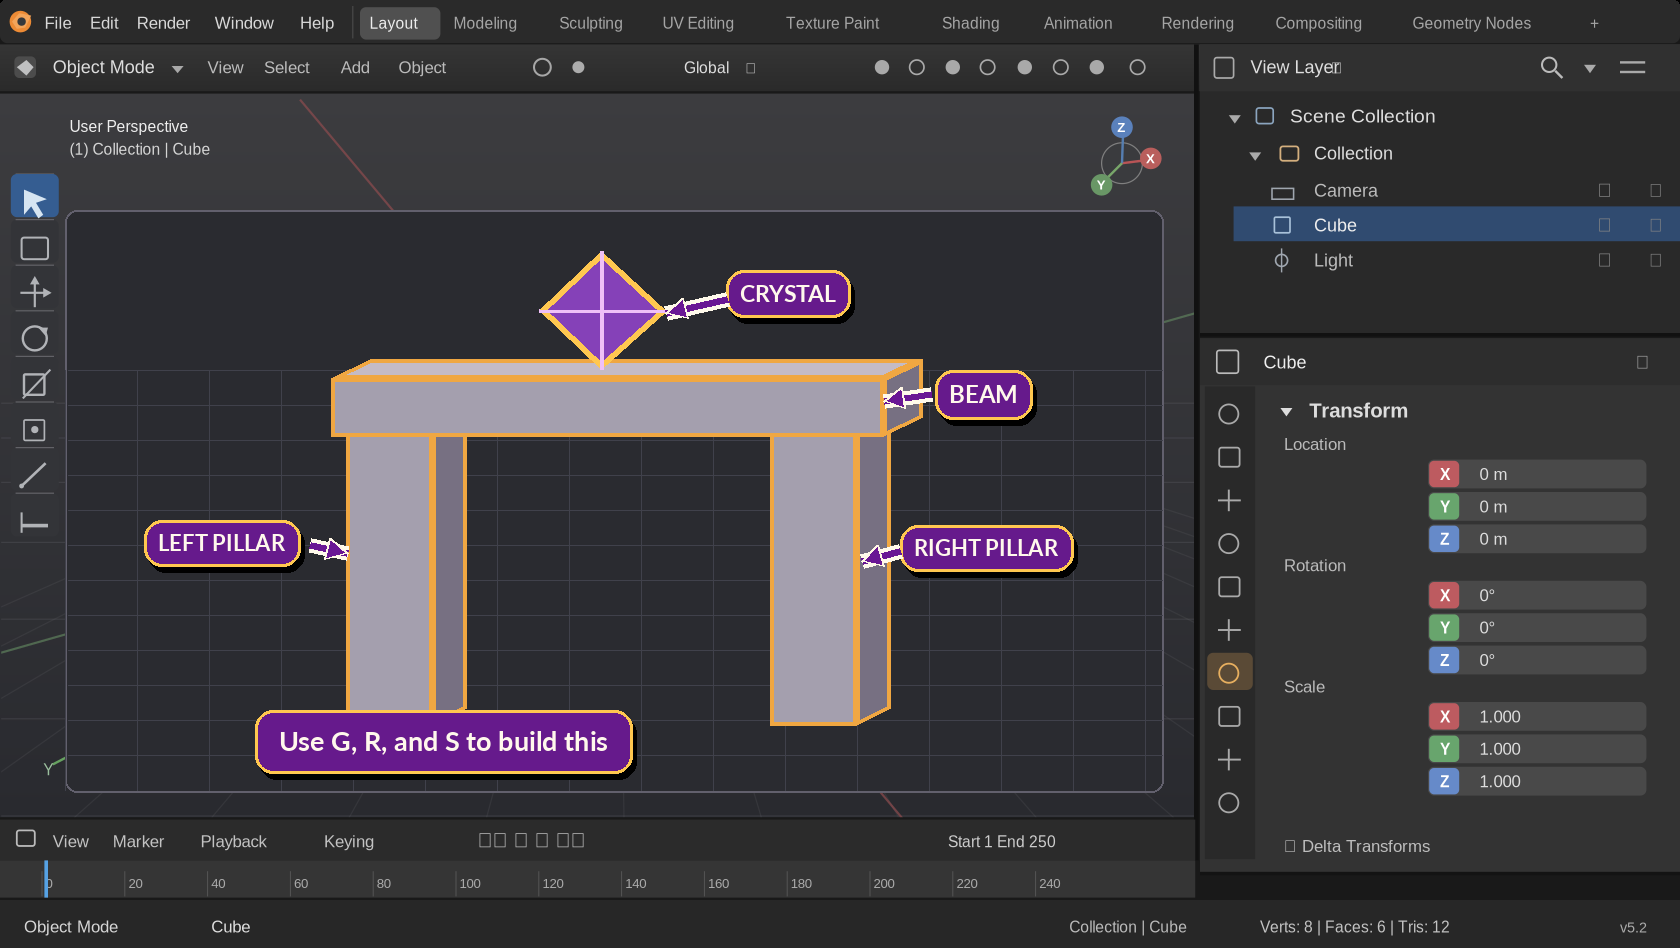
You can move objects exactly where you want them, rotate them to an angle, and resize them to fit your design. You're ready for more enchanted building.
Check what is selected: press Alt + A to deselect, then click just the object you want. The shortcut acts on your current selection.
Press Esc before confirming to cancel. If you've already confirmed, use Ctrl + Z to undo.
Use the letter-row numbers for values. Your numpad has separate 3D Viewport controls (for example, Numpad 1 changes the view).
Object Mode tracks transformations separately from the mesh. Later, learn when to Apply Rotation or Scale before using certain modifiers or exporting.