Ornate The Enchanted Workshop Lesson 03 header reading Move, Rotate & Scale with gold filigree, amethyst gems, Blender book, lantern, and cube transformation motifs

✦ BLENDER BASICS · LESSON 03 · BLENDER 5.2 LTS ✦

Move, Rotate & Scale

Three little shortcuts, a whole lot of creative possibilities! Learn to place, turn, and resize your creations with confidence.

For absolute beginnersAbout 25 minutesBlender 5.2

WHAT YOU'LL LEARN

Three everyday modeling spells

  • Move a cube with G
  • Rotate it using R
  • Make it taller or smaller using S
  • Lock a transform to the X, Y, or Z axis
  • Type exact values and build a magical arch

YOU ONLY NEED

Blender 5.2 & a cube

Start from a fresh General file in Object Mode. No add-ons or downloads are required.

START HERE

Before we begin

Open Blender 5.2 and choose File → New → General. Select the default cube. Stay in Object Mode for this lesson, and keep your mouse pointer over the 3D Viewport when pressing shortcuts.

In Lesson 02, we learned how whole objects differ from their editable meshes. This time, we’re going to master the three transformations you will use constantly!

A little note: This lesson assumes Blender’s default keymap. LMB means left mouse button. The X, Y, and Z keys below refer to the letter keys on your keyboard.

QUICK REFERENCE

The transform spellbook

G

Move

Grab the selected object and place it elsewhere.

R

Rotate

Turn the selected object to a new angle.

S

Scale

Grow, shrink, stretch, or flatten.

X

Red axis

Lock movement, rotation, or scale to X.

Y

Green axis

Lock the transform to Y.

Z

Blue axis

Lock the transform to Z (up and down for movement).

Press the shortcuts one after another, not simultaneously. Finish with Enter. The visual examples below are annotated Blender-style illustrations, so some icons and spacing may differ from your screen.

01

THREE ESSENTIAL SPELLS

Meet G, R & S

A transform changes where something is, which way it faces, or how big it is. These three shortcuts work on a whole selected object in Object Mode. In Edit Mode, the same shortcuts affect the selected mesh elements instead.

G Move

Change an object’s location in your scene.

R Rotate

Change which direction an object faces.

S Scale

Change an object’s size or proportions.
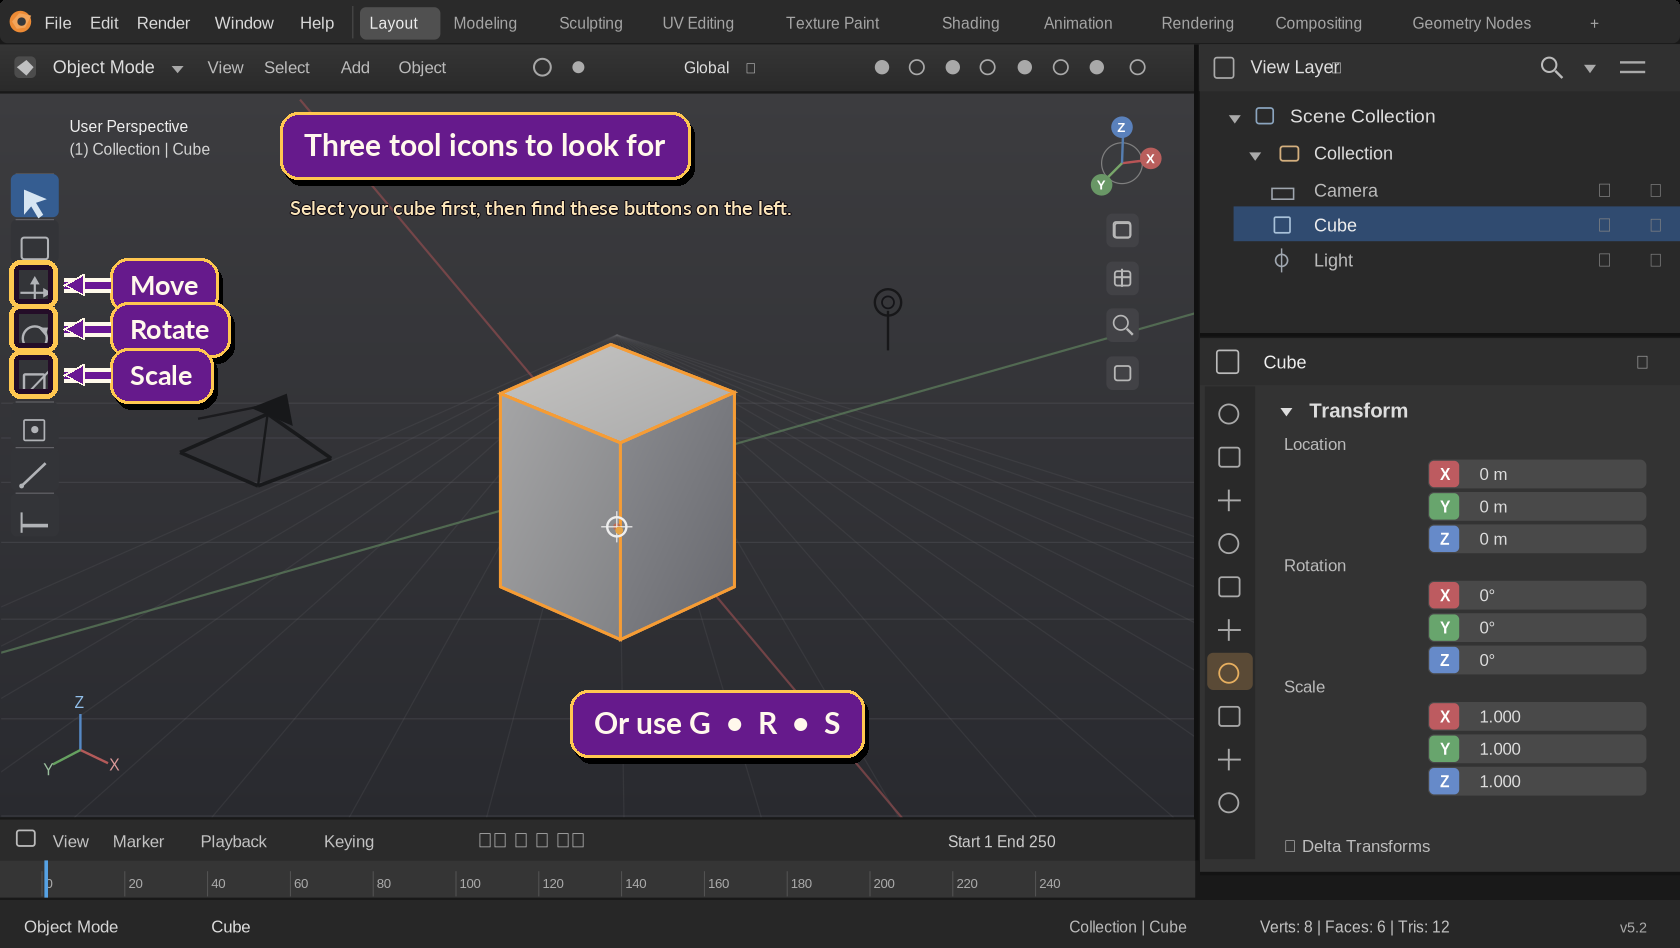
Annotated Blender-like Layout window highlighting the Move, Rotate, and Scale icons in the left toolbar and the matching G, R, and S shortcuts.
Where to click: Look for the transform icons in the left toolbar. You can also press G, R, or S without selecting an icon first.

These are simplified teaching illustrations, not screenshots of the Blender interface.

Your new memory trick: G = Grab/Move, R = Rotate, S = Scale. Press the key once, then move the mouse or type a value. Use Enter or LMB to confirm, and Esc or right-click to cancel.
02

PLACE IT WHERE YOU WANT IT

Move with G

Moving changes the cube’s location without changing its shape. Select your cube, then try these steps.
  1. Hover over the 3D Viewport and press G. Move the mouse gently: the entire cube follows.
  2. Press Esc to cancel that first movement. The cube returns to its starting position.
  3. Now press G, then X, then type 2, then press Enter. You have moved the cube 2 units along X.
  4. Press Ctrl + Z to undo and bring the cube back, ready for the next exercise.
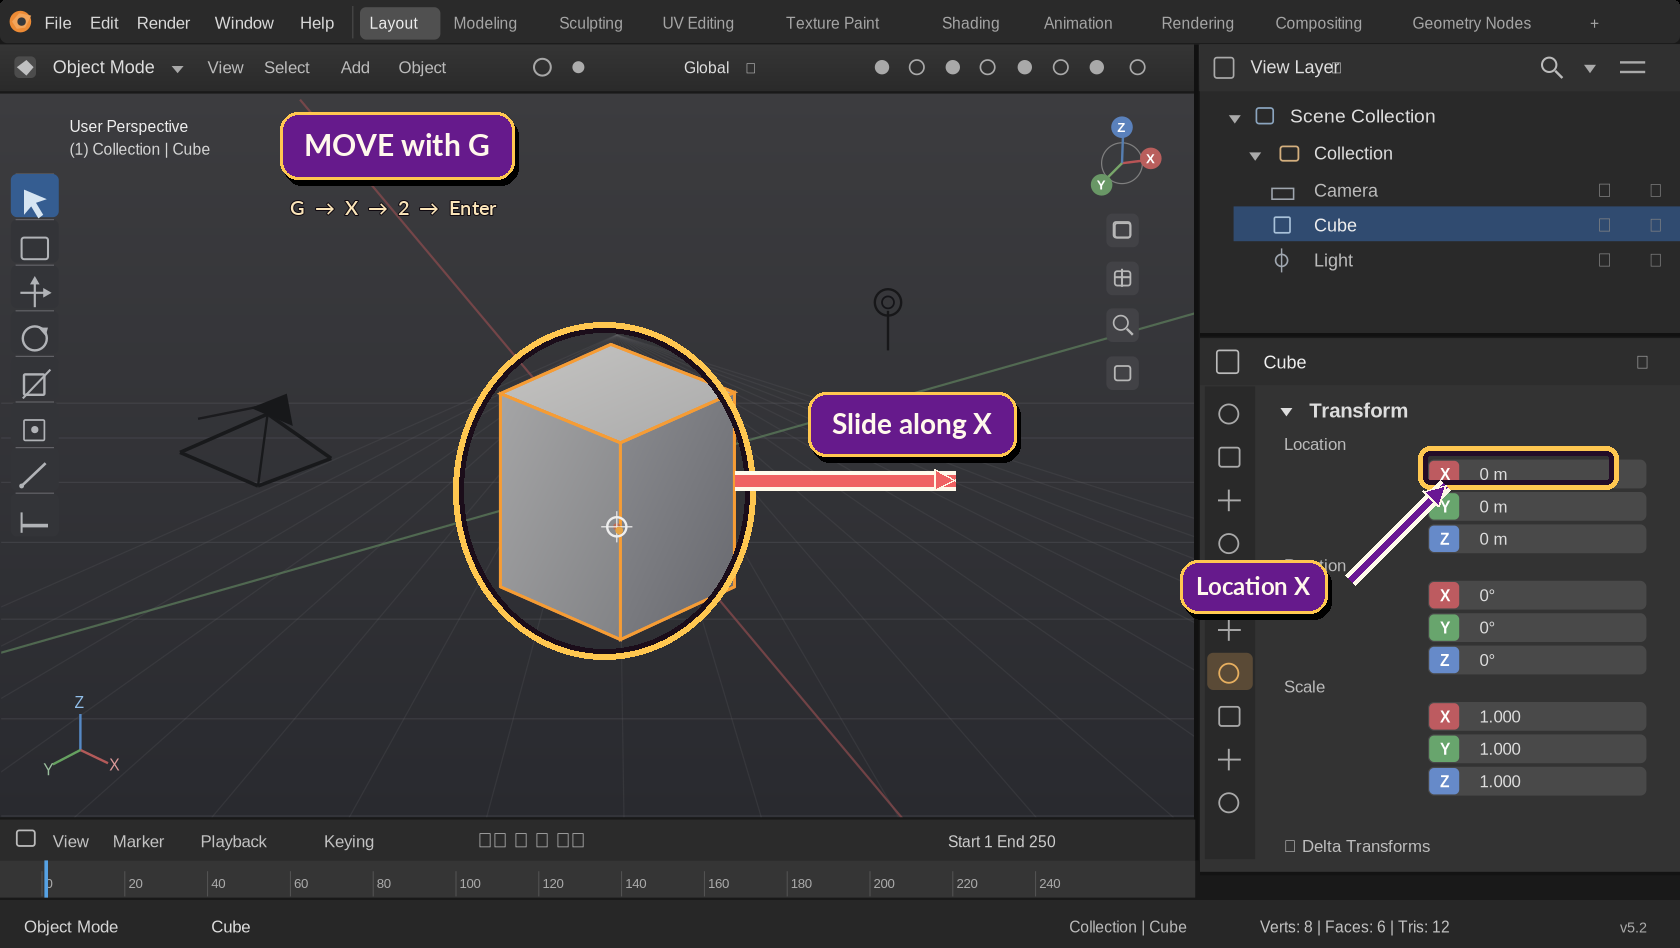
Blender-like viewport with the cube highlighted, a red X movement arrow, the G X 2 Enter shortcut, and the Location X field circled.
Press G, then X, then 2, then Enter. The picture shows where the Location X field is; after the move, that value changes from 0 to 2.

Three directions in Blender

X is red, Y is green, and Z is blue in Blender’s usual axis display. Think of Z as up and down.

G Z 1 Enter = move up one unit.

Remember: The letters X, Y, and Z are axis locks. They keep the motion on one axis. You can also use them after R or S.
03

GIVE IT A LITTLE TWIST

Rotate with R

Rotation turns your selected cube. You can turn it freely with your mouse, or choose an axis and type an exact angle.
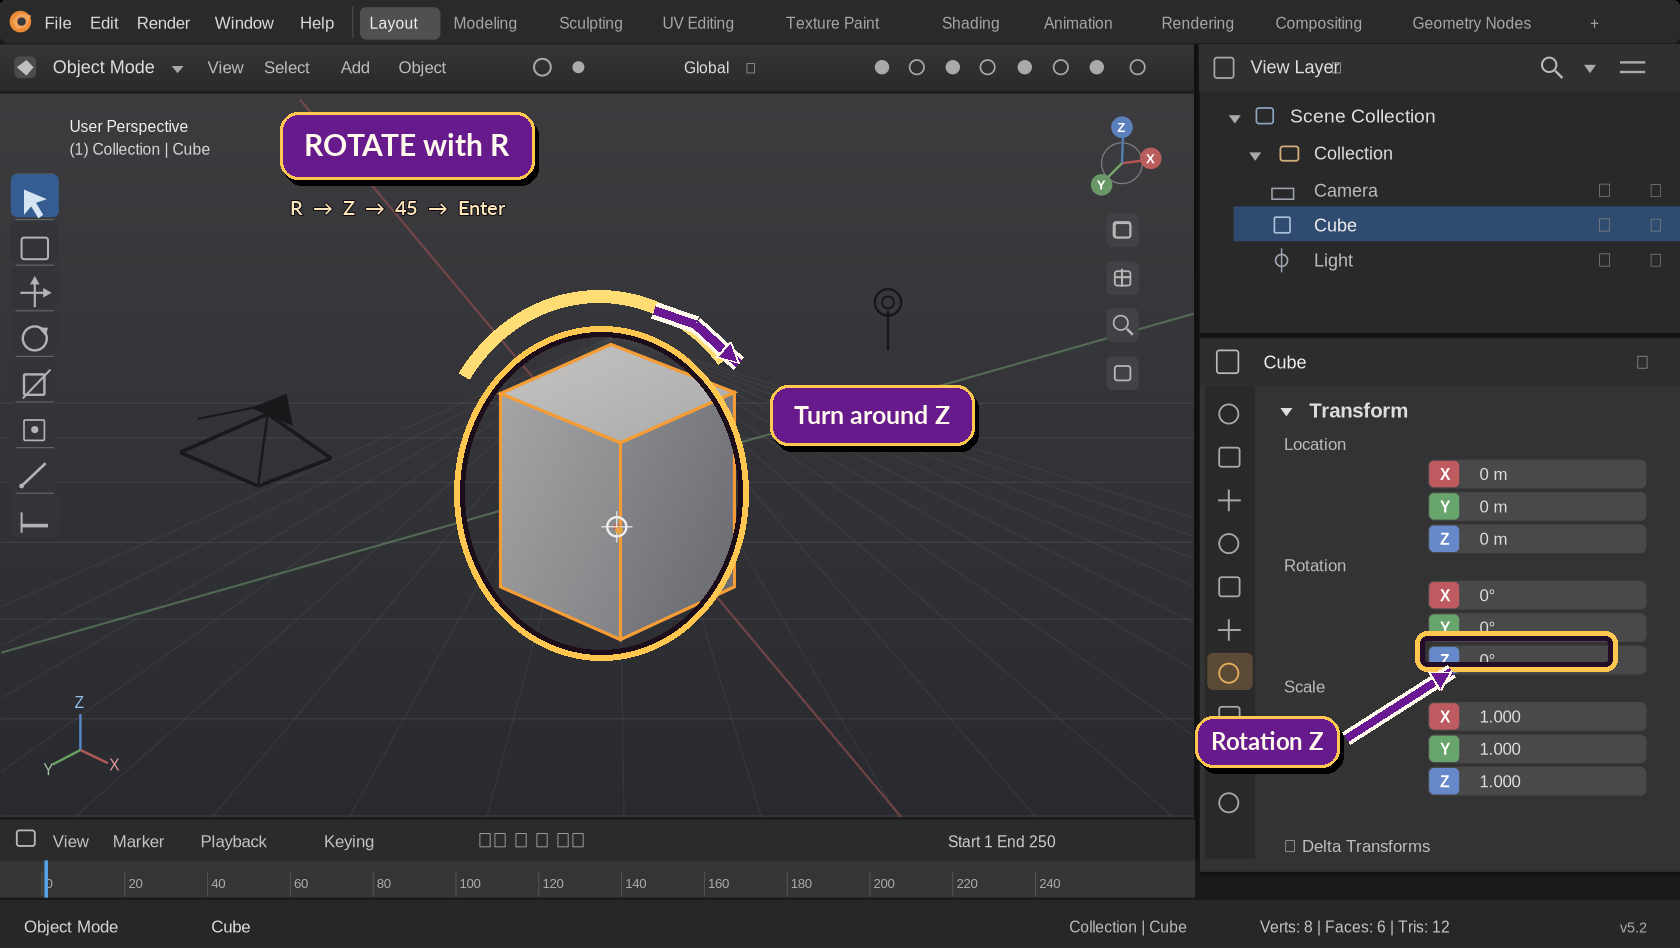
  1. Select the cube and press R. Move the mouse to see it turn, then press Esc to cancel.
  2. Press R, then Z, type 45, and press Enter. Your cube has turned 45 degrees around the vertical Z axis.
  3. Press Ctrl + Z to undo and restore the cube.
Blender-like viewport showing the cube, a rotation arrow, the R Z 90 Enter shortcut, and the Rotation Z field circled.
Press R → Z → 45 → Enter. The highlighted Rotation Z field is where you can check the angle after confirming.
↻

Why does the axis matter?

Rotate around Z to turn something like a compass needle on a table. Rotate around X or Y to tip it in another direction. Blender uses degrees when you type an angle.

Little workshop tip: If the rotation feels strange, try a front view (Numpad 1) or top view (Numpad 7) so you can see the direction more clearly.
04

MAKE IT BIGGER OR SMALLER

Scale with S

Scaling changes an object's size. Without an axis lock, Blender scales all three dimensions together. With an axis lock, you can stretch or flatten just one direction.

↗

Scale evenly

Press S, type 2, then Enter. The cube becomes twice as large in each dimension. Press Ctrl + Z to undo.

↕

Stretch one direction

Press S, then Z, type 2, and press Enter. The cube is twice as tall, but its width and depth stay the same. Undo when you're ready.

↙

Make it smaller

Press S, type 0.5, then Enter to make all dimensions half as large. Type the decimal point using the period key.
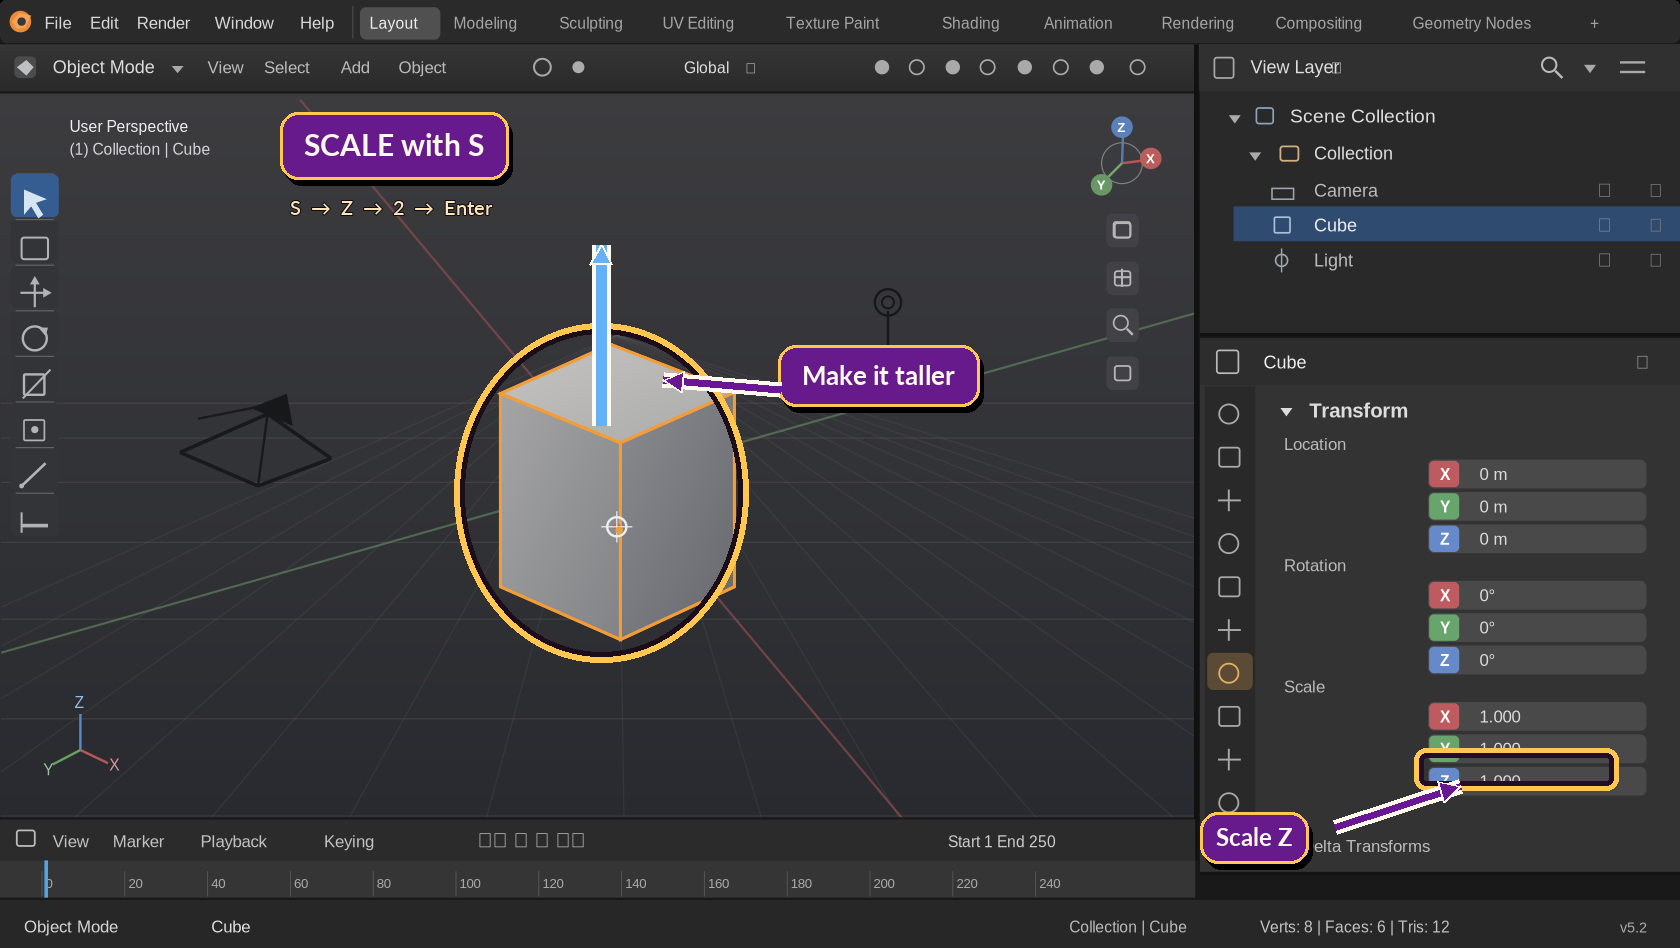
Blender-like viewport showing vertical scaling arrows with the S Z 2 Enter shortcut and the Scale Z field highlighted.
Press S → Z → 2 → Enter to stretch only the vertical direction. The illustrated values show the starting state; Scale Z changes to 2 after the transform.
Helpful for creators: In Object Mode, scaling changes the object's Scale transform values. For mesh exports and some modifiers, you'll eventually want to learn Object → Apply → Scale (Ctrl + A, then choose Scale). Applying Scale keeps the same visible size while making the Scale values 1, 1, 1. We'll cover export preparation later.
05

NO GUESSWORK NEEDED

Work with Exact Values

Mouse movements are great for experimenting. For neat models, numbers give you control.

G X 2Move two units along X
G Z -1Move one unit downward
R Z 90Rotate 90° around Z
S 0.5Scale evenly to half-size
S Z 2Double the size along Z only
Ctrl + ZUndo your last action

For these sequences, press the keys one after another, not all at once, and finish with Enter. Use a minus sign to move or rotate in the opposite direction.

N

See the numbers

Press N while your cursor is over the 3D Viewport to open the Sidebar. In the Item tab you can see and edit Location, Rotation, and Scale. Press N again to hide it.
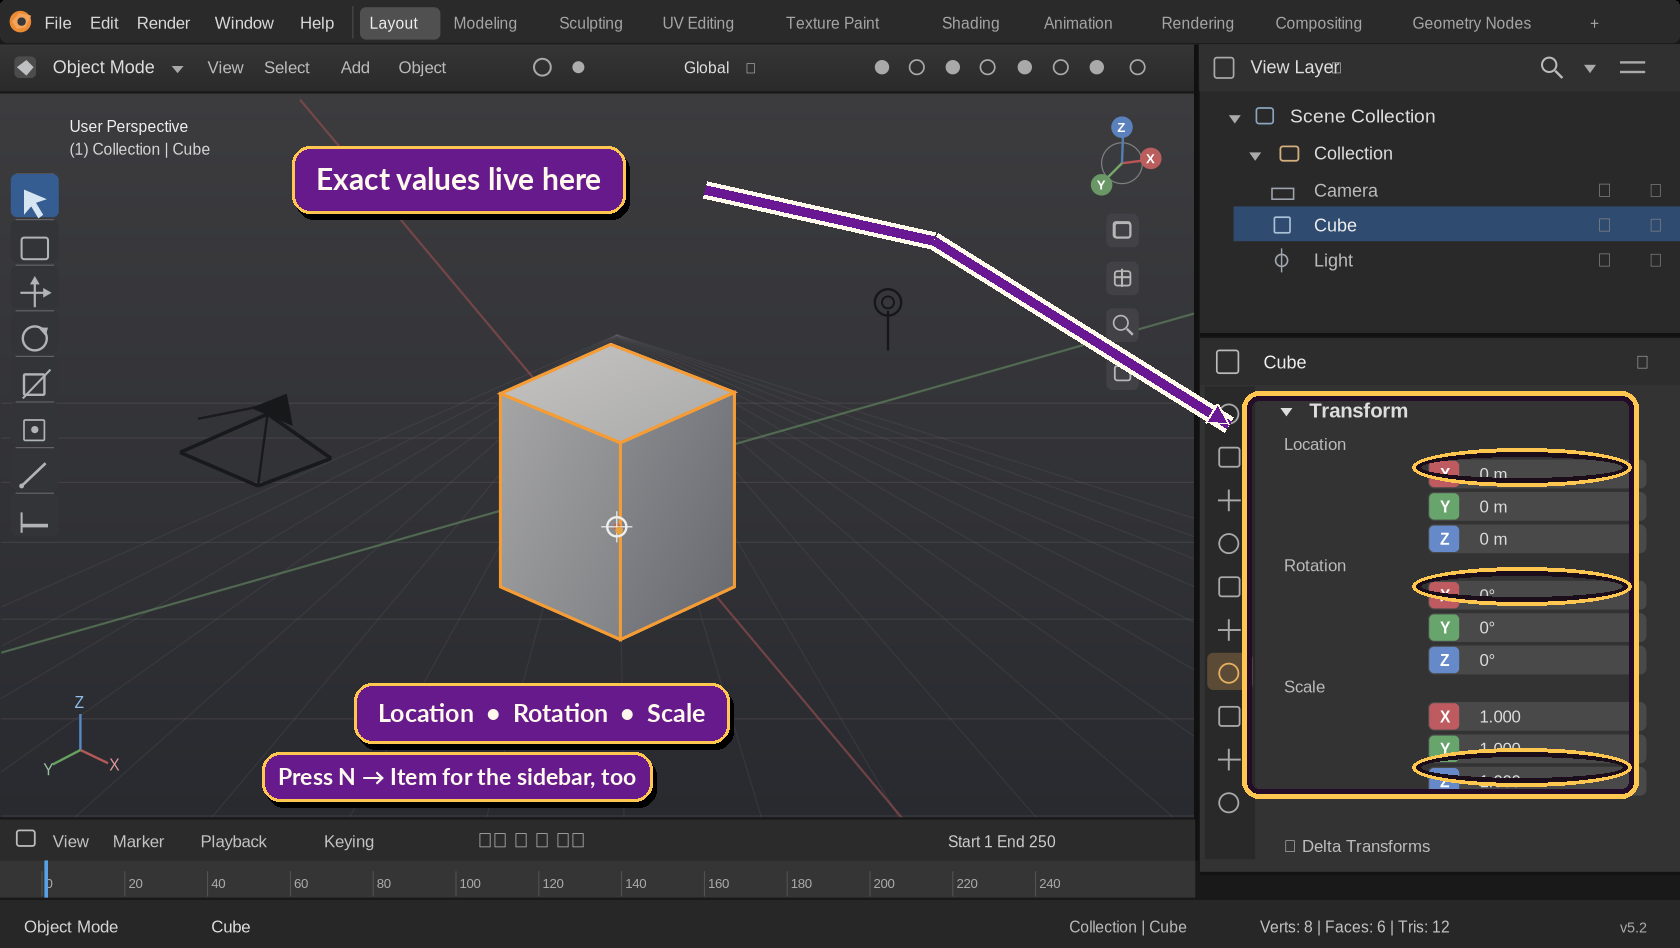
Blender-like window with Location Rotation and Scale values highlighted in the Properties Transform panel.
These fields show your object’s precise Location, Rotation, and Scale in the Properties editor. You can also press N over the 3D Viewport, then open the Item tab.
06

A LITTLE HANDS-ON MAGIC

Build an Enchanted Arch

Let’s put all three shortcuts together! We’ll make a simple arch from cubes and add a floating diamond ornament. No fancy modeling tools required—just G, R, and S.

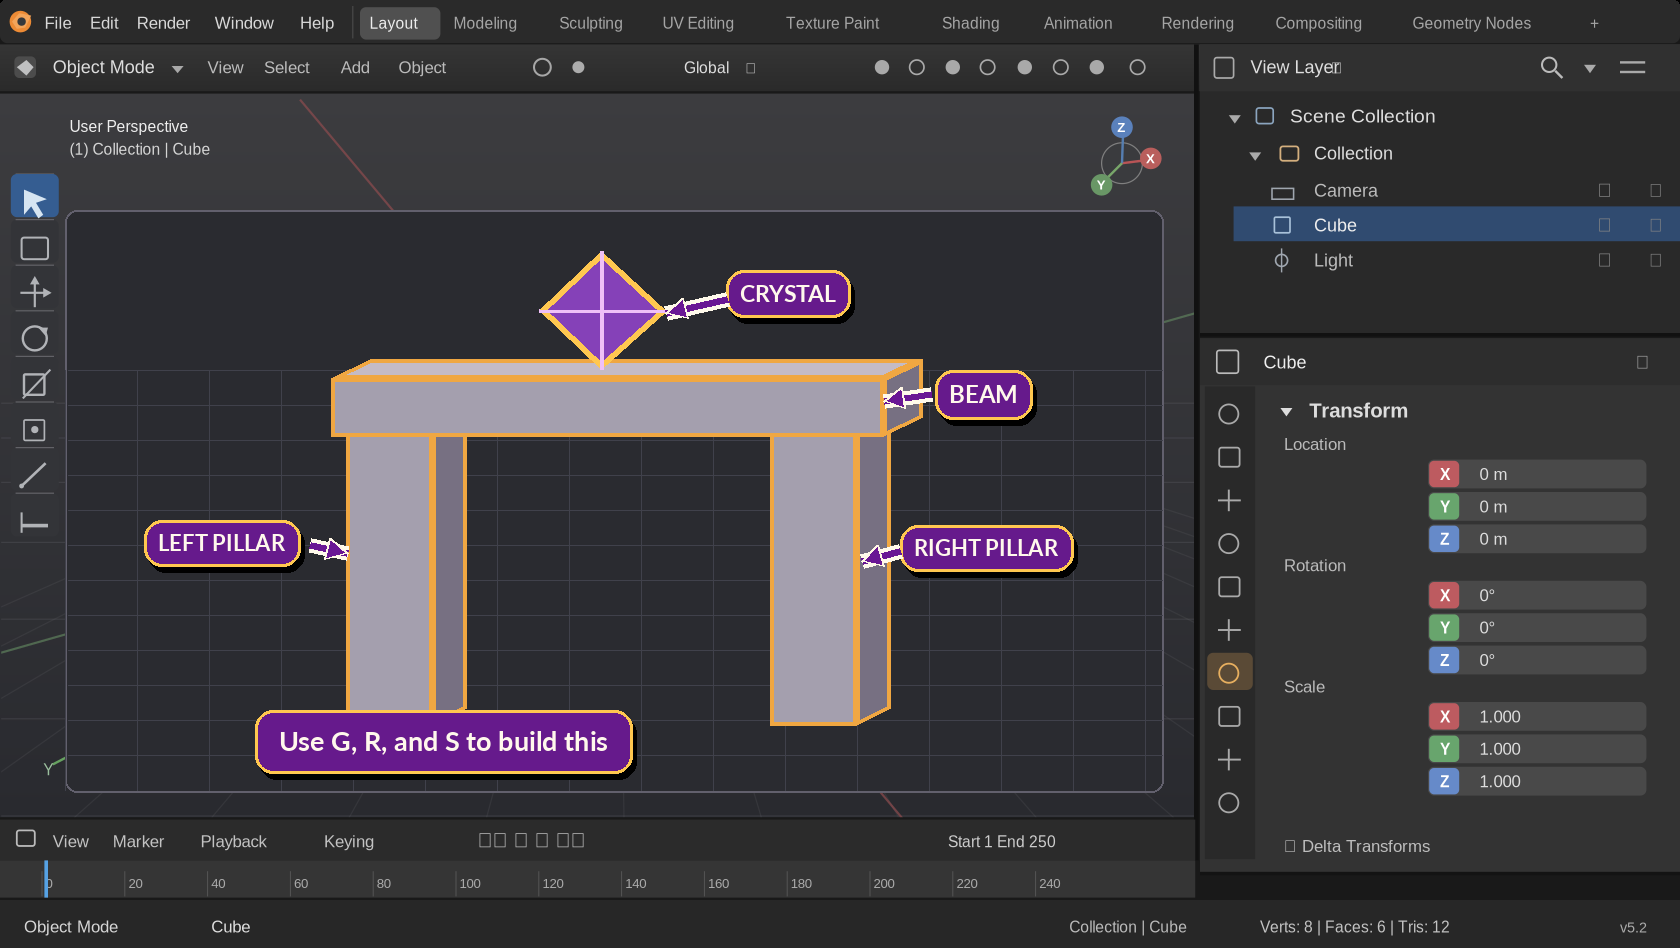
Blender-like model of an arch made with two pillars, a beam, and a floating diamond crystal, each labeled.
Here’s a Blender-style view of the four separate pieces you’ll build: left pillar, right pillar, beam, and crystal. The actual beginner project has no materials yet.
  1. Start fresh. Choose File → New → General. Select the default cube. Make sure you're in Object Mode.
  2. Shape the left pillar. Press S, X, type 0.25, Enter. Repeat using S Y 0.25, then S Z 1.5. This makes a tall, thin pillar.
  3. Place it. Press G X -1.5, Enter, then G Z 1.5, Enter. Press F2 and name it Left Pillar.
  4. Duplicate the other pillar. With your pillar selected, press Shift + D, then X, type 3, and press Enter. Press F2 to rename it Right Pillar.
  5. Add a top beam. Press Shift + A and choose Mesh → Cube. (Because we started from a fresh General file, the 3D Cursor is at the origin.) Scale the new cube with S X 1.75, S Y 0.4, and S Z 0.25, confirming each with Enter. Move it up with G Z 3.25, Enter. Name it Arch Beam.
  6. Make a diamond crystal. Add another cube using Shift + A → Mesh → Cube. Press S 0.35, Enter to shrink it, then R Y 45, Enter to tilt it like a diamond in Front View. Finish with G Z 4, Enter. Name it Magic Crystal.
  7. Admire the arch! Press Numpad 1 for Front View, then orbit with the middle mouse button to see all the pieces. The crystal sits just above the beam as a floating ornament.
  8. Save your work. Press Ctrl + S and save it as My Enchanted Arch.blend.
Why do all these objects remain separate? Because we added and duplicated them in Object Mode. You can click any one piece to adjust it without reshaping its neighbors. The decorations and colors in our illustration are just artistic inspiration; your Blender model will be a simple untextured arch for now.

You've mastered the three everyday transforms!

You can move objects exactly where you want them, rotate them to an angle, and resize them to fit your design. You're ready for more enchanted building.

A few beginner questions

Why did my whole scene move?

Check what is selected: press Alt + A to deselect, then click just the object you want. The shortcut acts on your current selection.

How do I stop a movement?

Press Esc before confirming to cancel. If you've already confirmed, use Ctrl + Z to undo.

Why do my number keys behave differently?

Use the letter-row numbers for values. Your numpad has separate 3D Viewport controls (for example, Numpad 1 changes the view).

Why does a rotated or scaled object act strangely later?

Object Mode tracks transformations separately from the mesh. Later, learn when to Apply Rotation or Scale before using certain modifiers or exporting.

← Back to Blender Basics