Gold and amethyst Lesson 10 header for Transparency, Normal and Specular Maps, featuring translucent wings, normal-map filigree, and gleaming gold

✦ BLENDER BASICS · LESSON 10 · BLENDER 5.2 ✦

Transparency, Normal & Specular Maps

A delicate wing, raised ornamental details, and polished gold can all begin as pictures. Discover what each map does and when to use it.

Beginner-friendlyAbout 25 minutesBlender 5.2

WHAT YOU’LL LEARN

Three kinds of texture magic

  • Alpha makes pixels transparent or sheer
  • Normal maps create the illusion of tiny relief
  • Roughness and Metallic shape reflected shine
  • Where to find the matching full guides

YOU ONLY NEED

One fresh Blender scene

Blender 5.2, a plane or cube, and the matching practice PNGs from the linked Workshop guides.

START HERE

Three Little Tricks of the Texture Atelier

In Lesson 09, you used an image to give a mesh visible color. This time, images will do three different jobs: hide or soften parts of a surface, make details catch the light, and control shine.

We've already made two complete resource guides—with practice PNGs and detailed Blender and in-world instructions. Rather than duplicate those guides, this lesson gives you a clear starting path and links directly to each one.

Important: Transparent pixels are real alpha values, not a checkerboard painted into the image. A normal map changes how a surface is lit, not its silhouette. A classic SL/OpenSim specular map is not interchangeable with Blender's Roughness input.

KEEP THIS HANDY

Your texture-map spellbook

ALPHA

Transparency

Visible, invisible, or see-through pixels.

NORMAL

Surface Detail

A blue-purple map changes the lighting, not the mesh.

ROUGHNESS

Reflections

Lower is shinier. Higher makes reflections blurrier.

01

WHERE THE LIGHT CAN PASS THROUGH

Transparency & Alpha Maps

Elegant amethyst fairy wings with truly transparent surroundings, sheer purple membrane, and opaque golden veins

The alpha channel of a PNG tells Blender which pixels are visible. Opaque parts have high alpha, invisible areas have zero, and sheer areas fall between those values.

  1. Start with an image that really contains alpha, such as the provided practice wings.
  2. In the Shader Editor, add an Image Texture node and open the PNG.
  3. Connect its Color to Principled BSDF Base Color, and Alpha to Principled BSDF Alpha.
  4. Preview the material and adjust transparency-related material settings as needed for your render engine.

Open the Alpha & Transparency Guide · Practice PNGs and full steps
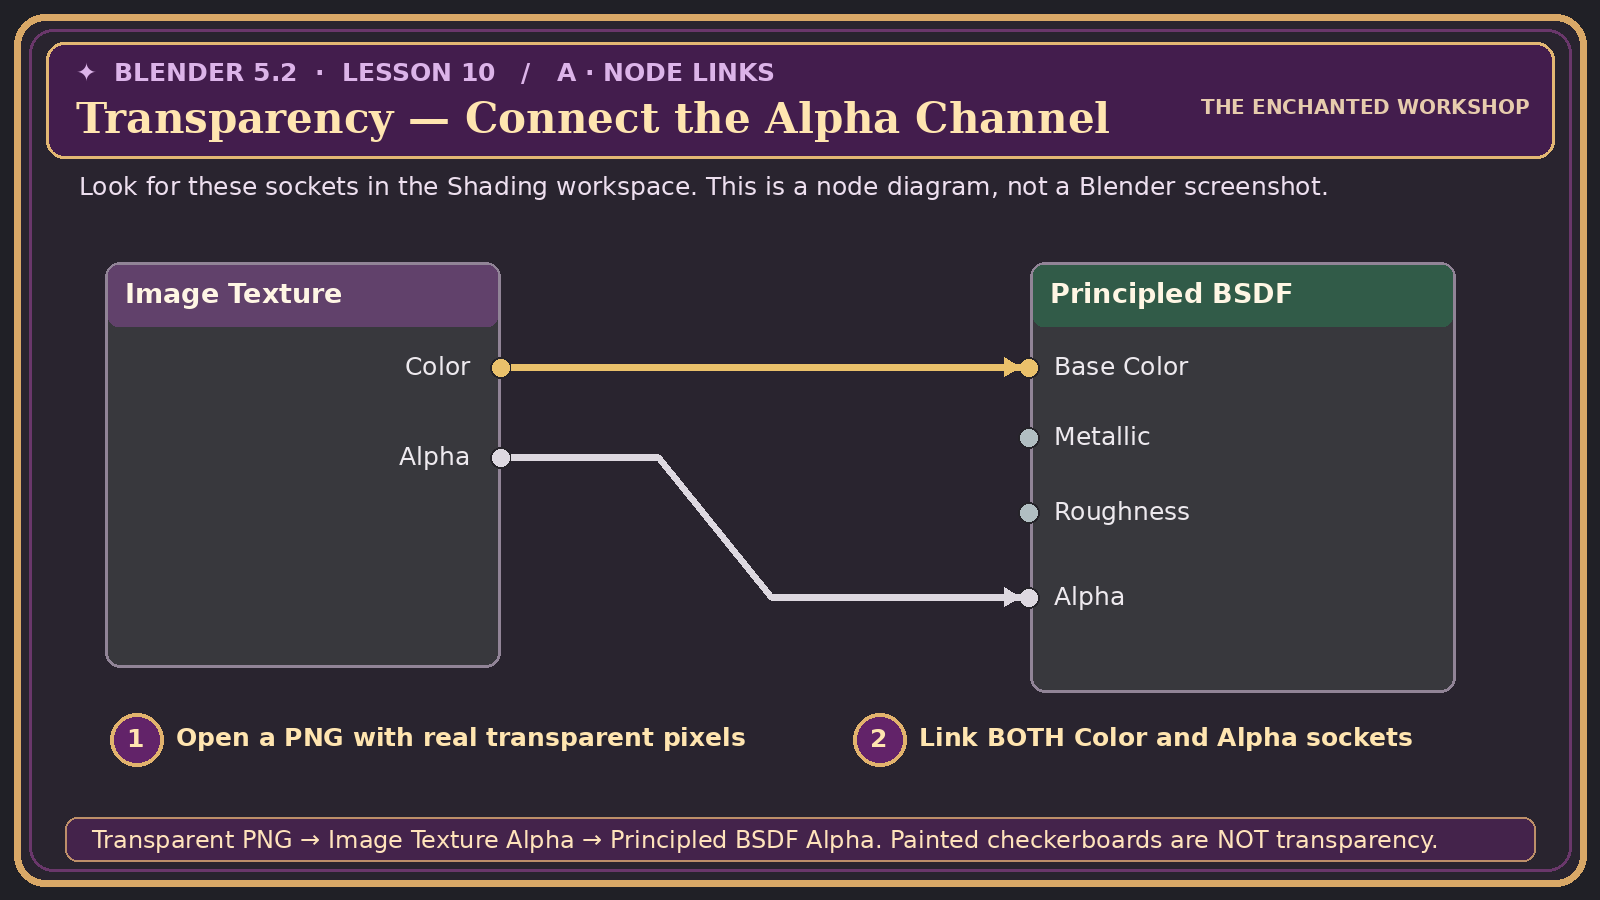
Blender-style shader-node diagram showing the Image Texture Color output connected to Principled BSDF Base Color and Image Texture Alpha connected to Principled Alpha.
Connect both sockets: Color → Base Color and Alpha → Alpha.
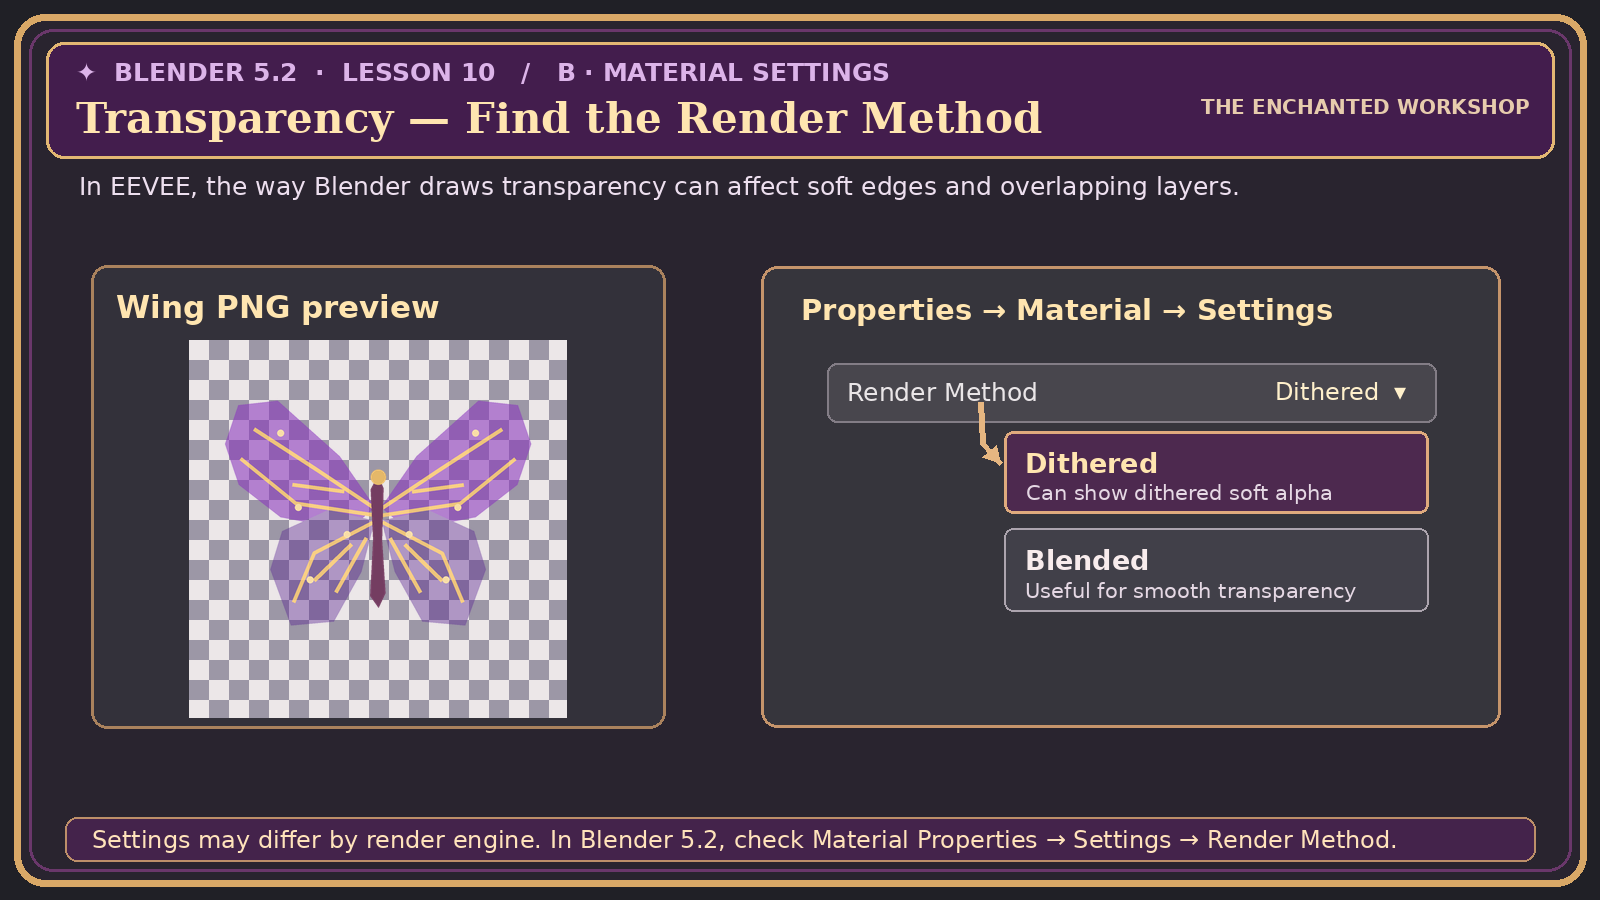
Illustrated material settings showing the Render Method selection and a wing PNG preview on genuine checkerboard transparency.
Material settings: In EEVEE, check Render Method if soft transparency looks wrong.

Illustrated Blender-style guides; labels may look a little different depending on your workspace and render engine.

02

DEPTH THAT APPEARS IN THE LIGHT

Normal Maps

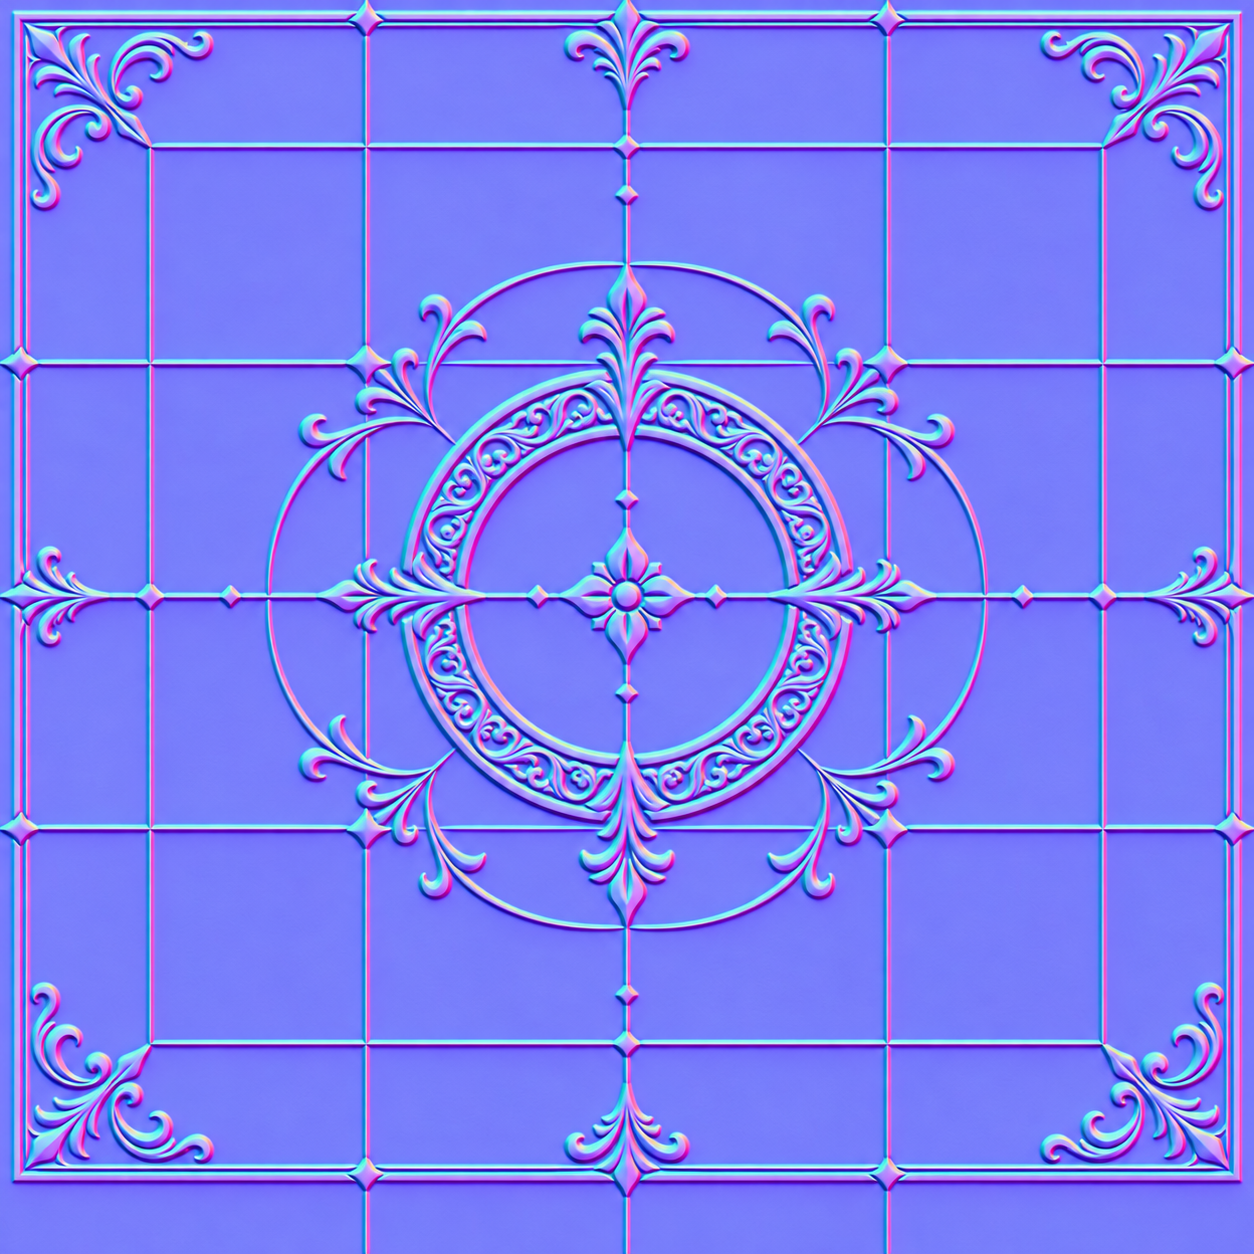
Blue-violet illustrative OpenGL normal map with ornate floral relief and filigree details

A normal map uses RGB colors to change the way lighting reacts to a surface. It makes tiny sculpted-looking details possible without adding geometry.
  1. Choose a UV-unwrapped surface and open the Shading workspace.
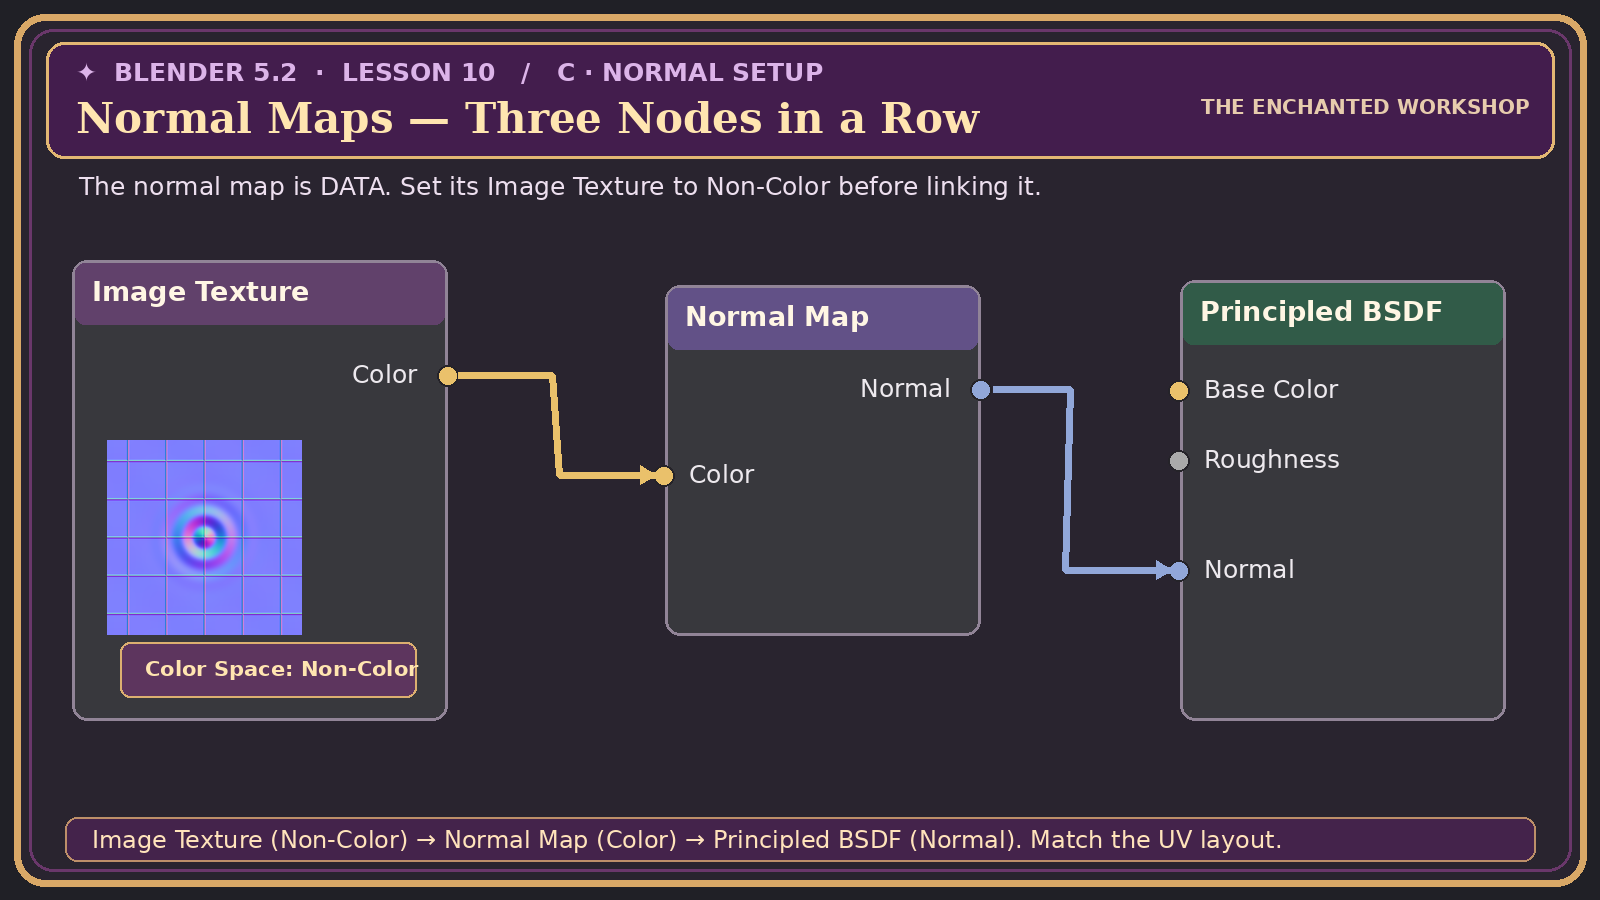
  2. Add an Image Texture node, open the normal map, and set Color Space to Non-Color.
  3. Add a Normal Map node. Connect Image Texture Color → Normal Map Color.
  4. Connect Normal Map Normal → Principled BSDF Normal. Adjust Strength gently and check under moving light.

Open the Normal & Specular Guide · Shader walkthrough

Blender-style node diagram showing a Non-Color normal image connecting through a Normal Map node into Principled BSDF Normal.
Three-node chain: Image Texture (Non-Color) → Normal Map → Principled Normal.
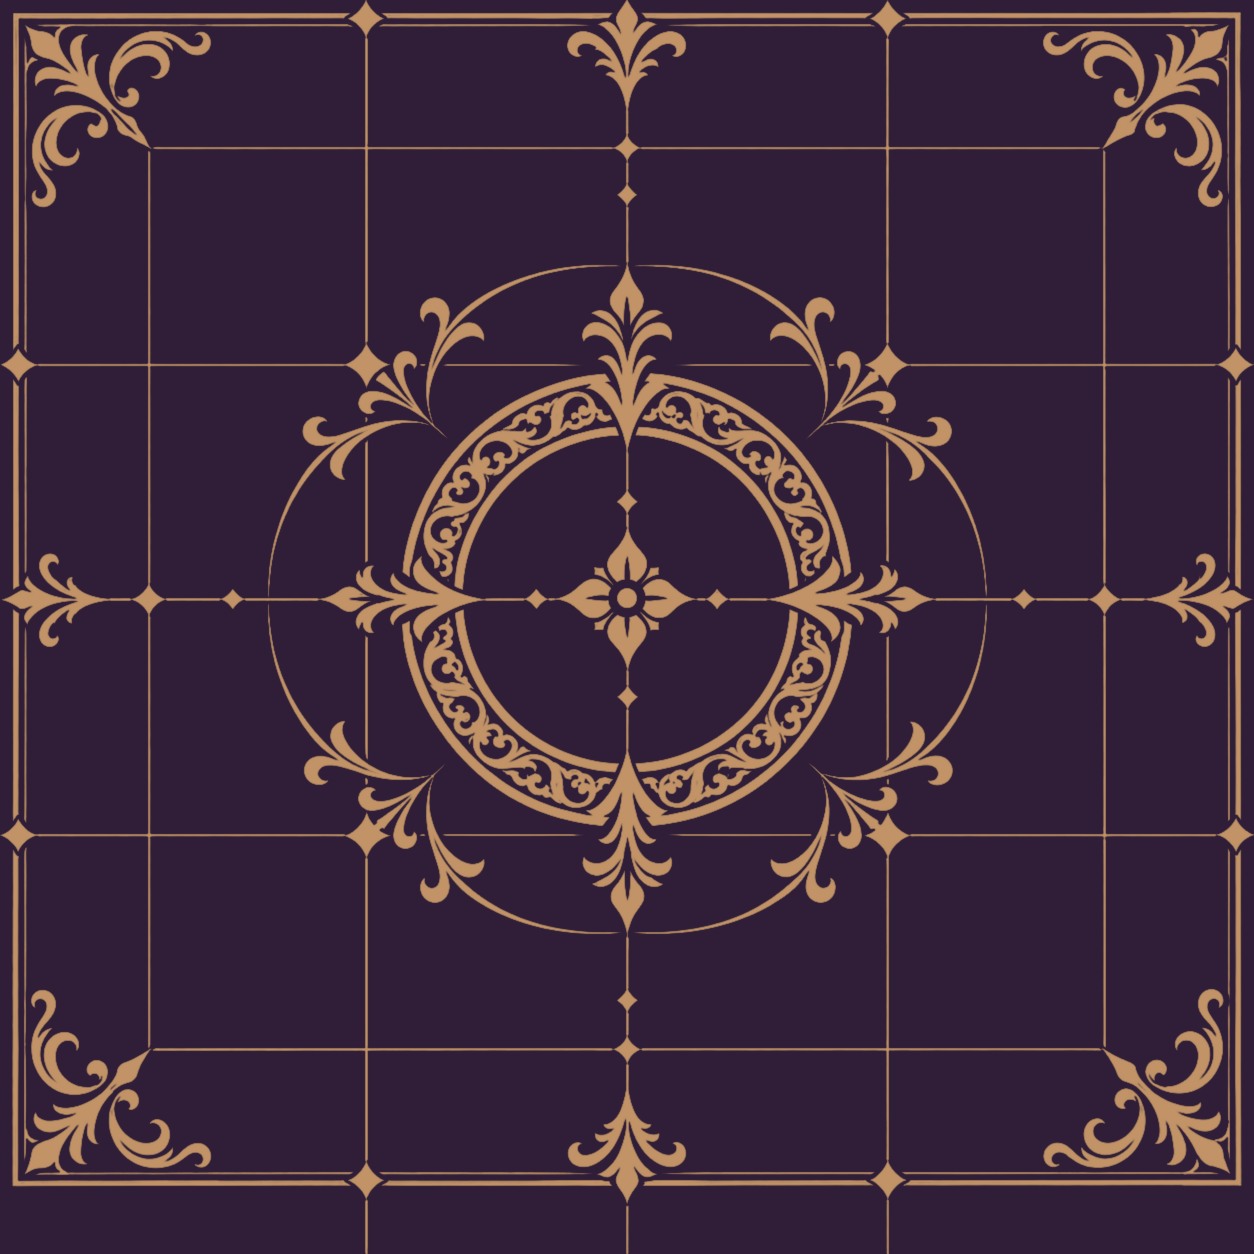
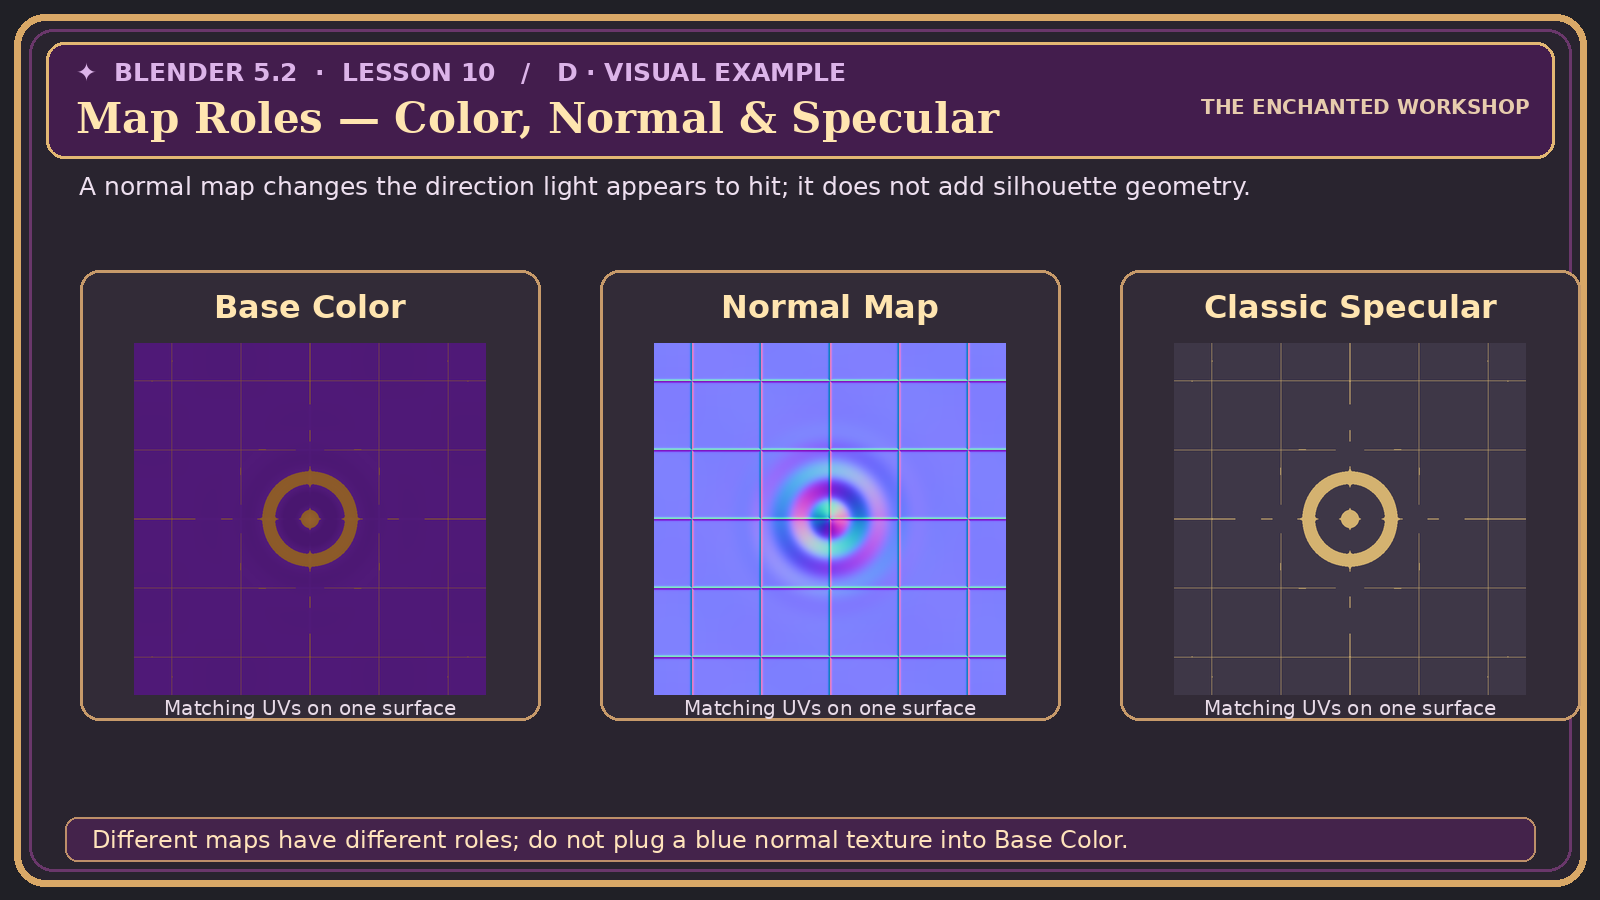
Comparison of three existing Workshop maps: a color image, purple-blue normal map, and classic specular map with matching UVs.
Same surface, different jobs: Base Color, Normal and classic Specular maps are not interchangeable.
03

A LITTLE GLIMMER OF MAGIC

Specular Highlights & Roughness

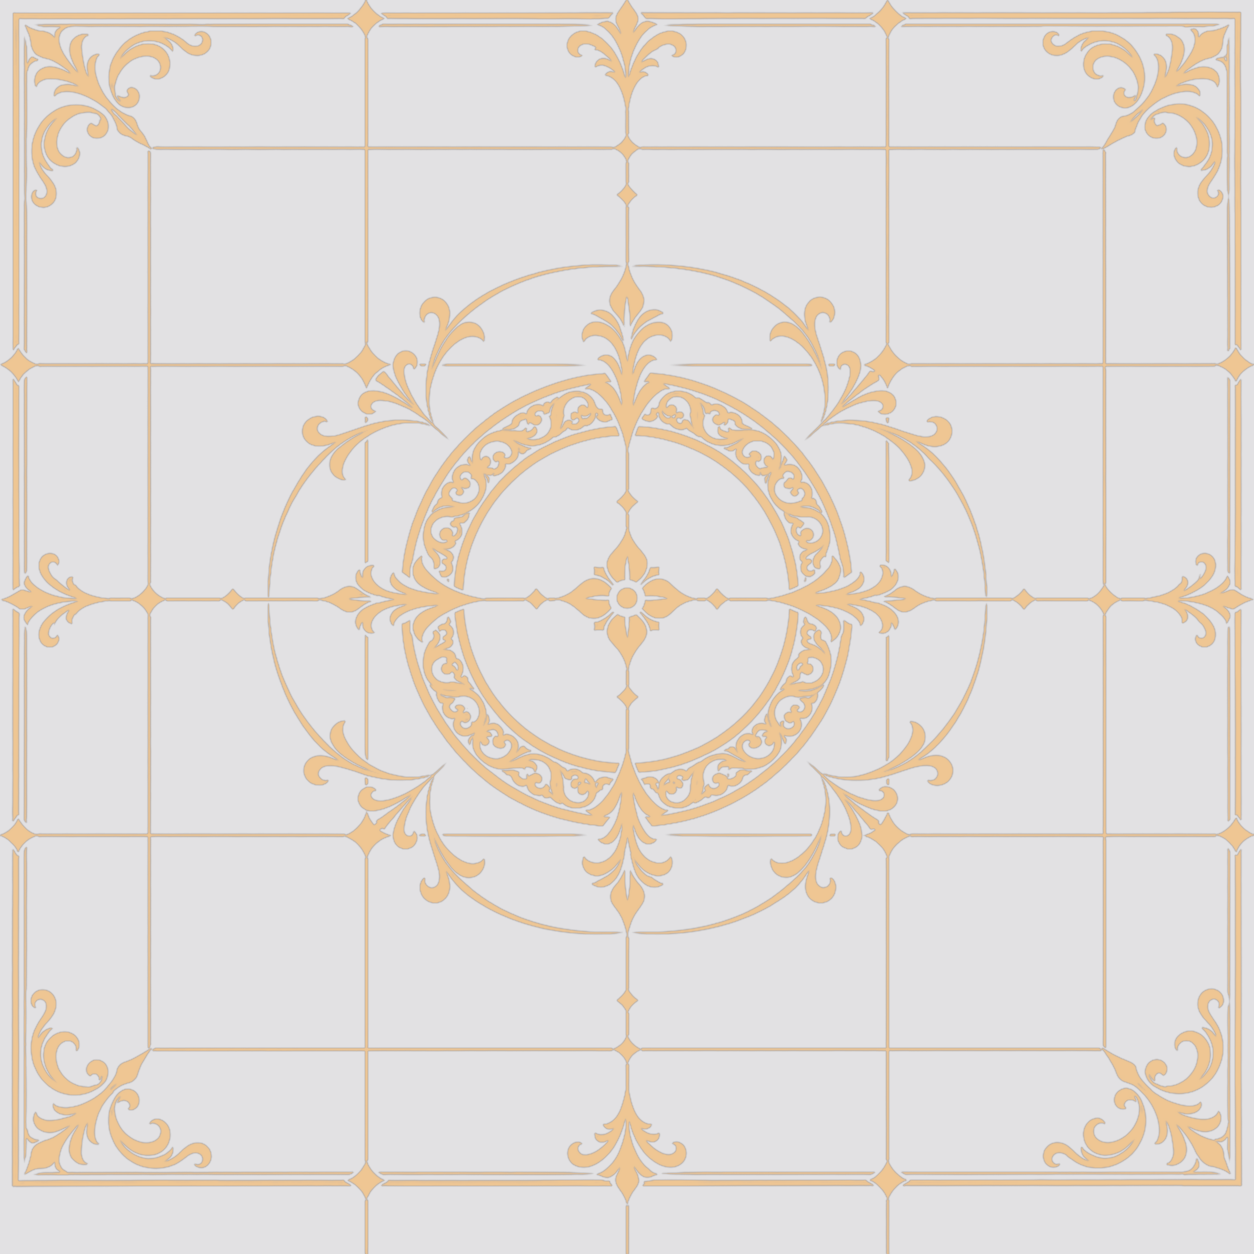
Sample classic specular texture preview showing bright gold ornament against darker regions

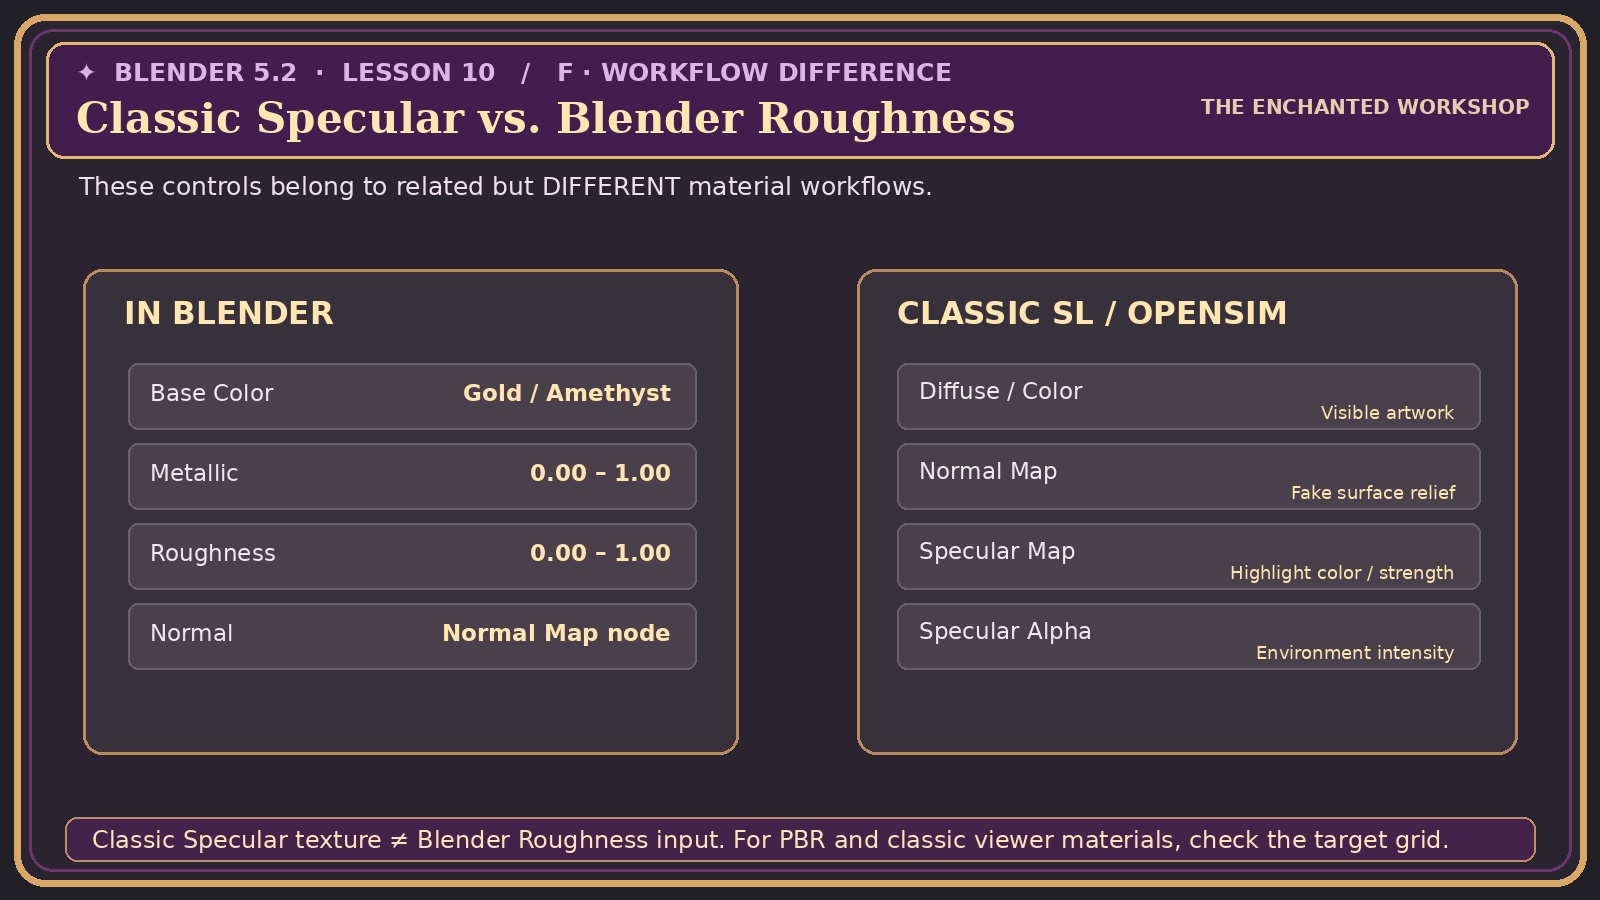
In Blender: A material's Roughness changes the sharpness of reflected highlights, while Metallic changes its metallic behavior. You can begin with sliders before adding any more images.

In classic OpenSim and Second Life materials: A separate specular texture can describe highlight color, and its alpha channel may be used for environment intensity. That is a different workflow from modern PBR materials.
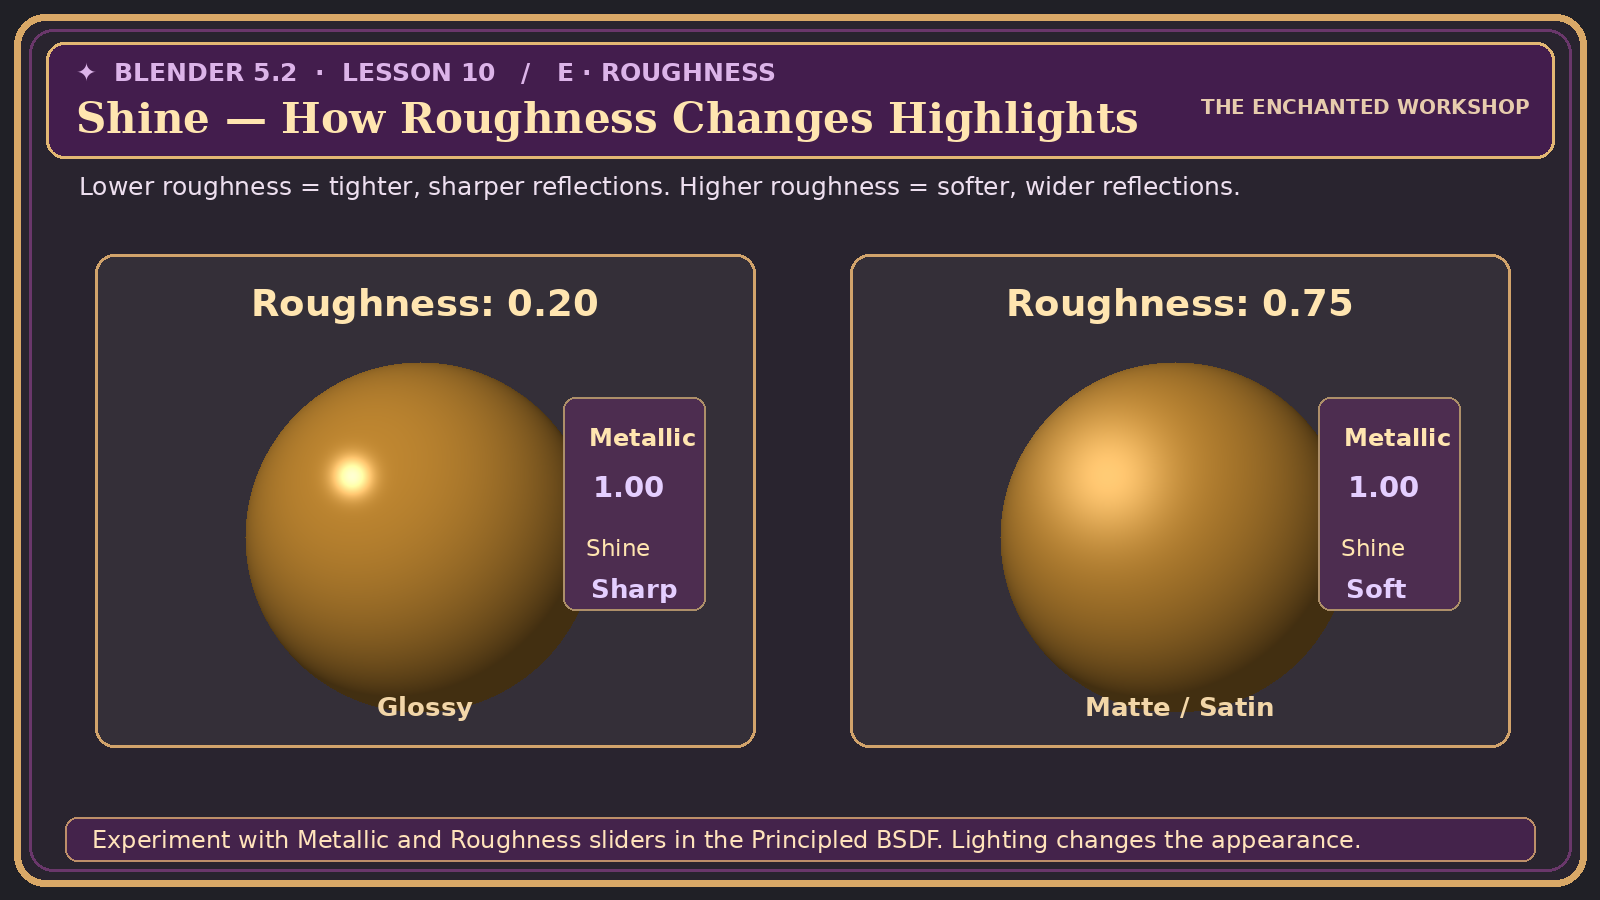
  1. Make a new material and compare Roughness values of about 0.2 and 0.75.
  2. Experiment with Metallic on a separate gold-colored sample.
  3. For classic in-world materials, follow the dedicated guide's instructions for the matching color, normal, and specular files.

Open the Normal & Specular Guide · Shine and in-world maps

Two gold test spheres comparing Roughness 0.20 with 0.75 under similar illustrative lighting.
Roughness comparison: Low values look polished; high values diffuse reflections.
Reference guide contrasting Principled BSDF Roughness and Metallic controls with classic Second Life and OpenSimulator Diffuse, Normal and Specular maps.
Different workflows: A classic specular map cannot be plugged straight into Blender’s Roughness socket.
04

A LITTLE WORKSHOP PRACTICE

Try the Three Effects

Make three simple test objects—one for each effect—so you can see the difference without getting overwhelmed. Download the new practice images directly above, or visit the two specialist guides for the complete steps.

✧ 01

Sheer magical wing

Put the alpha wing PNG onto a plane. Make sure the empty background truly disappears and the purple areas remain semi-transparent.

✧ 02

Ornamental relief tile

Put the matching color and normal images onto a plane or simple tile. Change the lighting to see the illusion of detail.

✧ 03

Gold-and-amethyst finish

Try glossy and matte roughness settings. Then compare what classic specular maps do when you bring a creation in-world.

Keep your maps together: When images describe the same surface, their UV placement should match. Save your Blender file and use File → External Data → Pack Resources if you want the image files stored in the project.

WHEN SOMETHING LOOKS WRONG

Quick little fixes

My wing has a solid background.

Check that the PNG has real transparency, then connect Image Texture Alpha to the Principled BSDF Alpha input.

My normal map looks strange or inverted.

Set the image to Non-Color, connect through a Normal Map node, and confirm the map convention and UVs.

My gold does not look shiny.

Use Material Preview or a lit scene. Lower Roughness, adjust Metallic, and rotate your view or light.

Will this look the same in Second Life?

Not always: classic materials and PBR follow different in-world workflows. Use the matching specialist guide for your grid.
← Back to Blender Basics