You've made your first shapes. Now give them personality! Learn to choose lovely colors, create different finishes, and color more than one part of the same model.
Beginner-friendlyAbout 35–45 minutesBlender 5.2
WHAT YOU'LL LEARN
A little color magic
Find Material Properties and choose a material
Change Base Color, Metallic, and Roughness
Switch to Material Preview to see your work
Assign different colors to faces and objects
YOU ONLY NEED
Blender and a little curiosity
Start with Blender 5.2 → New File → General. We'll color the default cube first, then make a tiny magical cottage.
✦
START HERE
Welcome to the Color Studio!
Open Blender 5.2. Start with File → New → General, and keep the default cube for our first experiment. Later, we'll use separate simple shapes to build a little enchanted cottage with stone-colored walls, an amethyst roof, a wooden door, and a gold detail.
Workshop wisdom: A material describes how a surface looks—its color, shininess, and other qualities. An image texture is not the same thing; we'll work with image textures after UV mapping.
✦
KEEP THIS HANDY
Your color spellbook
Material Properties
Pick your material
Find the red half-shaded sphere icon in Properties.
Base Color
Choose a shade
Click the color swatch to open the picker.
Metallic
Metal or nonmetal
Start with 0 for stone; try 1 for gold.
Roughness
Matte or glossy
High numbers are matte; low numbers reflect sharply.
Material Preview
See the color
Use the third shading sphere in the 3D Viewport header.
Assign
Color a chosen face
In Edit Mode, assign a material slot to selected faces.
01
THE SECRET BEHIND THE COLOR
What Is a Material?
Think of the mesh as the shape of your creation, and its material as the finish on that shape. One material can make an object look like dull stone; another can suggest polished gold or glossy purple enamel.
Matte Stone
Low metallic, high roughness
Glossy Amethyst
Low metallic, lower roughness
Shiny Gold
High metallic, lower roughness
We'll use Blender's Material Properties (the red checkered sphere icon in the Properties editor) and the standard Principled BSDF shader. Its Base Color, Metallic, and Roughness settings are the three most useful controls to meet first.
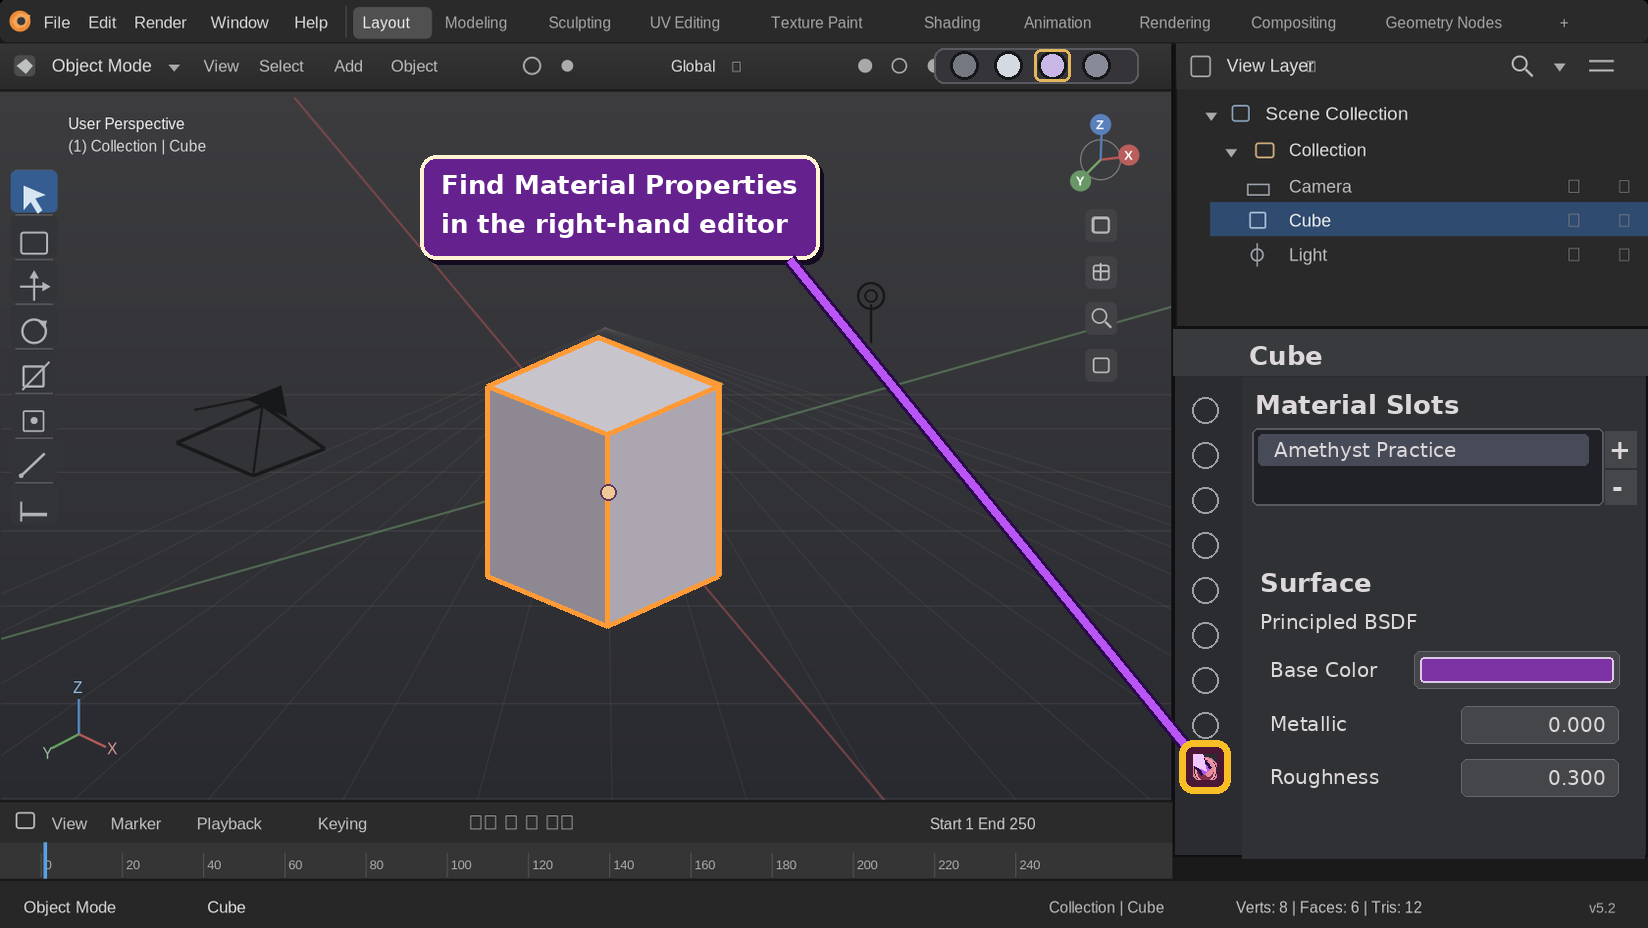
First find Material Properties: select your cube, then click the material icon on the right.
02
OUR FIRST BIT OF COLOR MAGIC
Give the Default Cube a Material
In Object Mode, select the default cube.
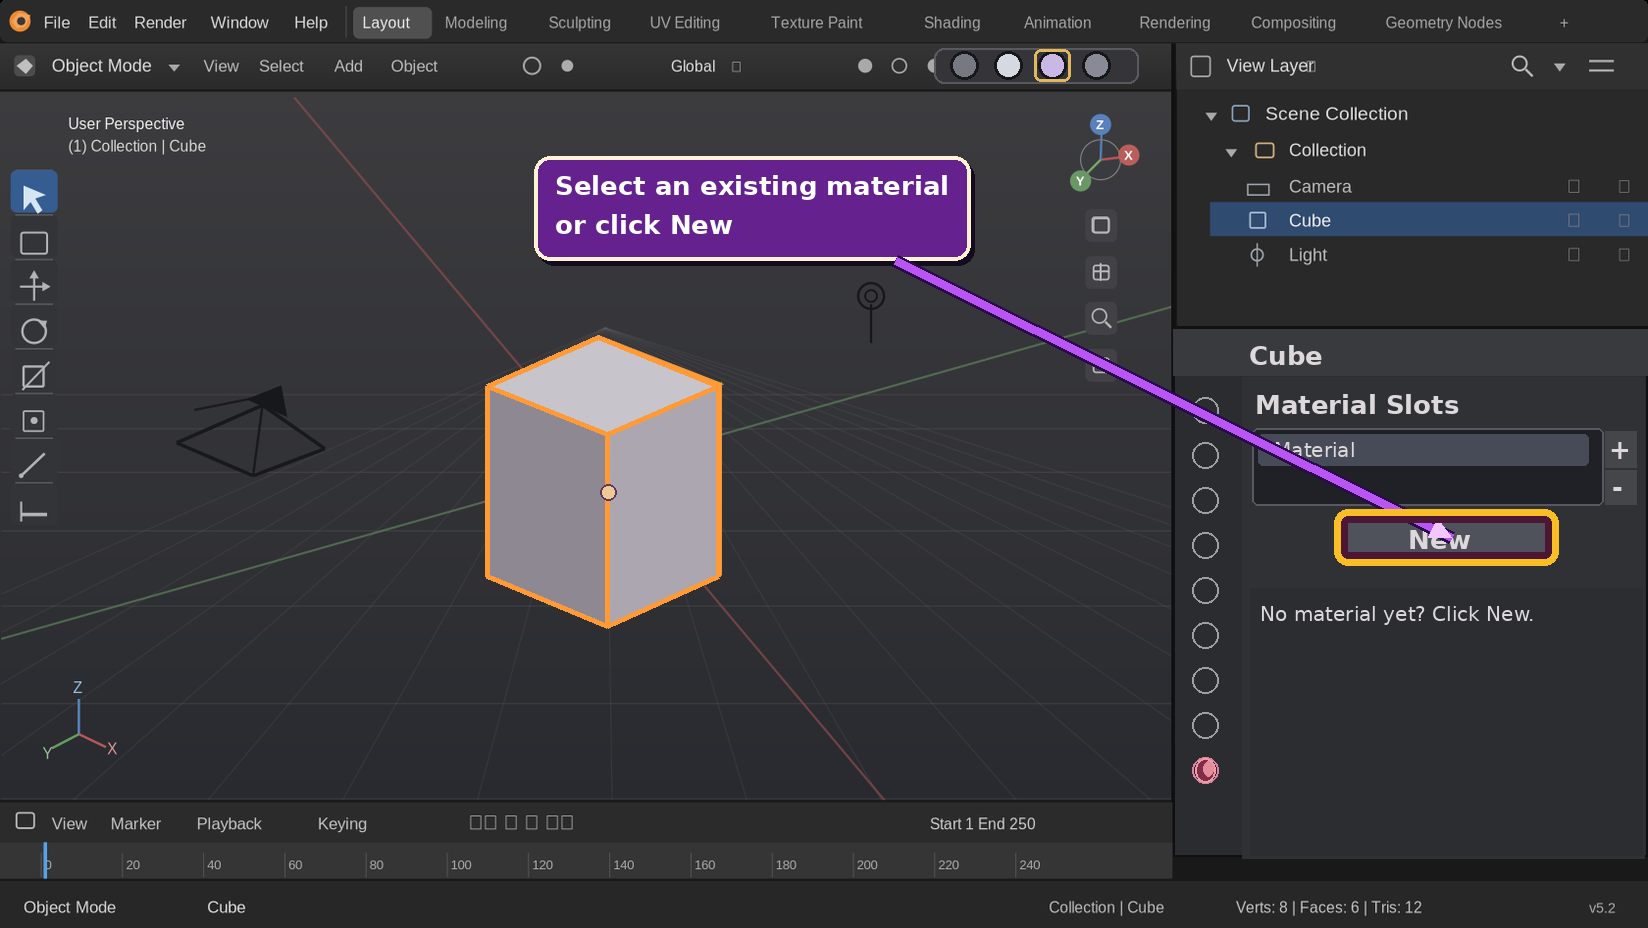
In the Properties editor (usually at the right), click Material Properties — the red checkered sphere icon. If the object has no material, click New. If it already has a material named Material, select that material instead.
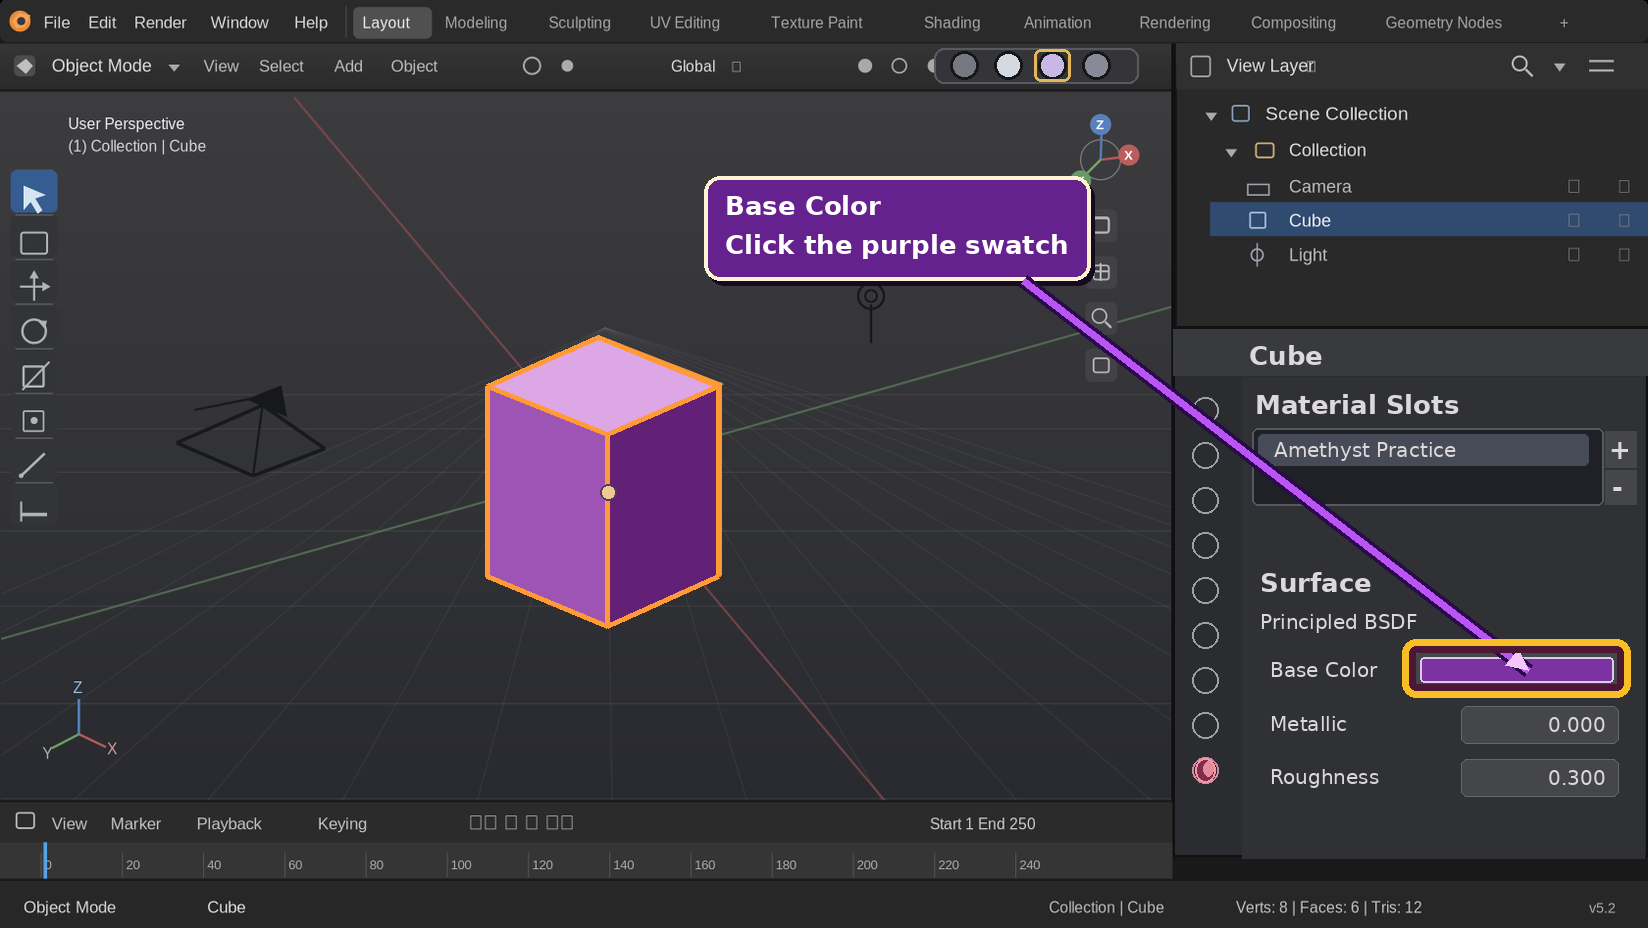
Rename the material Amethyst Practice. Find Surface → Principled BSDF → Base Color, click the color swatch, and choose a rich purple.
Set Metallic to 0.0 and Roughness to approximately 0.3.
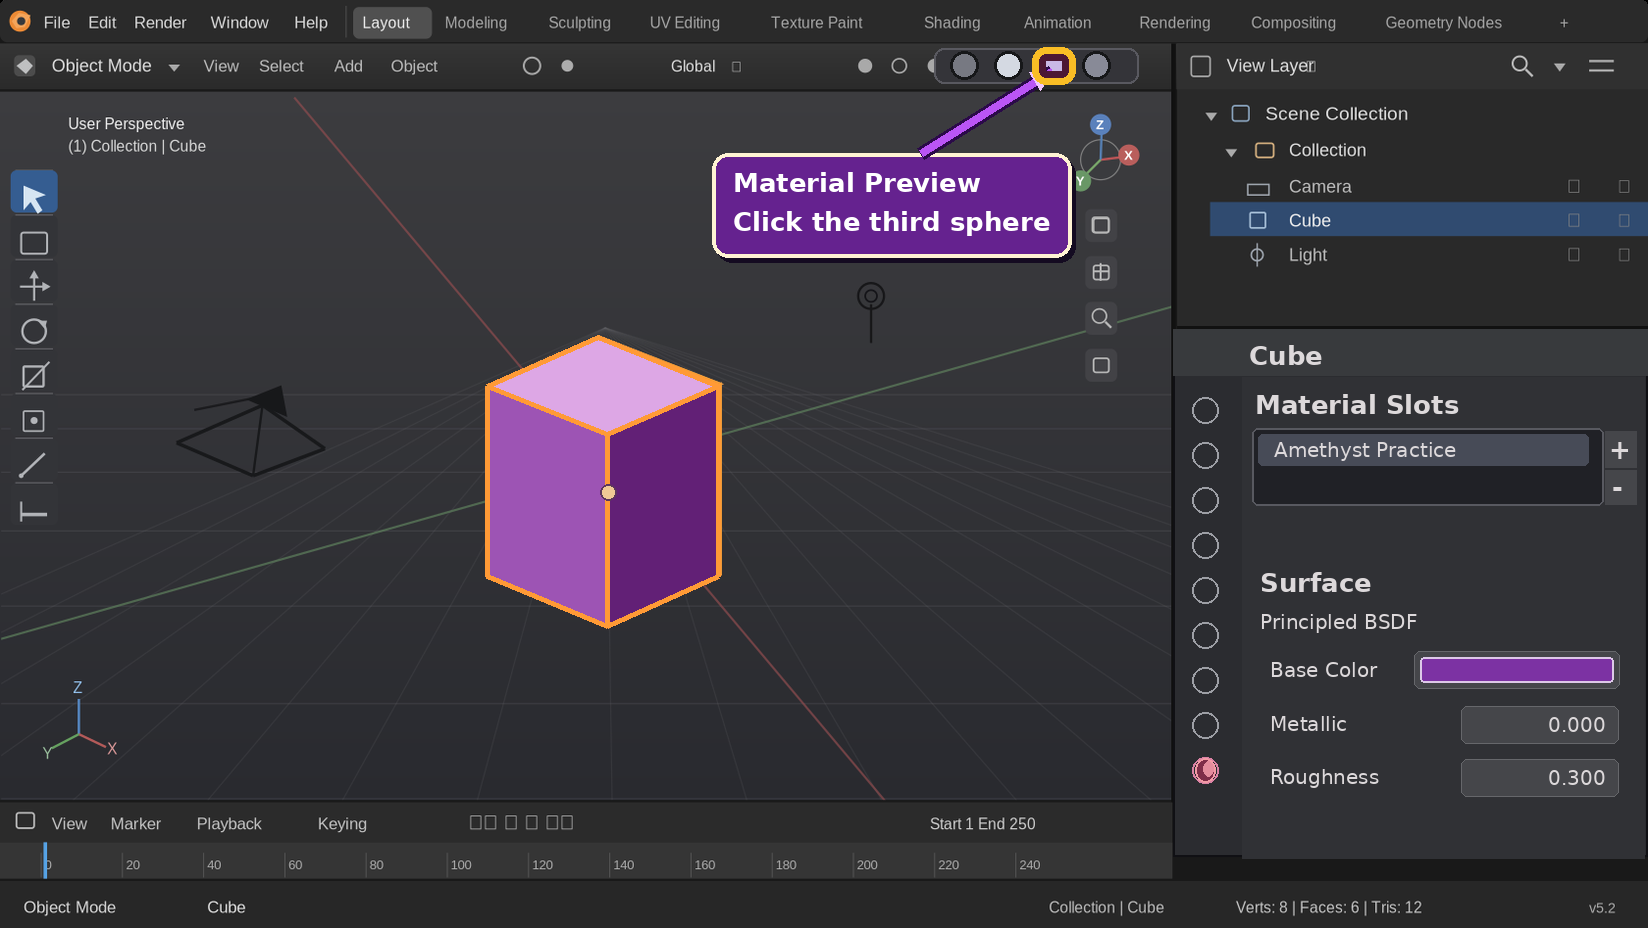
In the 3D Viewport, click the Material Preview shading icon (third sphere icon in the top-right shading controls), or press Z and choose Material Preview. Your cube should now show its purple surface.
No material? Click New. If a material already exists, select it instead.Choose your color: expand Surface and click Base Color.
Illustration of the change, not a screenshot of Blender's interface.
Still seeing gray? Click the third shading sphere, Material Preview, in the viewport header.
Still gray? Blender's default Solid shading often ignores the shader Base Color. Switch to Material Preview. The selected object's orange outline is just a selection highlight, not part of the material.
03
STONE, SILK, OR SHINY GOLD?
Understand Metallic & Roughness
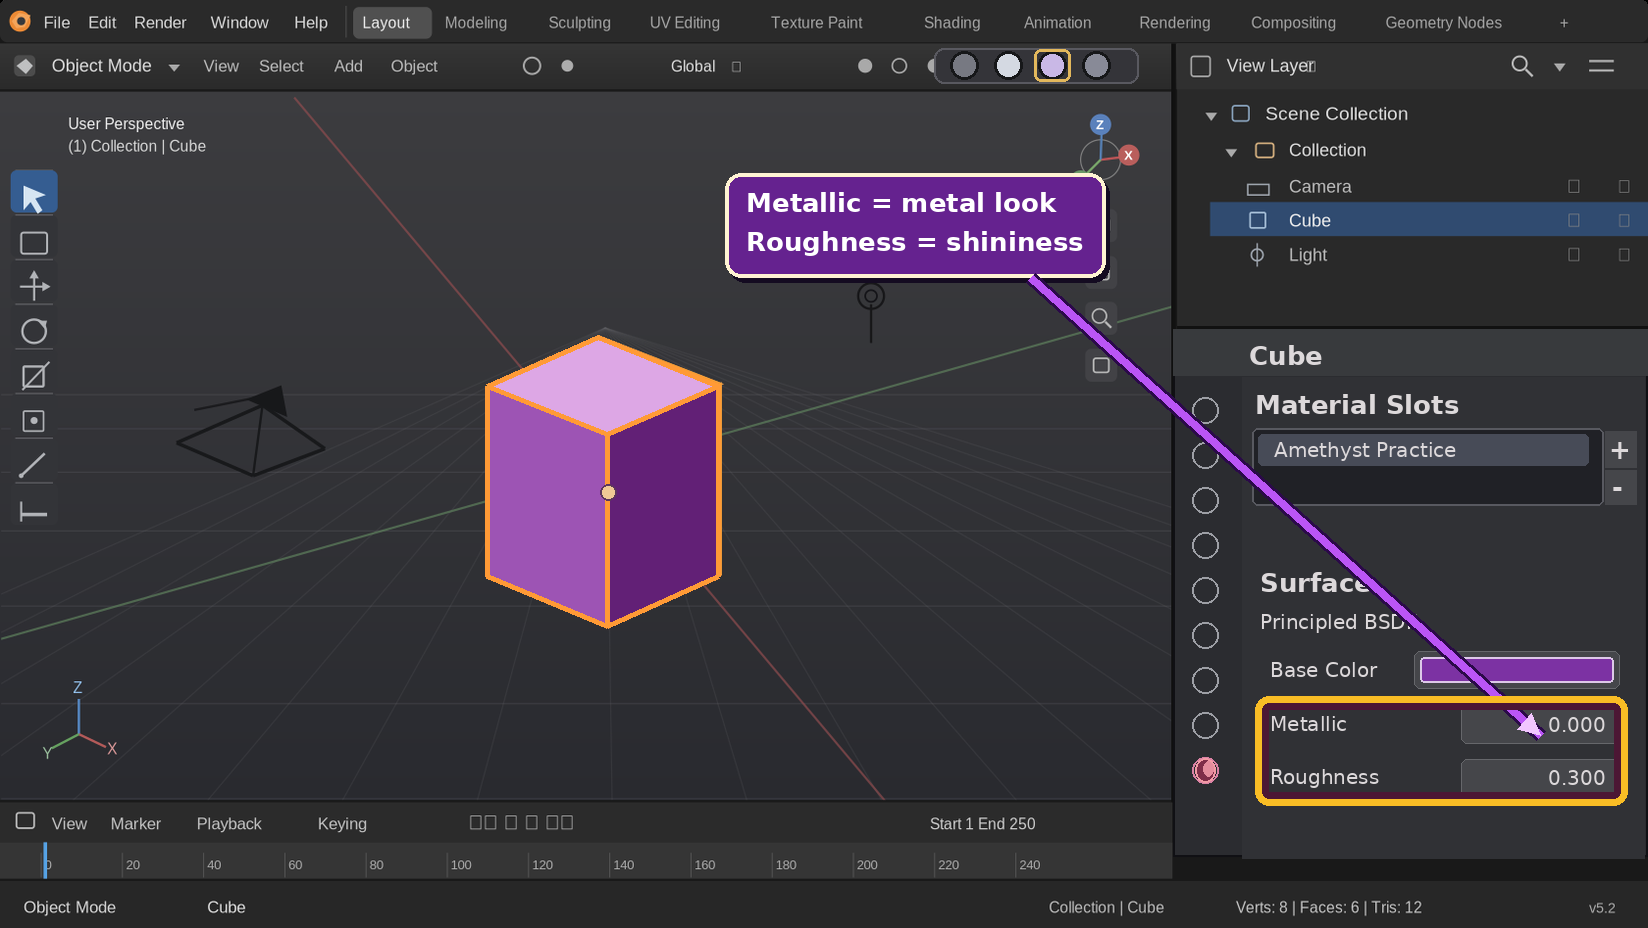
Base Color sets the main color. Metallic controls whether the surface behaves like metal, and Roughness controls how crisp or blurry its reflections look.
Matte Stone
Base Color: Warm gray or cream
Metallic: 0.0
Roughness: 0.85
Glossy Purple
Base Color: Amethyst purple
Metallic: 0.0
Roughness: 0.20
Polished Gold
Base Color: Warm gold
Metallic: 1.0
Roughness: 0.25
Make it shiny or matte: adjust Metallic and Roughness inside the material Surface settings.
Try the values on your practice cube and watch how its appearance changes as you switch between them. Those values are suggested starting points, not rigid rules. Environment lighting can make the same material appear very different.
Little workshop tip: Roughness near 0 makes highlights sharper, while roughness near 1 makes them softer. Metallic should usually be 0 for wood, stone, or painted objects, and 1 for actual metals.
04
MORE THAN ONE COLOR PER MESH
Assign a Second Material to Selected Faces
You can give separate objects different materials, but you can also assign multiple materials to faces within a single mesh.
With the practice cube selected, keep your Amethyst Practice material as its first material slot.
Press Tab to enter Edit Mode. Press 3 on the number row (not the numpad) for Face Select, and select one visible face. Press Alt + A first if other geometry is selected.
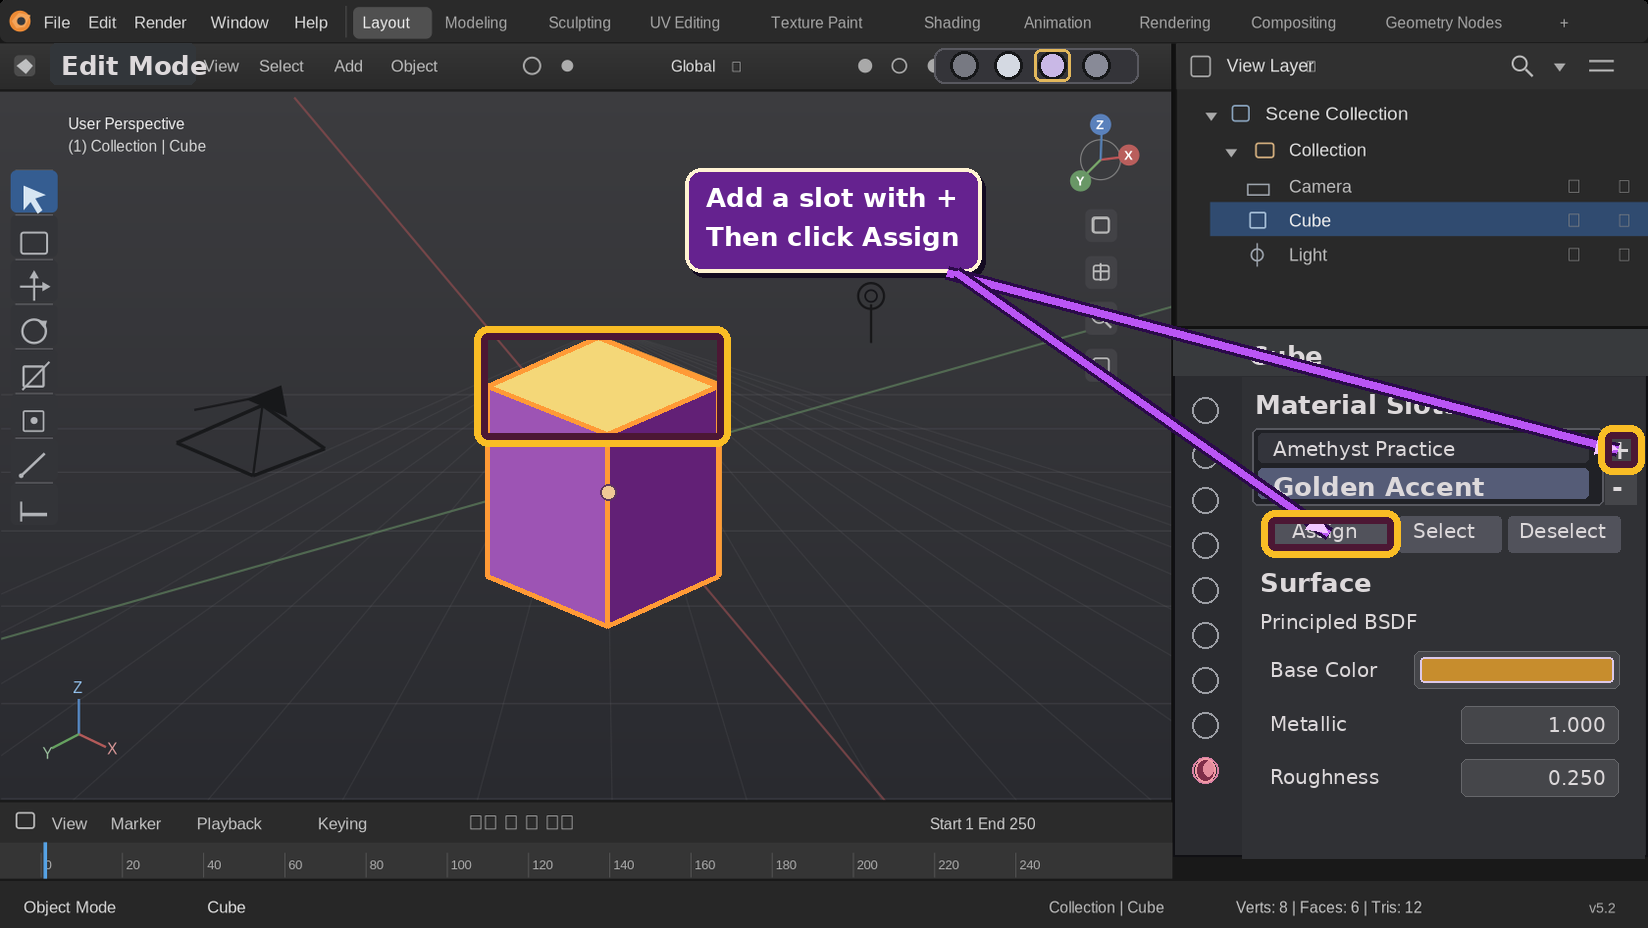
In Material Properties, click the + next to the material slot list to add a new slot. With that new slot active, click New and name it Golden Accent.
Set the accent material's Base Color to gold, Metallic to 1.0, and Roughness to about 0.25.
While still in Edit Mode, with the desired face selected and Golden Accent as the active material slot, click Assign below the material slots.
Press Tab to return to Object Mode and view it in Material Preview. Only your selected face should be gold.
One mesh, two colors: add a slot with +, choose a material, select a face, then click Assign.
Simple teaching diagram: material slots are assigned per face in Edit Mode.
Helpful distinction: Clicking New creates a new material; clicking + adds another material slot. Both are needed when you want an additional brand-new material on the same mesh.
05
A COTTAGE FOR THE ENCHANTED WORKSHOP
Hands-On Project · Our First Colorful Cottage
We'll build a small, simple dome-roofed fantasy cottage from basic shapes. It won't be as detailed as the storybook art on the lesson banner, but the materials will give it the same purple-and-gold personality.
Suggested shapes and colors. This is not a rendered Blender scene.
Clear the practice cube: In Object Mode, select it and press X, then confirm Delete. The camera and light may stay; they will not get in our way.
Make the walls: Press Shift + A → Mesh → Cube. Rename it Cottage Walls. Scale with SX1.5Enter, SY1.2Enter, and SZ1.1Enter. Move up with GZ1.1Enter. Give the walls a new material named Warm Stone: light beige Base Color, Metallic 0.0, Roughness 0.85.
Add the curved roof: In Object Mode, press Shift + A → Mesh → UV Sphere. Rename it Amethyst Roof. Scale it to X 1.8, Y 1.5, Z 0.5 using the three S axis shortcuts, then move it up with GZ2.55Enter. Give it a rich purple Base Color, Metallic 0.0, Roughness about 0.25. (Optional: right-click the sphere and choose Shade Smooth.)
Make a wooden door: Add another Cube in Object Mode and rename it Wooden Door. Scale it to X 0.35, Y 0.12, Z 0.65; move it Y −1.22, Z 0.65. Give it a dark chestnut Base Color, Metallic 0.0, Roughness 0.65.
Place a golden doorknob: Add a small UV Sphere and rename it Gold Knob. Press S.08Enter; move it X 0.22, Y −1.38, Z 0.75 using G and the axis keys. Give it a warm yellow-gold Base Color, Metallic 1.0, Roughness 0.25.
Preview and save: Switch to Material Preview, orbit the cottage, and adjust the colors to your taste. Save with Ctrl + Shift + S as My First Colorful Cottage.blend.
✧
You've brought a little cottage to life!
Your simple shapes now have different surface personalities: warm stone, glossy purple, wood, and gold. Try changing only Roughness on the roof and watch how different the same color can feel.
A note for OpenSim and Second Life creators: Blender materials make a great preview, but they may not export as identical in-world materials. Surface appearance in-world depends on the platform, viewer, upload format, texture maps, and material workflow. We'll cover those later.
06
IF YOUR COLORS ARE HIDING
Quick Fixes & Helpful Reminders
My object is still gray.
Switch from Solid shading to Material Preview. Check that the material is assigned to the selected object.
One face won't change color.
In Edit Mode, select the intended face, select the correct material slot, and click Assign.
My gold looks dark or brown.
Metallic materials reflect their surroundings. Try a different Material Preview studio light from the viewport shading popover.
I can't find the material controls.
Select a mesh object and open the Material Properties tab. You can also use the Shading workspace for the node-based material view.
Why don't the colors match my reference perfectly?
Lighting, color management, roughness, and the viewing environment all affect what you see.
Does a material equal an image texture?
No. Materials describe surface behavior; image textures can feed color and other information into those materials. That's coming later!